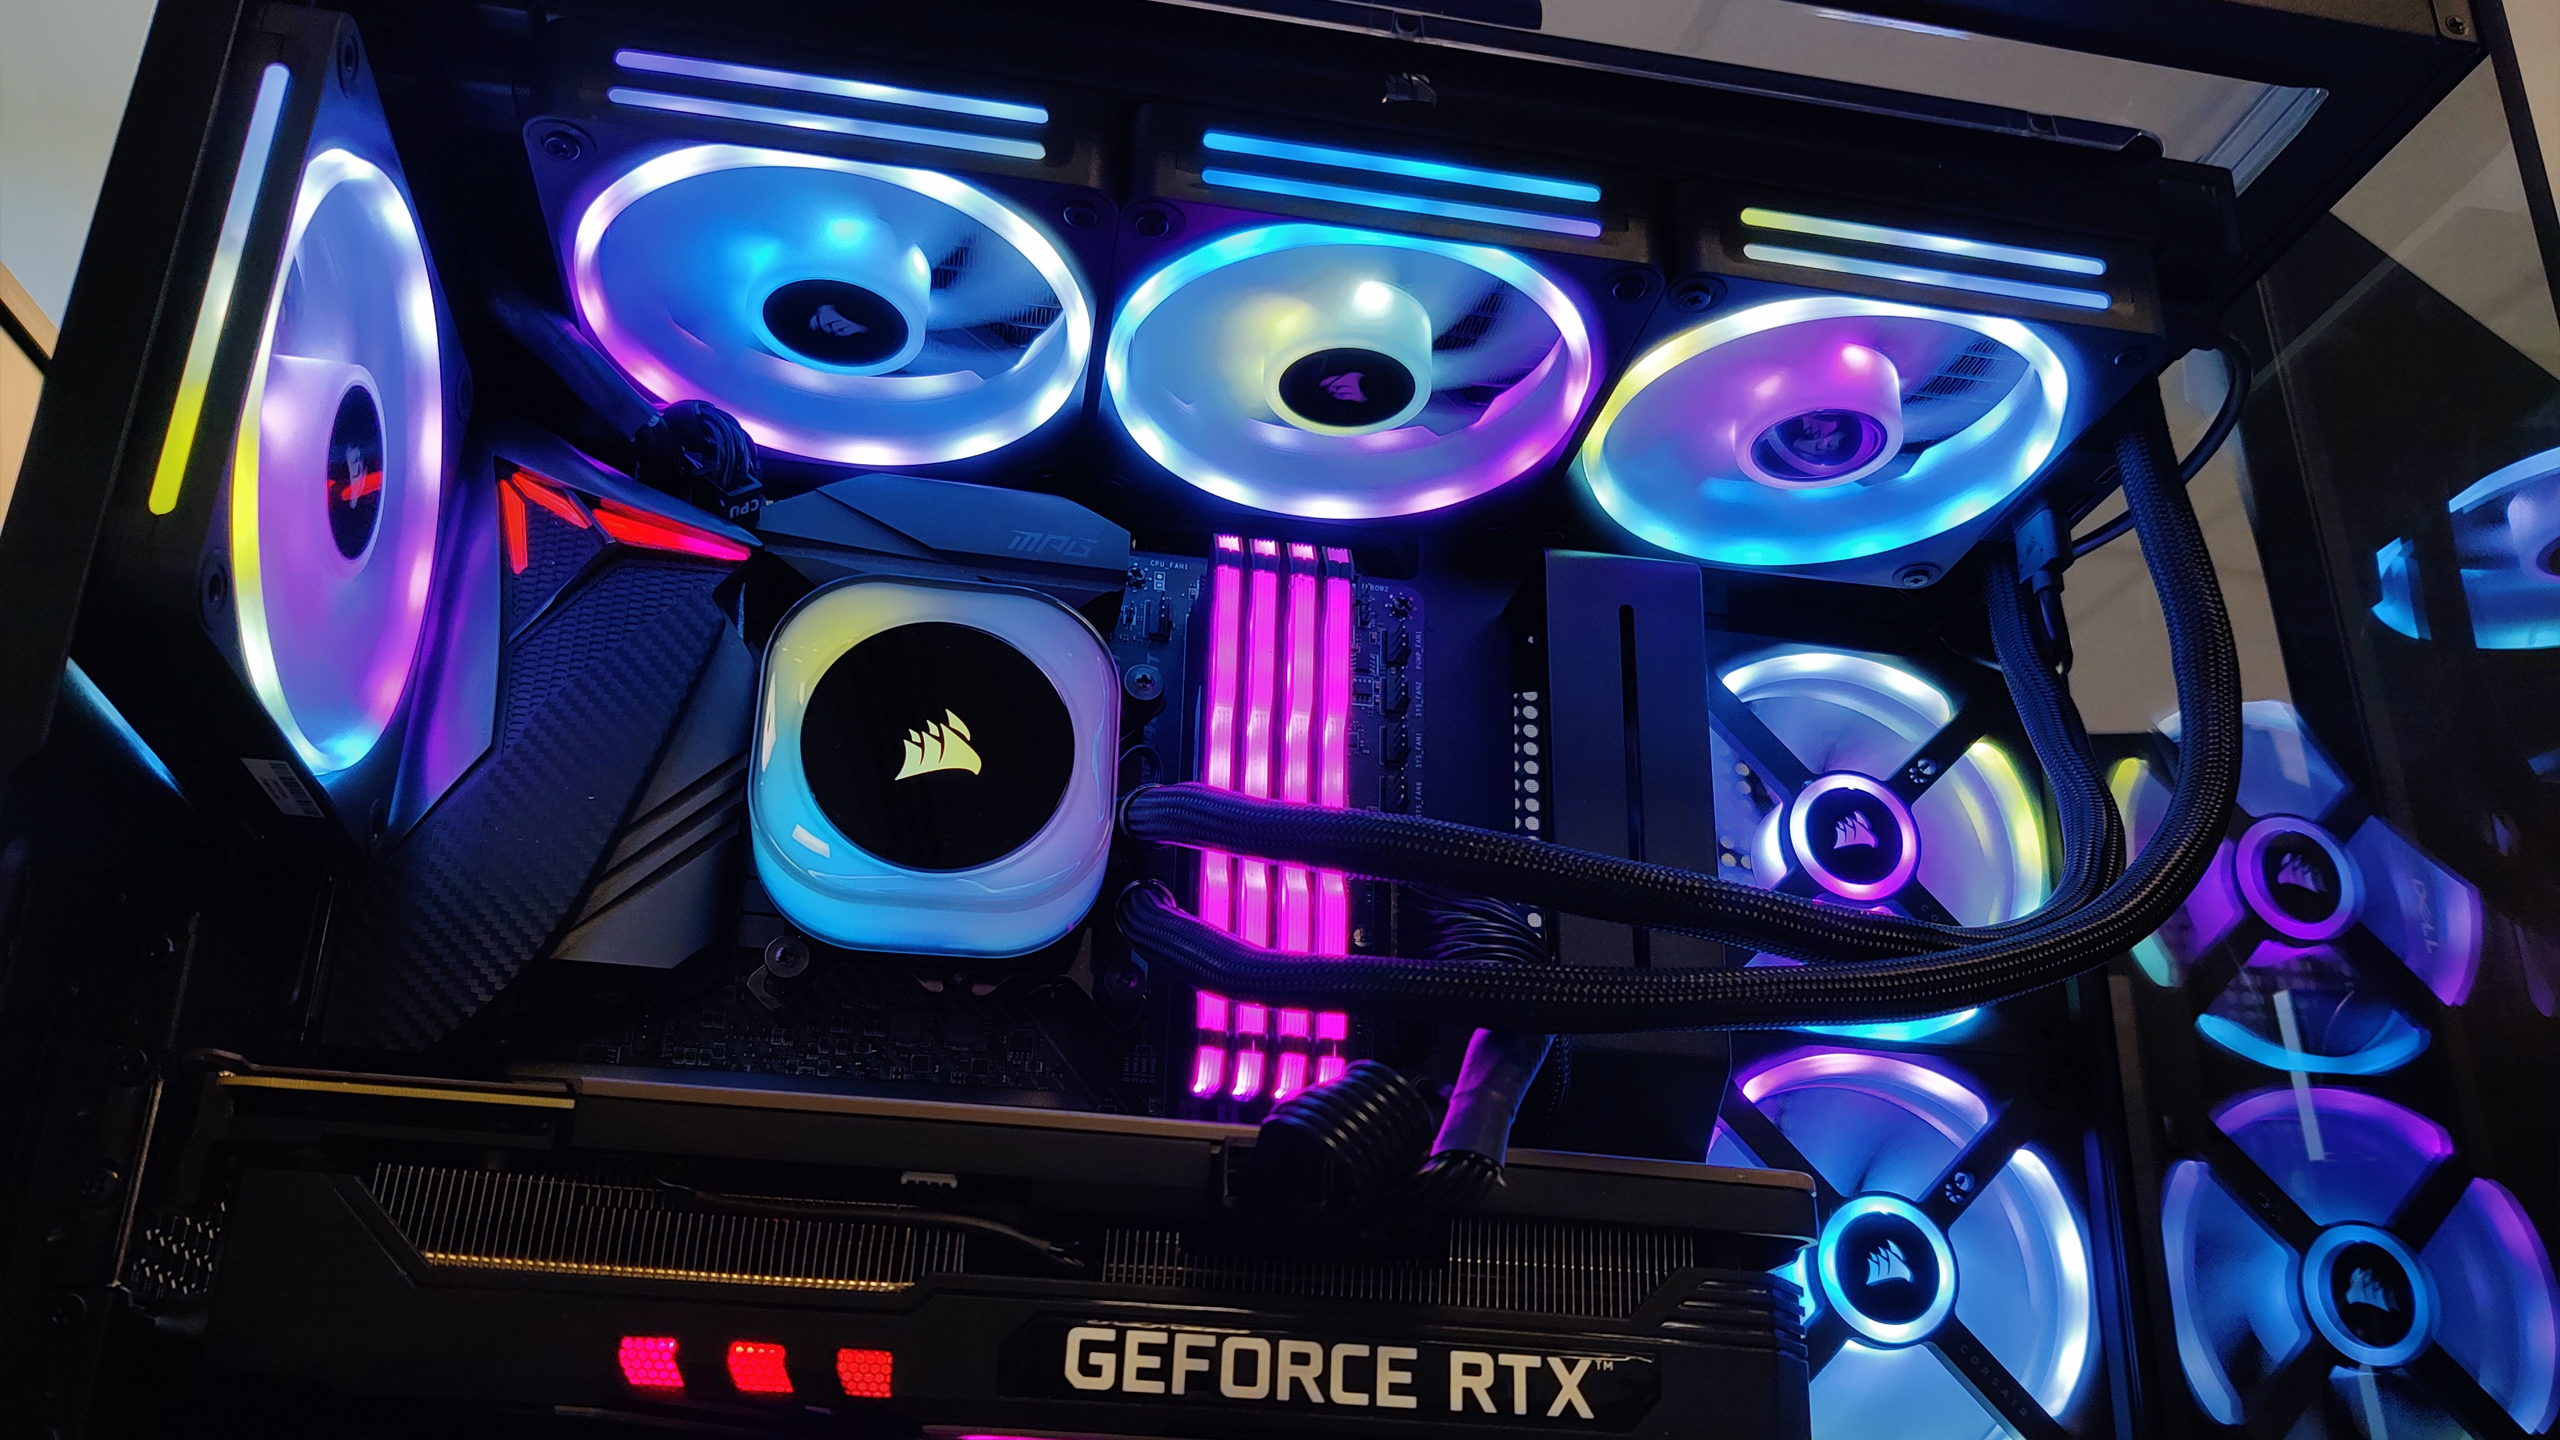
The Corsair iCue Link system aims to "reignite your passion for DIY" and even though putting it together without instructions was stressful, it was worth it.
I just had the pleasure of chaining up the Corsair iCue Link—a gorgeous full PC cooling “ecosystem” that snaps together and links up to its accompanying System Hub with fewer cables than your average cooling and RGB control system. The idea is that it’s meant to take the stresses out of PC building, at least when it comes to cooling installation, with Corsair claiming it will “reignite your passion for DIY.”
The reality? Sure, it’s a much cleaner experience and less cable heavy, but the stresses of DIY are still very much present.
Opening the box for the System Hub up—the so-called brain of the iCue Link—I was met with a QR code with a very prominent STOP sign, bidding me check the instructions online before setting everything up. Because I’ve been previewing the kit ahead of launch the final version of the instructions weren’t available when I was testing it out. Sure I had the reviewer’s guide to go off, but if I know anything about DIY PC builders I’d say going instructionless felt like a truer experience—we can be a little gung-ho when it comes to these things.
I set about getting everything set in place in the lovely NZXT H9 Elite chassis we reviewed recently. This fish tank-looking beastie is the perfect exhibit for the iCue Link, since you can see everything going on from both front and side.
(Image credit: Future)
1x QX120 RGB Starter Kit
1x QX120 RGB Expansion Kit
1x iCue Link System Hub
1x iCue Link cable kit
1x Connector Set
1x 600mm Slim Cable
1x 200mm Slim Cable
It sounded simple enough going in. The iCue Link System Hub comes with a short 6-pin PCIe cable, and USB 2.0 data cable to plug into the motherboard. On each side, there’s a single iCue Link channel port for connecting the rest of the ecosystem together. That means none of the other components would need power or data routed to them. It’s an exciting concept, to say the least, especially when you consider the sheer number of cables connecting to your average RGB control hub.
I was sent the chonky iCue Link H150i RGB AIO CPU cooler. Rather than having a power connector on the pump head, the power is deftly routed through the outside of the liquid tube sleeves and into the 397mm x 120mm radiator, with its three, preinstalled QX120 RGB 120mm fans.
I’d have to get that connected up to the System Hub using one of the many ports on the sides and bottom of the radiator, along with the collection of iCue Link QX RGB PWM fans I’d been sent with the starter kit. Each fan has a port on either side, to be snapped together with other fans, or chained to other components with Corsair’s nifty proprietary power cables.
The initial installation wasn’t too bad. Starting with the AIO cooler for the CPU, that screwed in with no issues, and luckily there was already a bracket installed behind the motherboard so I didn’t have to sort that out. It does come with both an AMD and Intel bracket, though, so no worries there if you don’t have one already. Oh, and it comes with thermal paste pre-applied too, so that was nice.
The fan screws on the other hand were a little difficult to twist. Really, I needed three hands: one to hold the fan in place, and two to grasp and deathroll on the screwdriver like some RGB-fuelled alligator. At first I put it down to sweaty hands, but I’ve genuinely never had such trouble trying to fix fans into place.
Because of this, though, the triple fan intake on the side had a little give so it could slide up and down during the building process—something that frankly saved me when I had to unplug everything three bloody times.
Help, why is the AIO radiator not lighting up? (Image credit: Future)
Once everything was vaguely screwed in, it was a matter of figuring out where I could afford to place the Hub. I wanted to display it in the front of the case, because it’s a cute little block, all things considered. Besides, not only does it take up just 2 inches of space, it’s even magnetic. No screwing involved here.
I settled on popping it near the bottom right of the motherboard, and luckily I had a spare PCIe power cable so I could route power to it, circumventing the NZXT H9 Elite’s weird PSU placement issue. Just something to keep in mind if your chassis has a non-standard PSU placement or you want to put the hub somewhere else, as you only get a teeny weeny 10cm power and header cable with it.
That said, the fact you only have to plug a single USB header cable into the motherboard’s USB 2.0 slot is an absolute marvel. Seriously, you should have seen the state of the case before I swapped the hubs over… fan header cables everywhere. The hack who reviewed the H9 Elite is decidedly not good at cable management either.
While the lack of cables is very much appreciated, the trouble came in figuring out how to chain everything together. I imagined I could attach the powered System Hub to one of the AIO cooler’s many ports, then octopus out from there into the rest of the components. I thought that should work, but it simply did not do the thing.
I made a mess. (Image credit: Future)
I ended up creating a chained loop of cables from one side of the System Hub, into the triple fan intake, up into the top-mounted AIO radiator, and then back down to feed into the other side of the System Hub. I then simply attached the single QX120 exhaust fan to the other end of the AIO radiator.
When I look at it now, it seems so simple. Not at the time, though.
My saving grace at this point was the extra Cable Kit. It meant I had some leeway to swap different length cables in and out while trying to figure out how to make the fans go brrr. All the components come with one or two cables, at least, including some 90° ones that really saved me when it came to the tighter spaces.
The true hero of the hour, though, is the fact the cables connect whichever way up you try and jam them in. That meant I had a lot of options as to which direction to tackle my problems from.
My biggest regret of this whole ordeal was screwing the three side fans in before I figured out how the cables worked. Because trying to jam my hand in between some parts to get the connector situated was a nightmare even in a case that’s super easy to build in.
Look ma, it’s defragging. (Image credit: Future)
Once you get the new version of the iCue software installed, there’s a plethora of effects to pick from. Each with literal layers of potential and individual zones on every piece of kit, so you can highlight individual LEDs to get things just right. There’s 34 RGB LED per fan, in fact, so lots of leeway for silliness, like my attempts to make an old Microsoft background look alike. The LEDs didn’t handle the green rolling hills of the XP background well, but the AIO looks great in the old Windows logo colours.
The software actually detects everything automatically, though you do have to rearrange them into the right order, and make sure all the fans are up the right way for your RGB customisation session. It does helpfully display a single RGB colour you can relate to each fan on screen, which also helps you figure out orientation. The orange is very easy to mistake for a creamy white, but otherwise it’s a pretty helpful system.
All in all, I’d say the final visage is pretty rad. Even if you decide not to install any software, the pastel “Watercolour” take on the RGB is refreshing. And hot damn, the satisfaction from finally getting everything working without having looked at any instructions is immense. Go me.


