Get a head start and glide your way to victory with some of the best drop spots on the map.
Your chosen Fortnite landing spot can make or break your game. If you drop in an isolated part of the map, your loot will lag behind other players in mid and late-round fights. But land in a busy zone and you’ll be forced to fight multiple enemies at once, meaning an early trip back to the Battle Bus if you’re not careful.
Finding the best landing spot can be tricky, so in this guide I’ll first run through some advice for picking where to drop, and then highlight 16 POIs (points of interest) I think strike the best balance between safety and powerful gear.
I’ll update this guide throughout the season as new locations are added.
Fortnite best landing spots: Where to drop
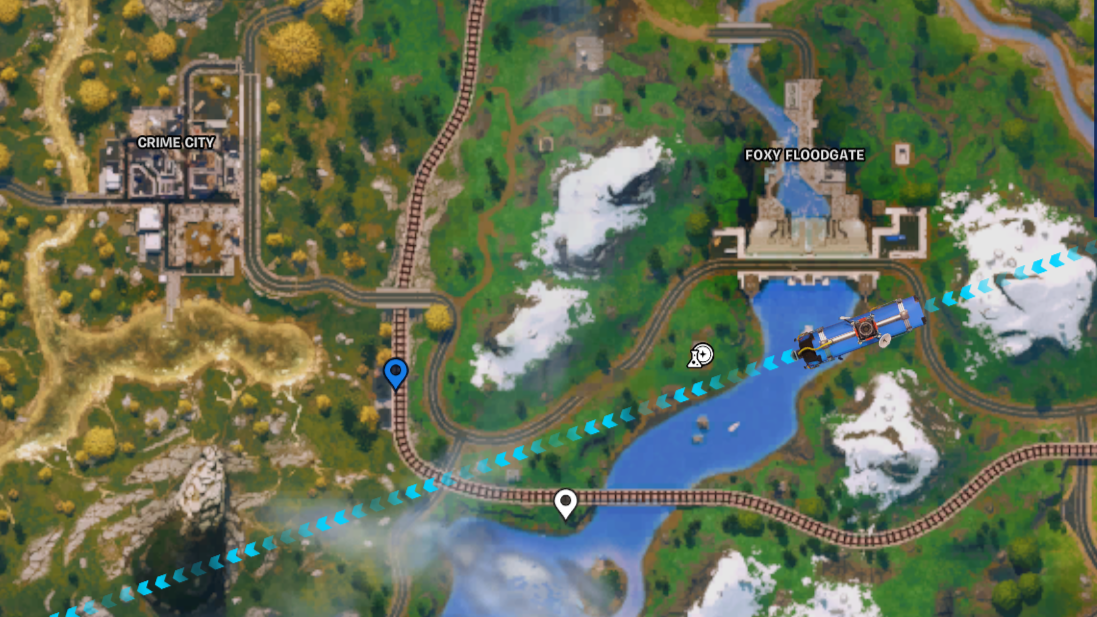
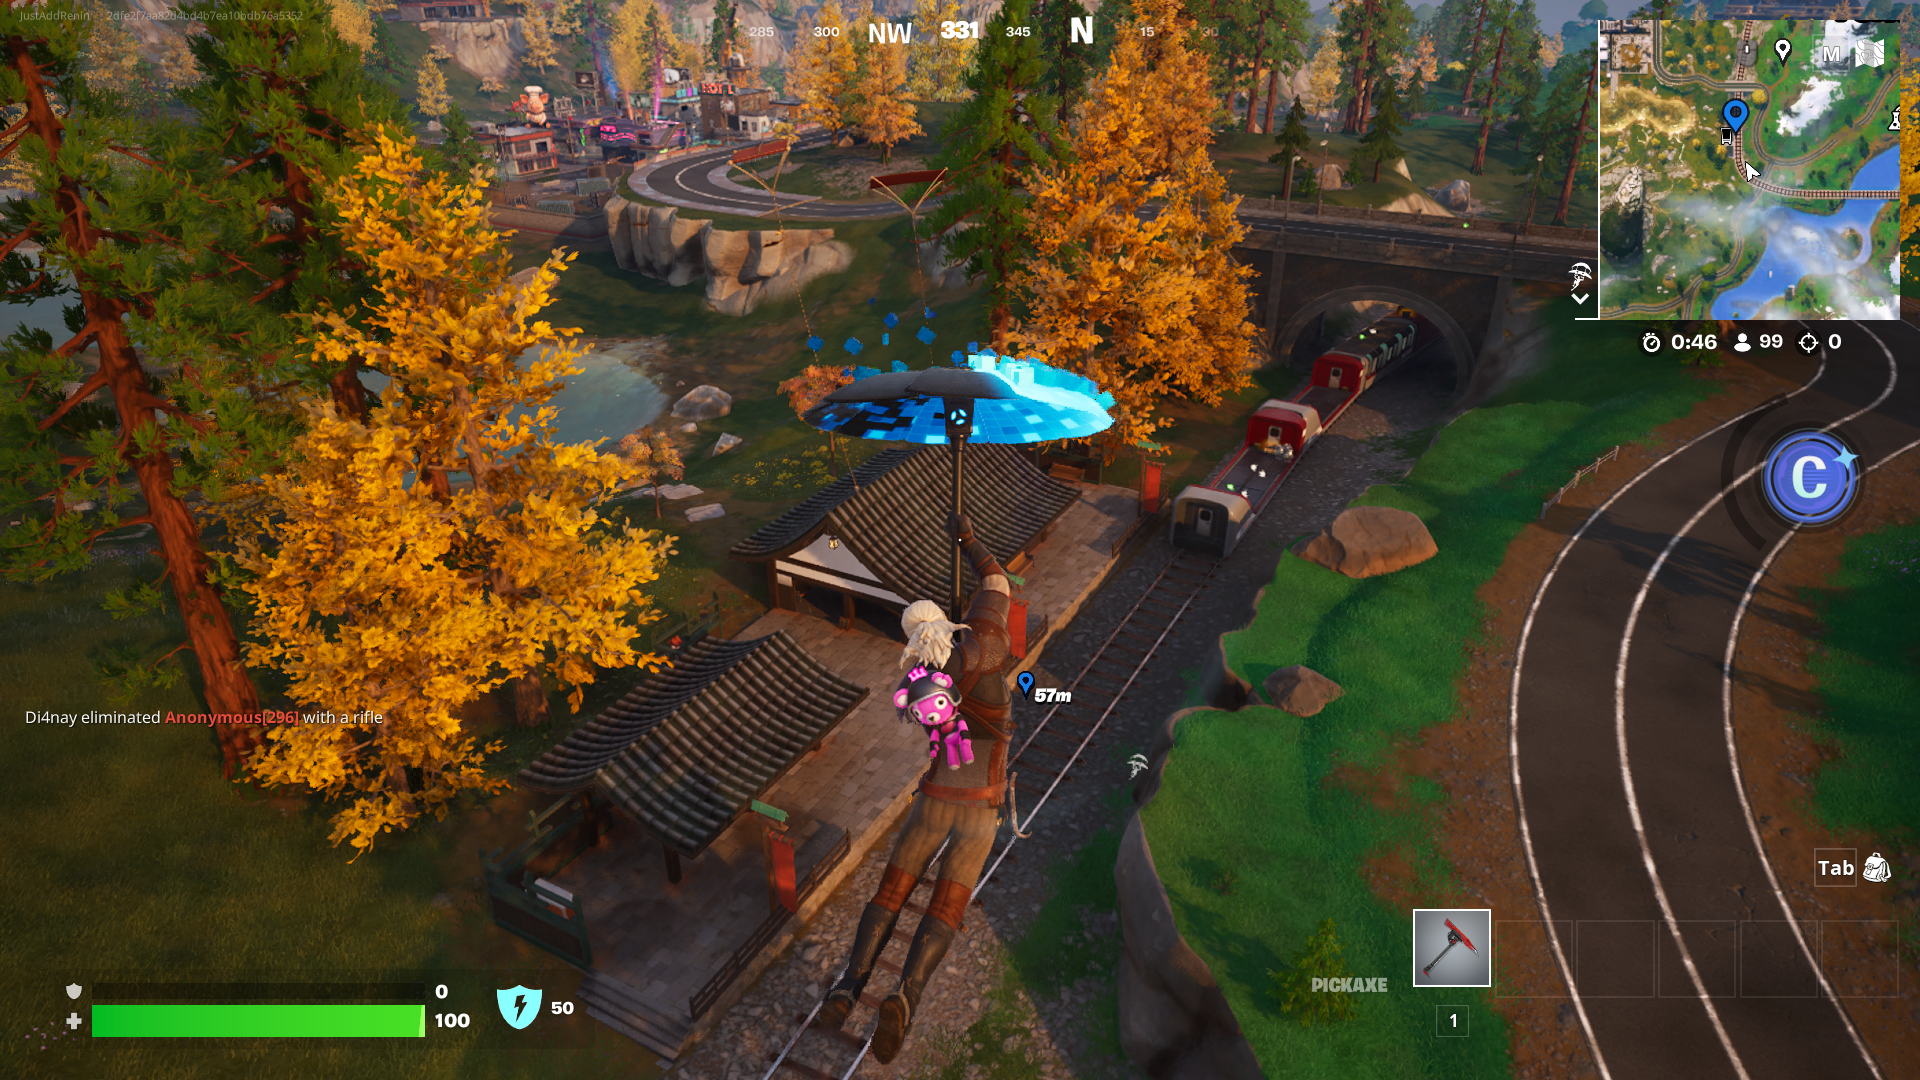
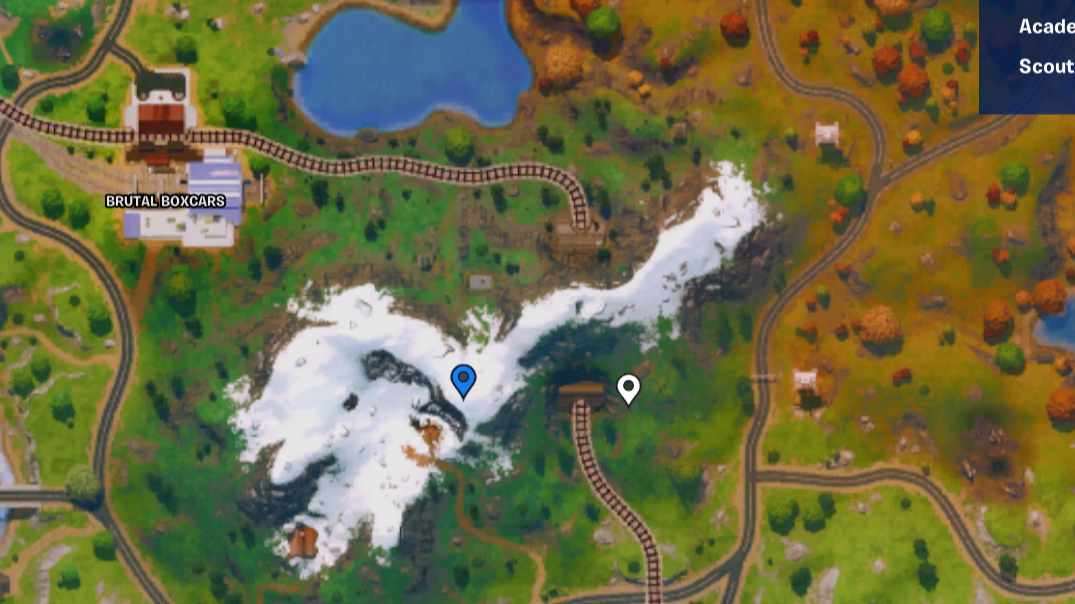
Crashed train outside Crime City
This might just be the best drop in the game because, firstly, it’s quiet, and secondly, it has two guaranteed rare chests packed with powerful goodies. Land on the north side of the train and make your way along it, grabbing the loot as you go and breaking the Slurp Barrels instead of wasting your shield items.
There’s a chance for an Academy Stand to spawn in the train station—they grant strong items, which you can find out more about in the tips section below—and there’s a vending machine to top up your healing. Get in and out quickly, and then head over to Crime City to third-party any dueling opponents.
Placid Paddies
A low-key drop spot with plenty of chests and a breakable Slurp Truck to give you max shields quickly. Start on the small building in front of the paddies because it’s an Academy Stand spawn point.
There’s usually a vehicle, and when you’re finished looting you have plenty of options, including a potential Spire spawn to the west and a potential Shrine spawn point to the south.
Both are valuable: the mini-boss Spires are easy to kill and drop solid loot, while Dash Sprites can be returned to a shrine for movement items.
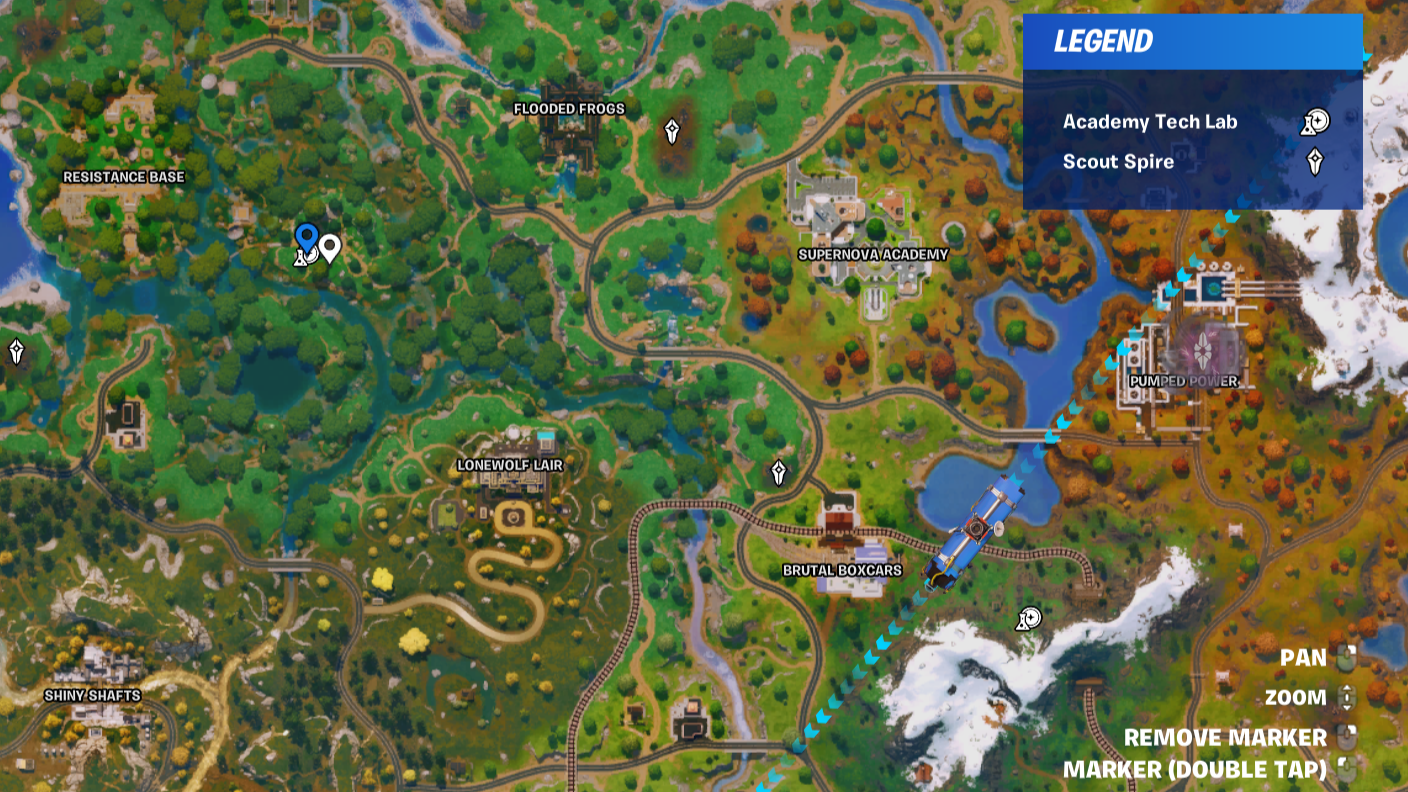
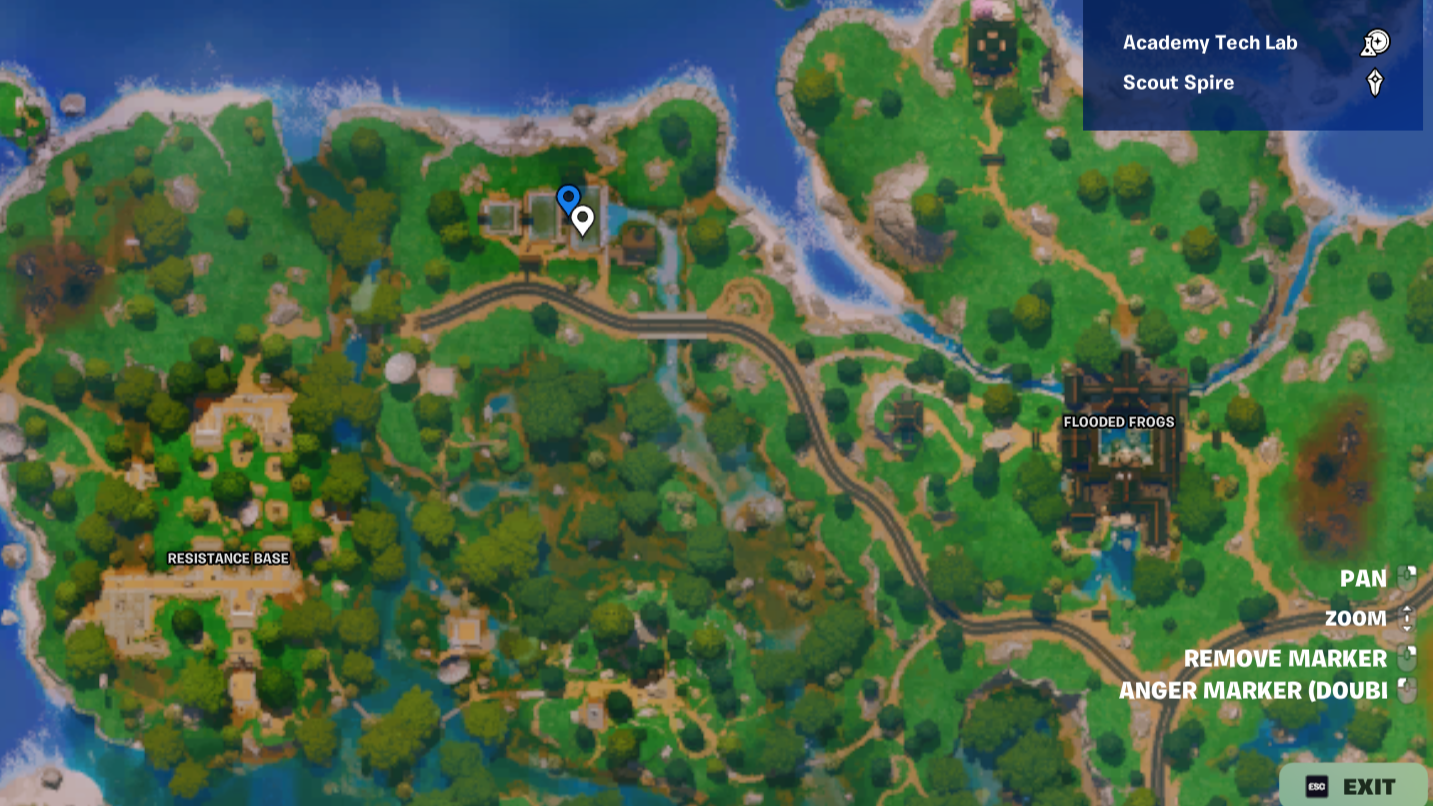
Academy Tech Lab… if you have gold
The locations of Academy Tech Labs change every round. They’re busy drops because they’re stuffed with strong loot, and if you’ve got spare gold you can buy powerful items off the wall.
Only drop there if you’ve got more than 1,000 gold—and because of their popularity, I’d only recommend it if they’re far away from the Battle Bus’ path, like in the example above.
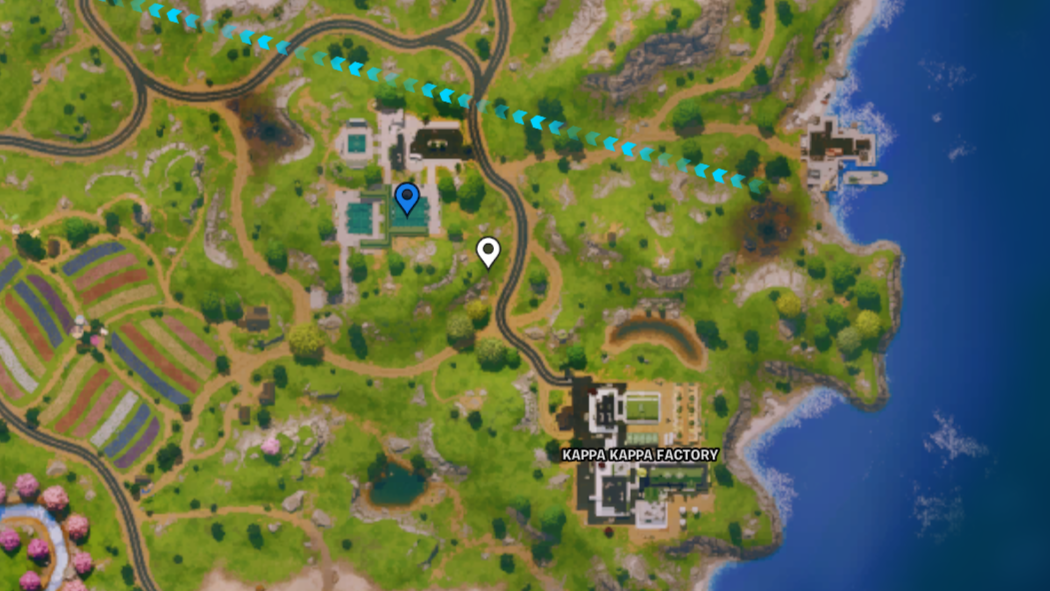
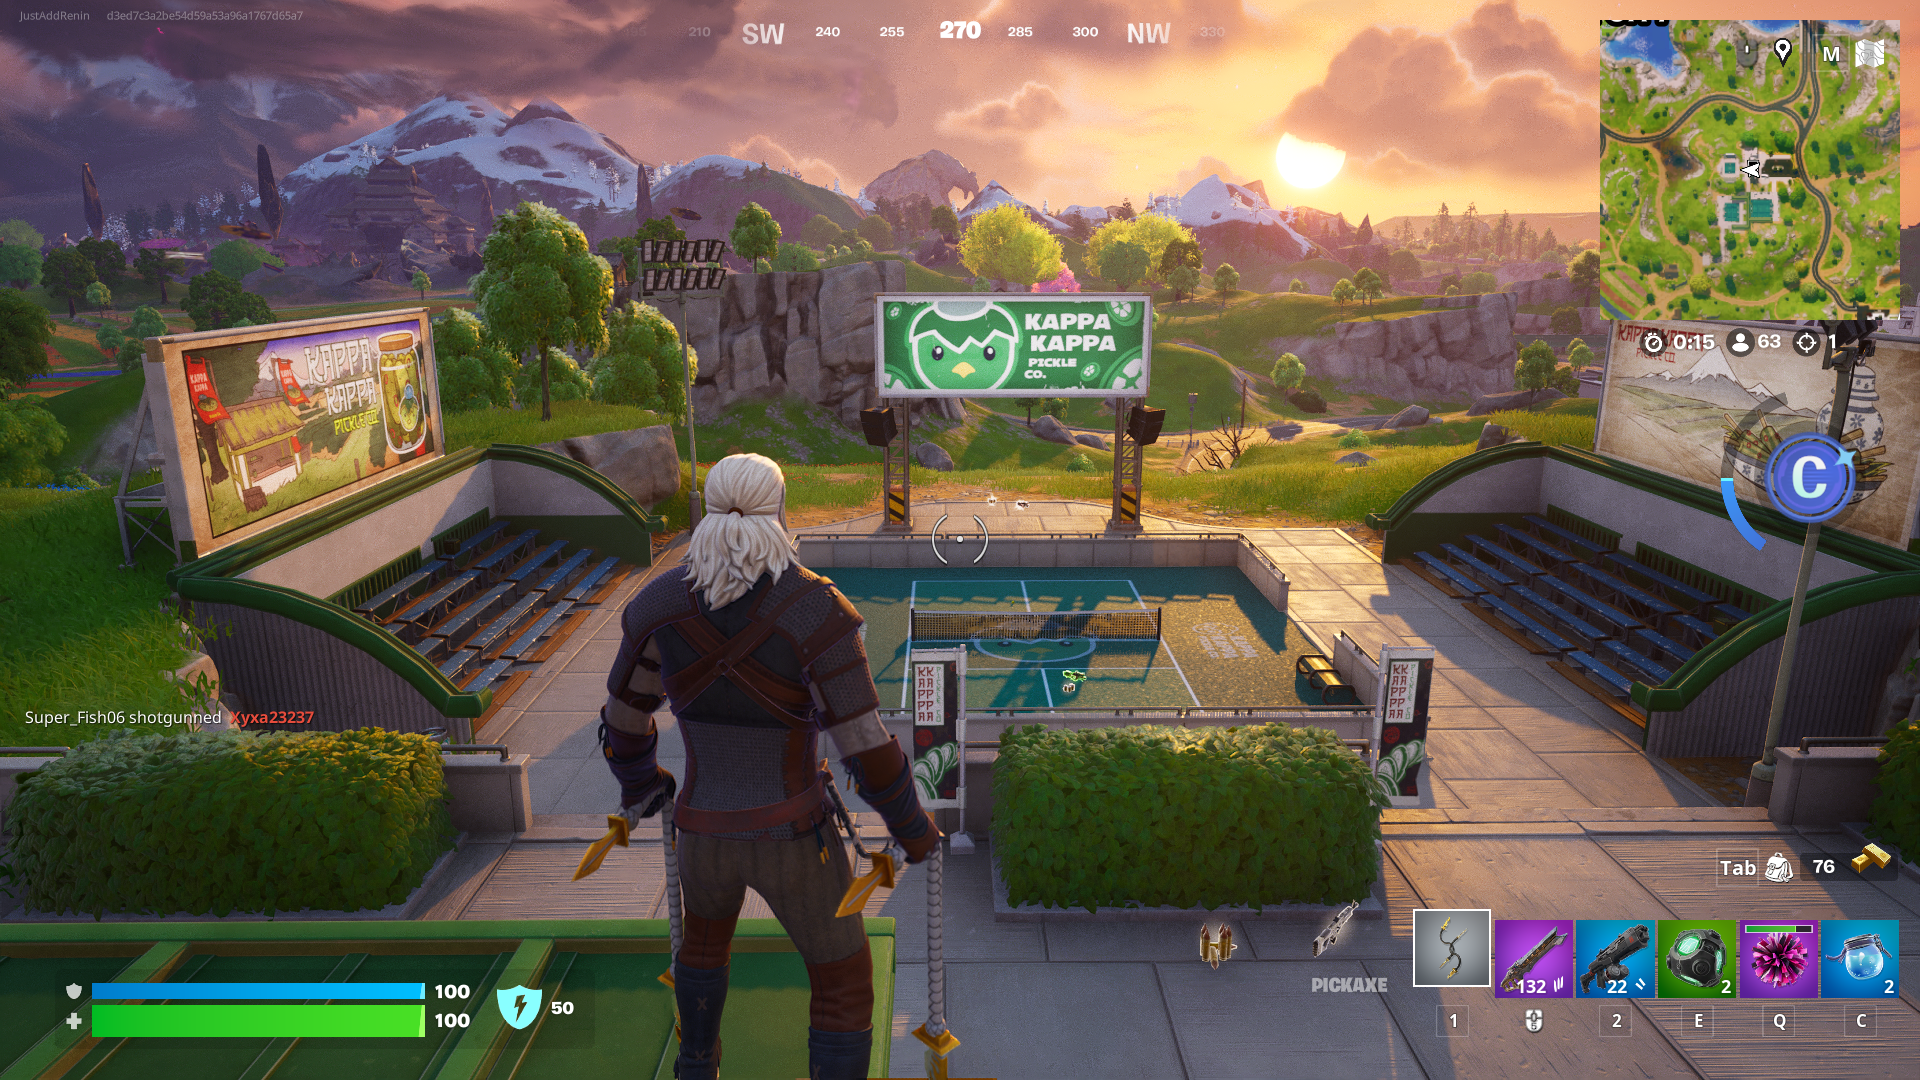
Pickleball courts
A one-stop shop for everything you need, including Academy Stands (there are two possible spawns), plenty of chests, a vending machine and vehicles. Plus, it’s right next to possible spawns for a Spire and a Shrine.
Try to land on the lone court in the top-left corner (shown above), grab the two guaranteed chests, and then turn in a Dash Sprite at the Shrine if it has spawned. Then, clear the area, starting from the very top, where you might find an Academy Stand.
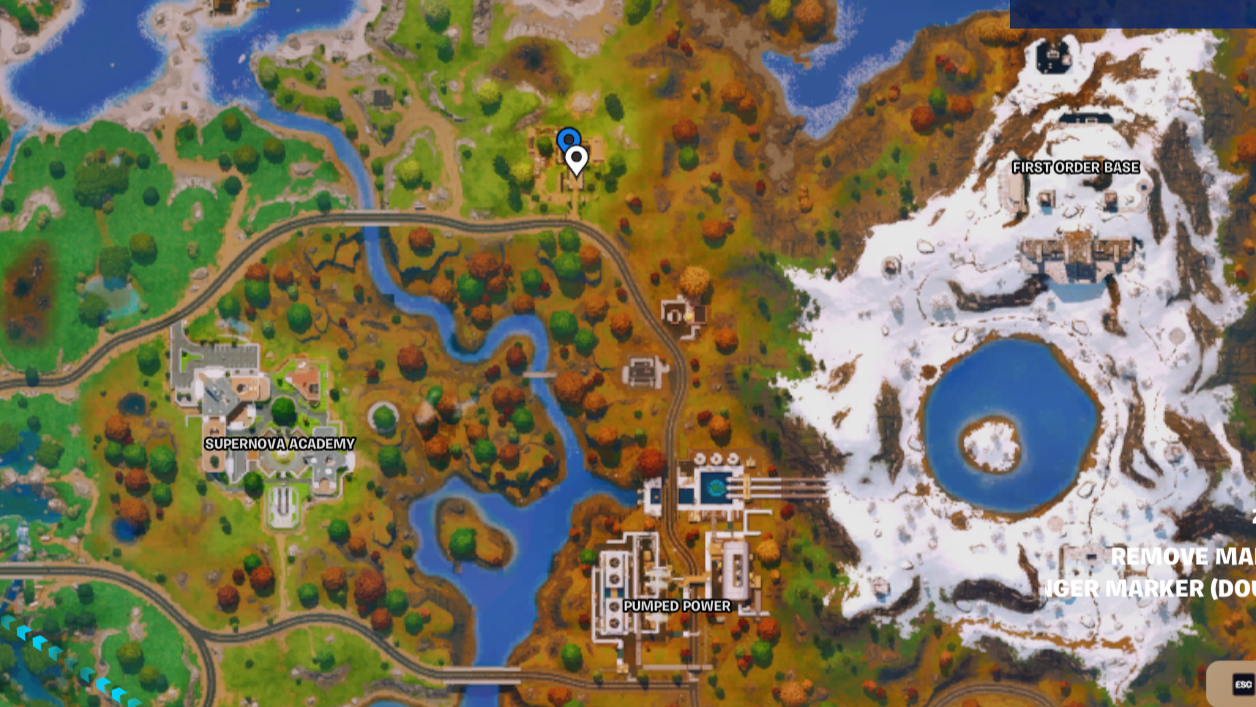

Martial Maneuvers
A reliable drop spot ever since the start of Chapter 6. If you’ve got the POI to yourself, land on the structure to the right, marked on the picture above, and break the Slurp Truck beneath to get full shields. If someone else has landed there, get a weapon first.
Loot the chests and check for an Academy Stand on the far left of the POI, near the rocks (you can see it on the left of the picture above). Now, you’ve got options: you can take a car down to Supernova Academy if you’re feeling confident, or if you want less action, drive down the road to the southeast.
If the Spire or Shrine has spawned nearby, go there first.
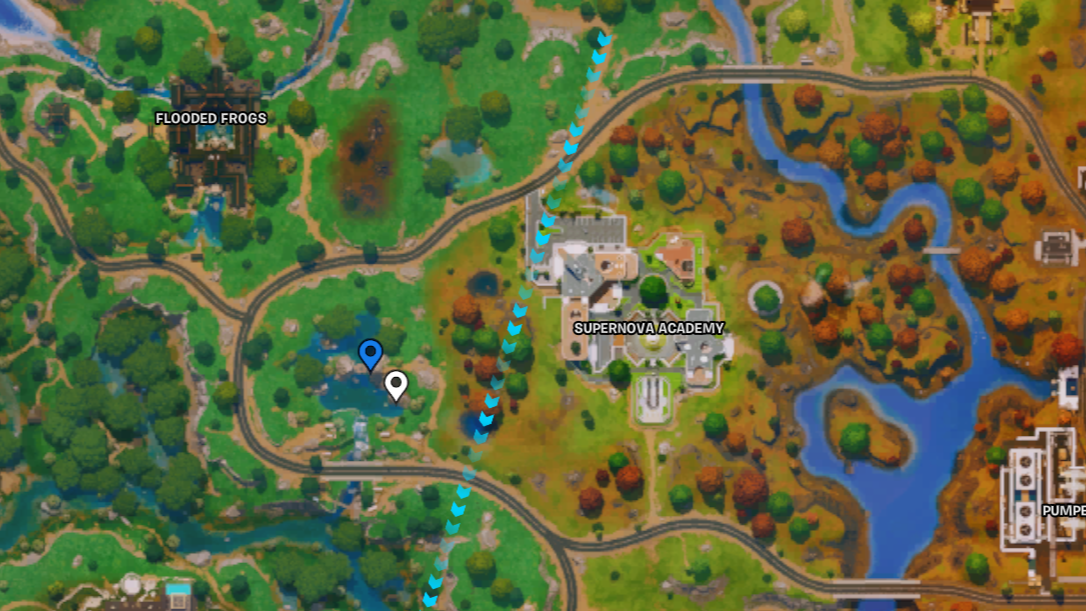
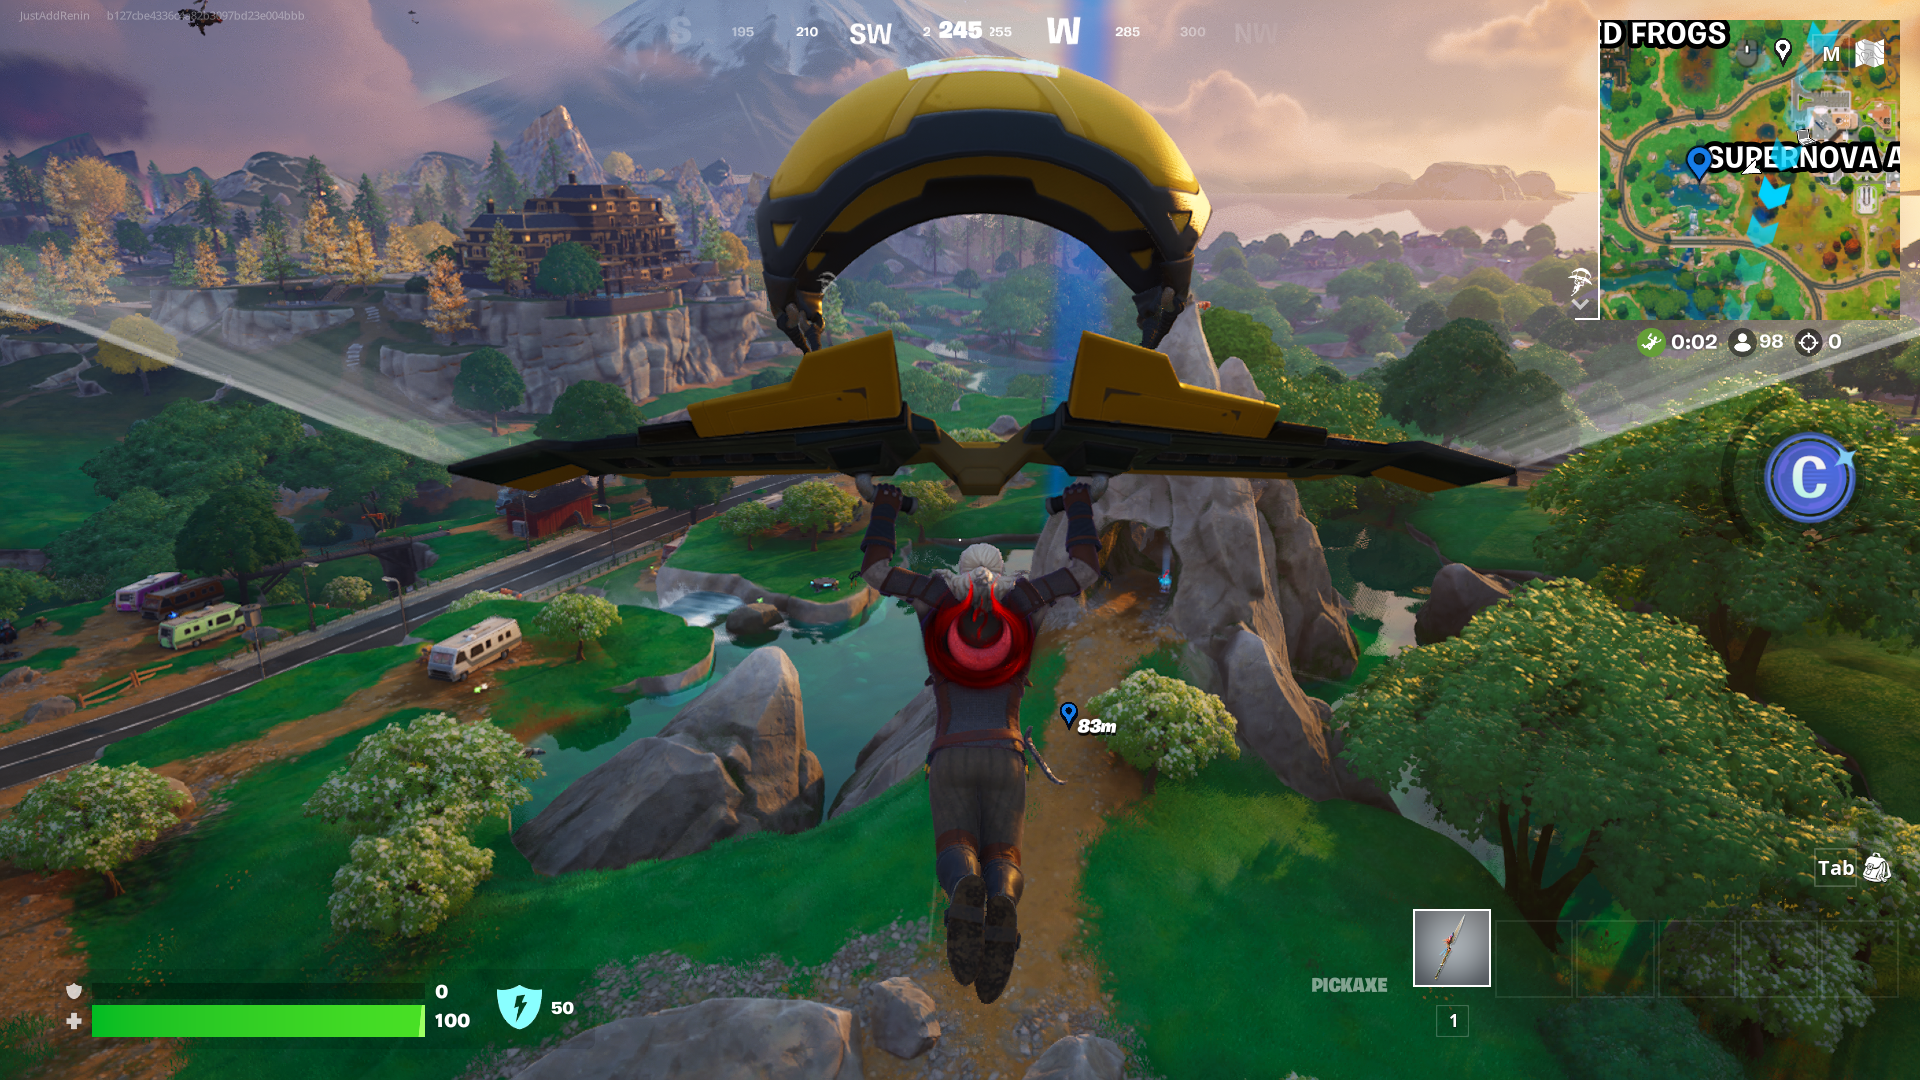
Bridge at Rocky RVs
Supernova Academy is perhaps the busiest drop spot on the map and arguably has the best loot in the game. But landing there is chaos, and you’ll be lucky to live for 30 seconds.
I much prefer landing slightly west, dropping onto an Academy Stand spawn point at Rocky RVs. Quickly loot a handful of chests and, if there’s a Shrine nearby, grab a Dash Sprite. Then roll into Supernova Academy ready for battle.
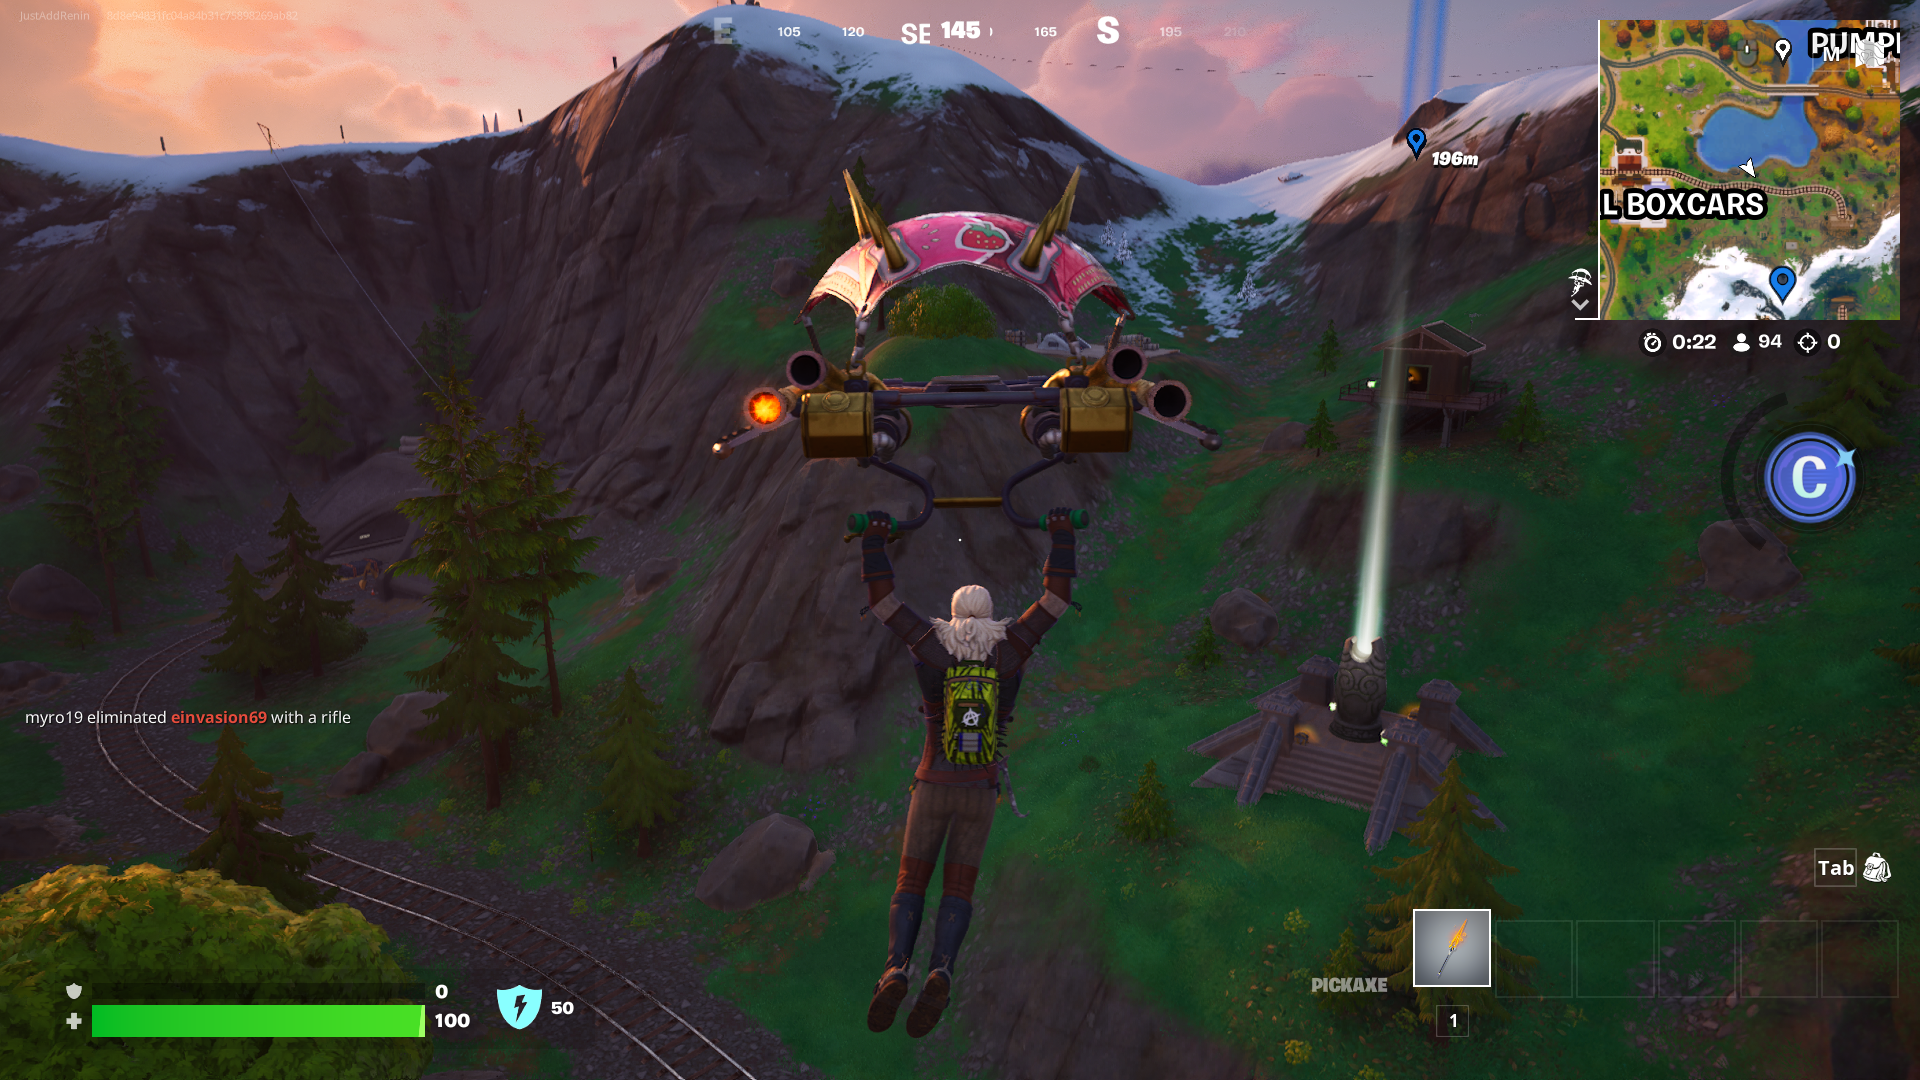
Mountain Base Tunnel
If you prefer a quieter drop, dangle over this mountain and drop whichever side the Shrine has spawned. There’s one to the north, and one to the south. Then, head into the tunnel and grab all the loot inside.
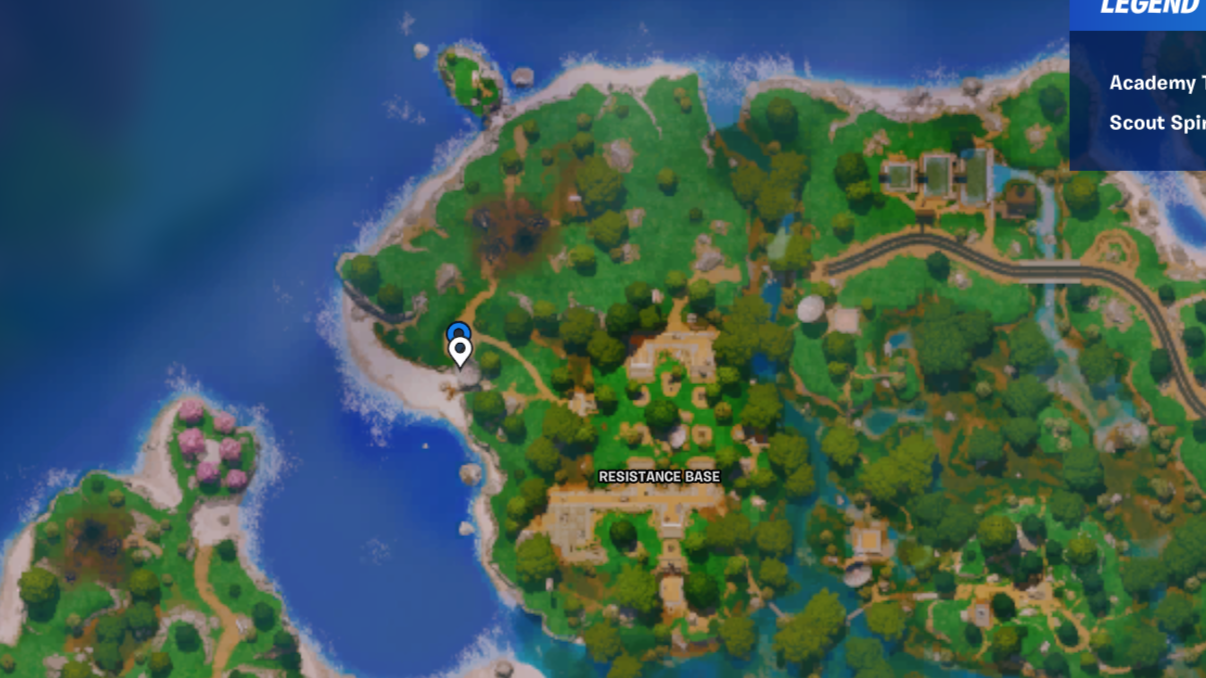
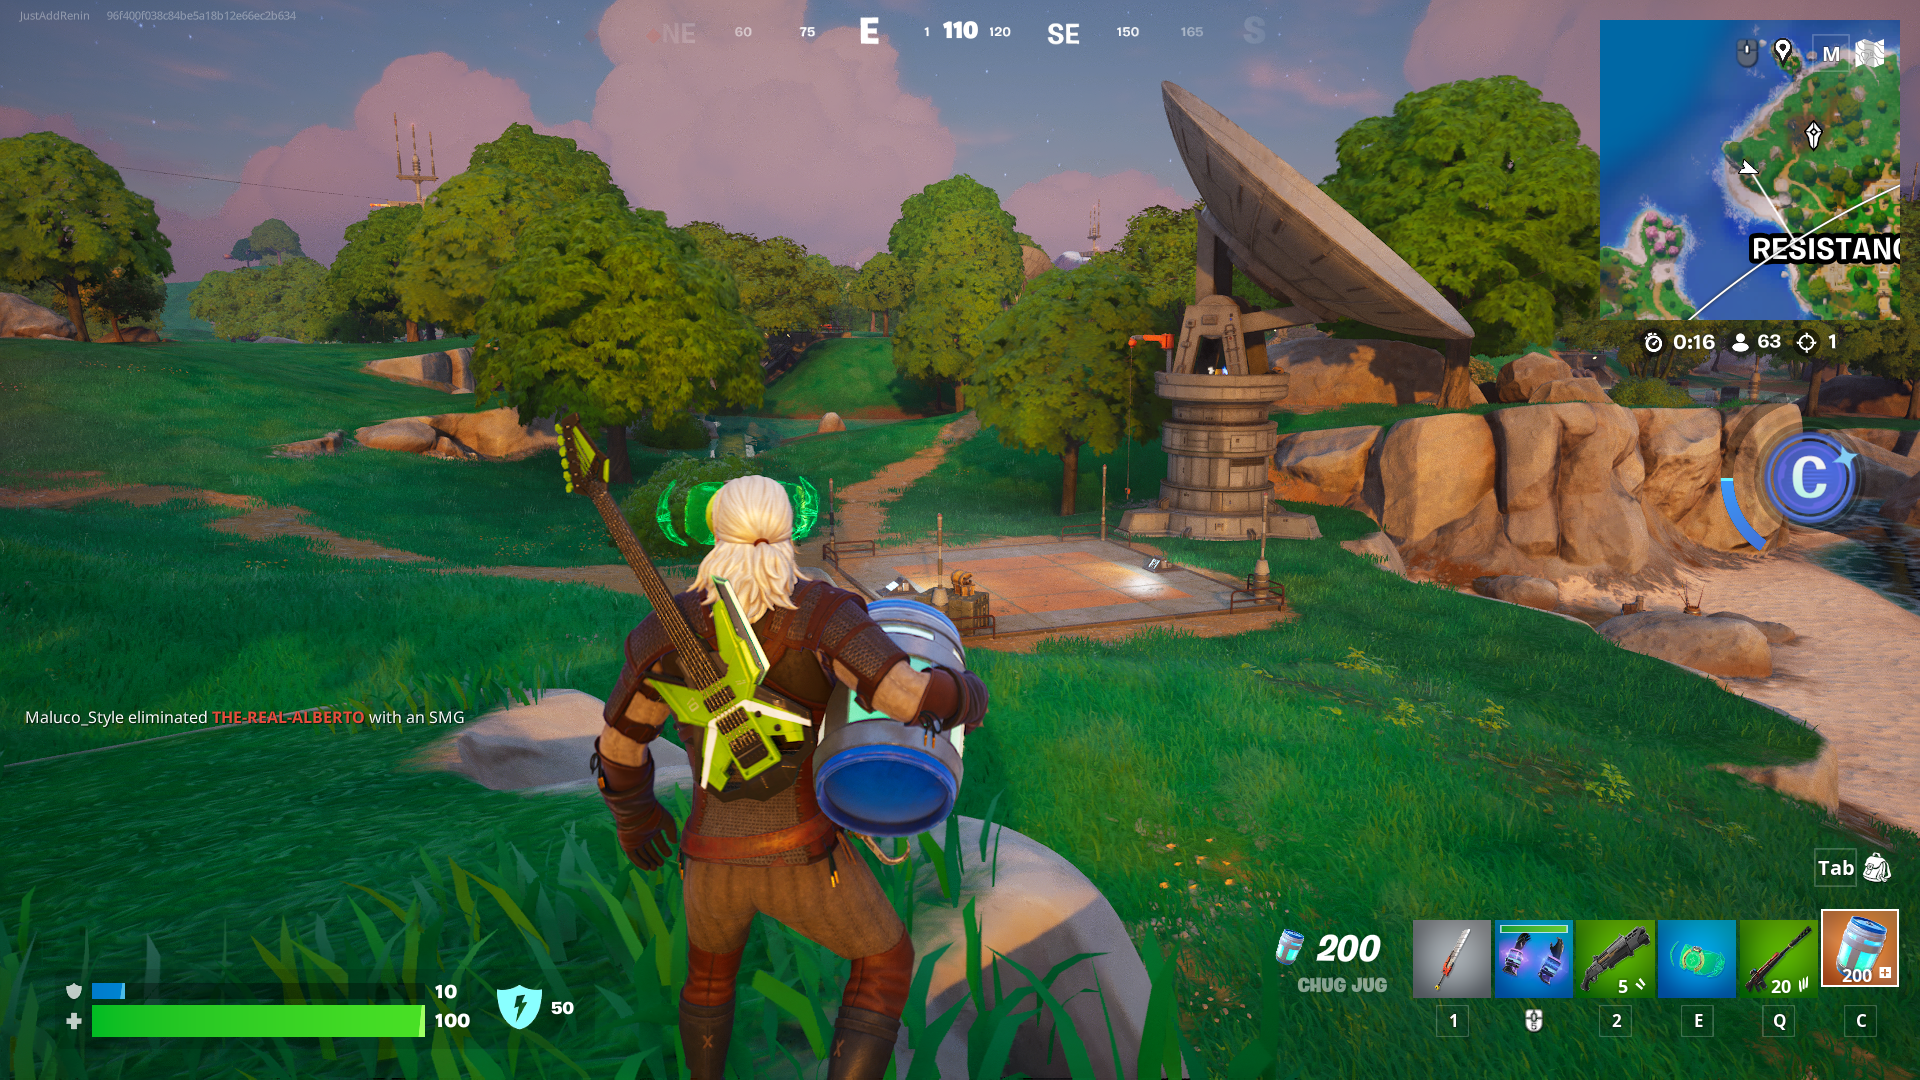
West side of Resistance Base
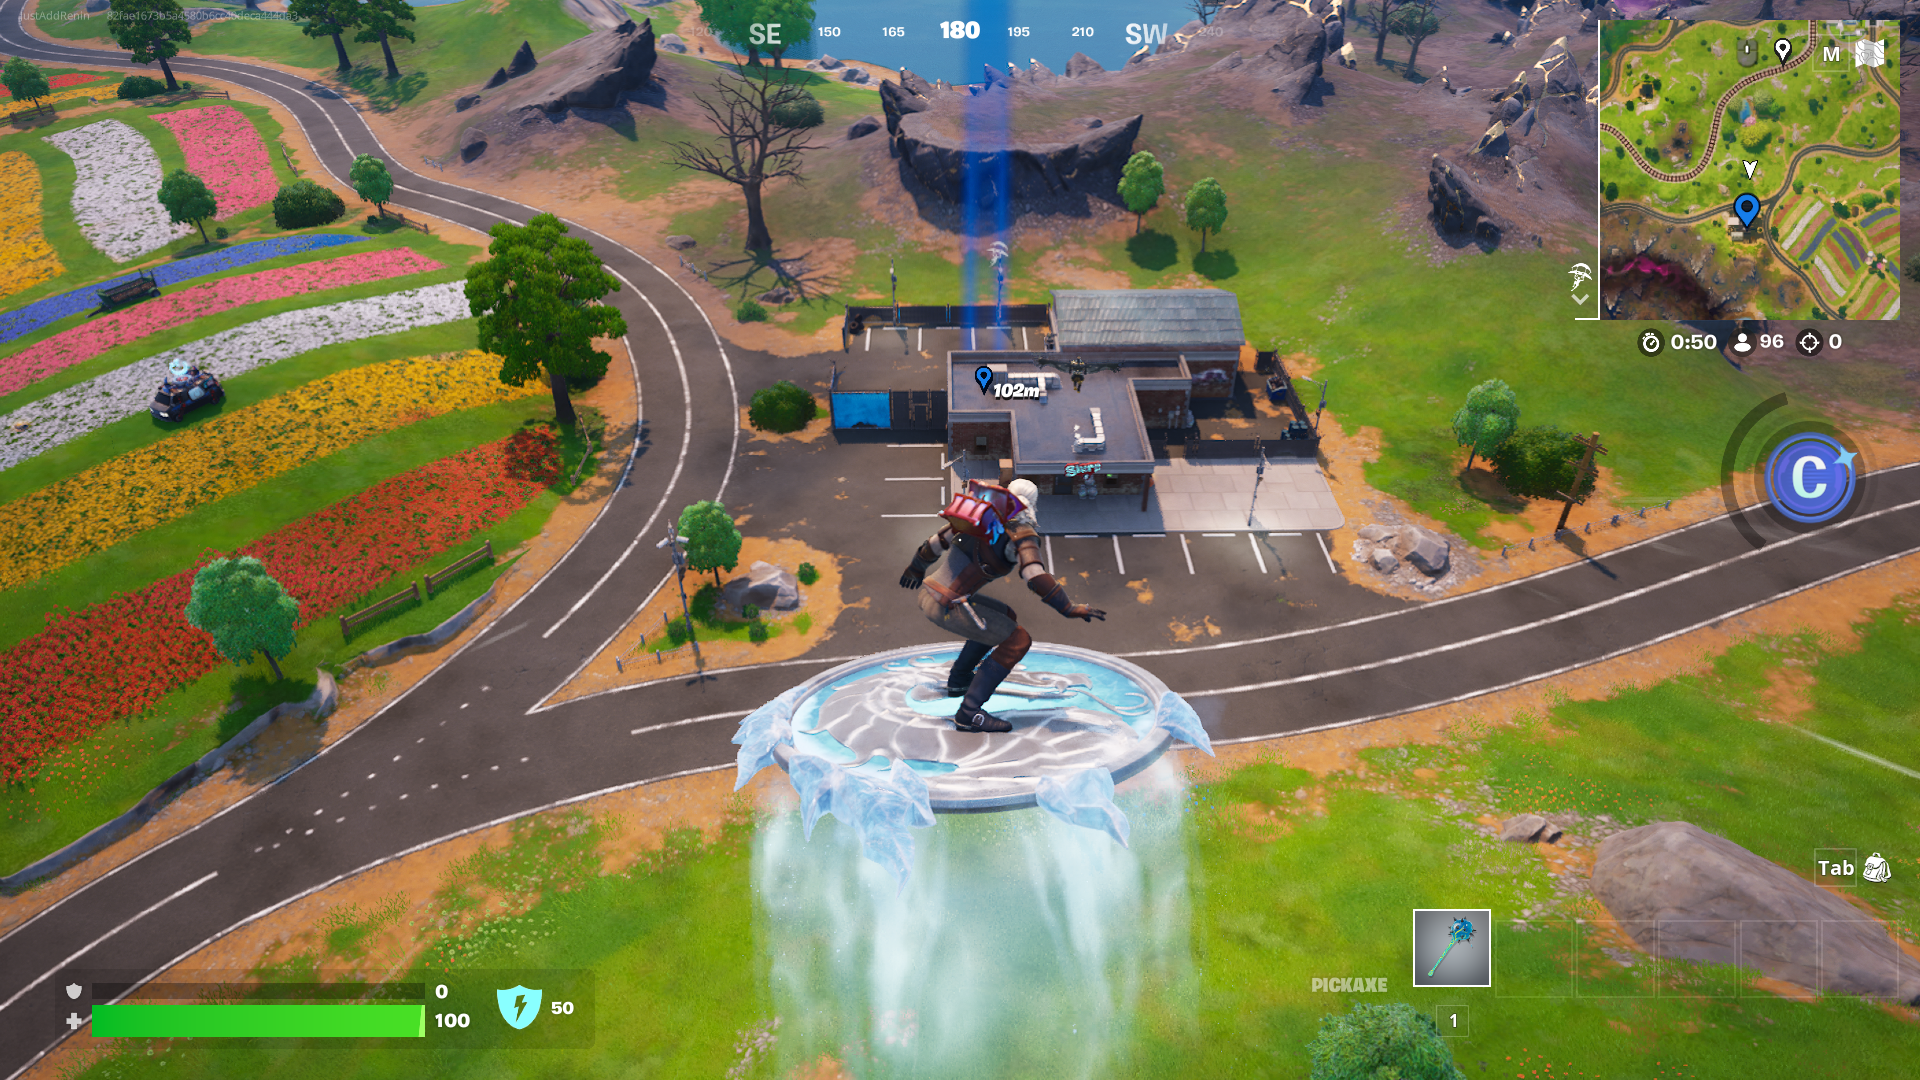
A slightly spicier drop, but often less crowded than the other named locations. There’s a landing pad to the west of the POI next to a satellite dish (shown above) that can spawn an Academy Stand, and there are also three guaranteed chests nearby. From there, make your way along the path to the base itself. You’ll probably face…er…resistance, so be on your guard.
For a bonus Academy Stand, as you’re dropping, glance over to the pink trees to the west, across the water. One might spawn in the middle of the clearing; if you see it and the base is too busy, veer off.
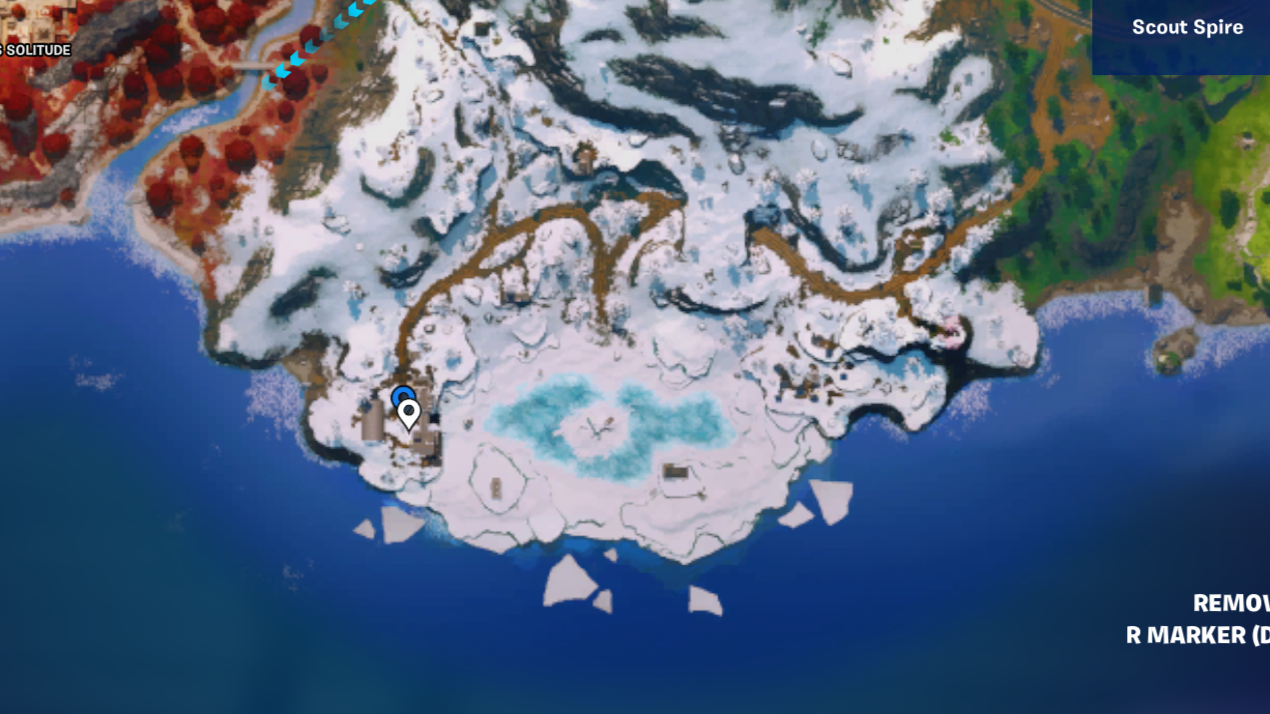
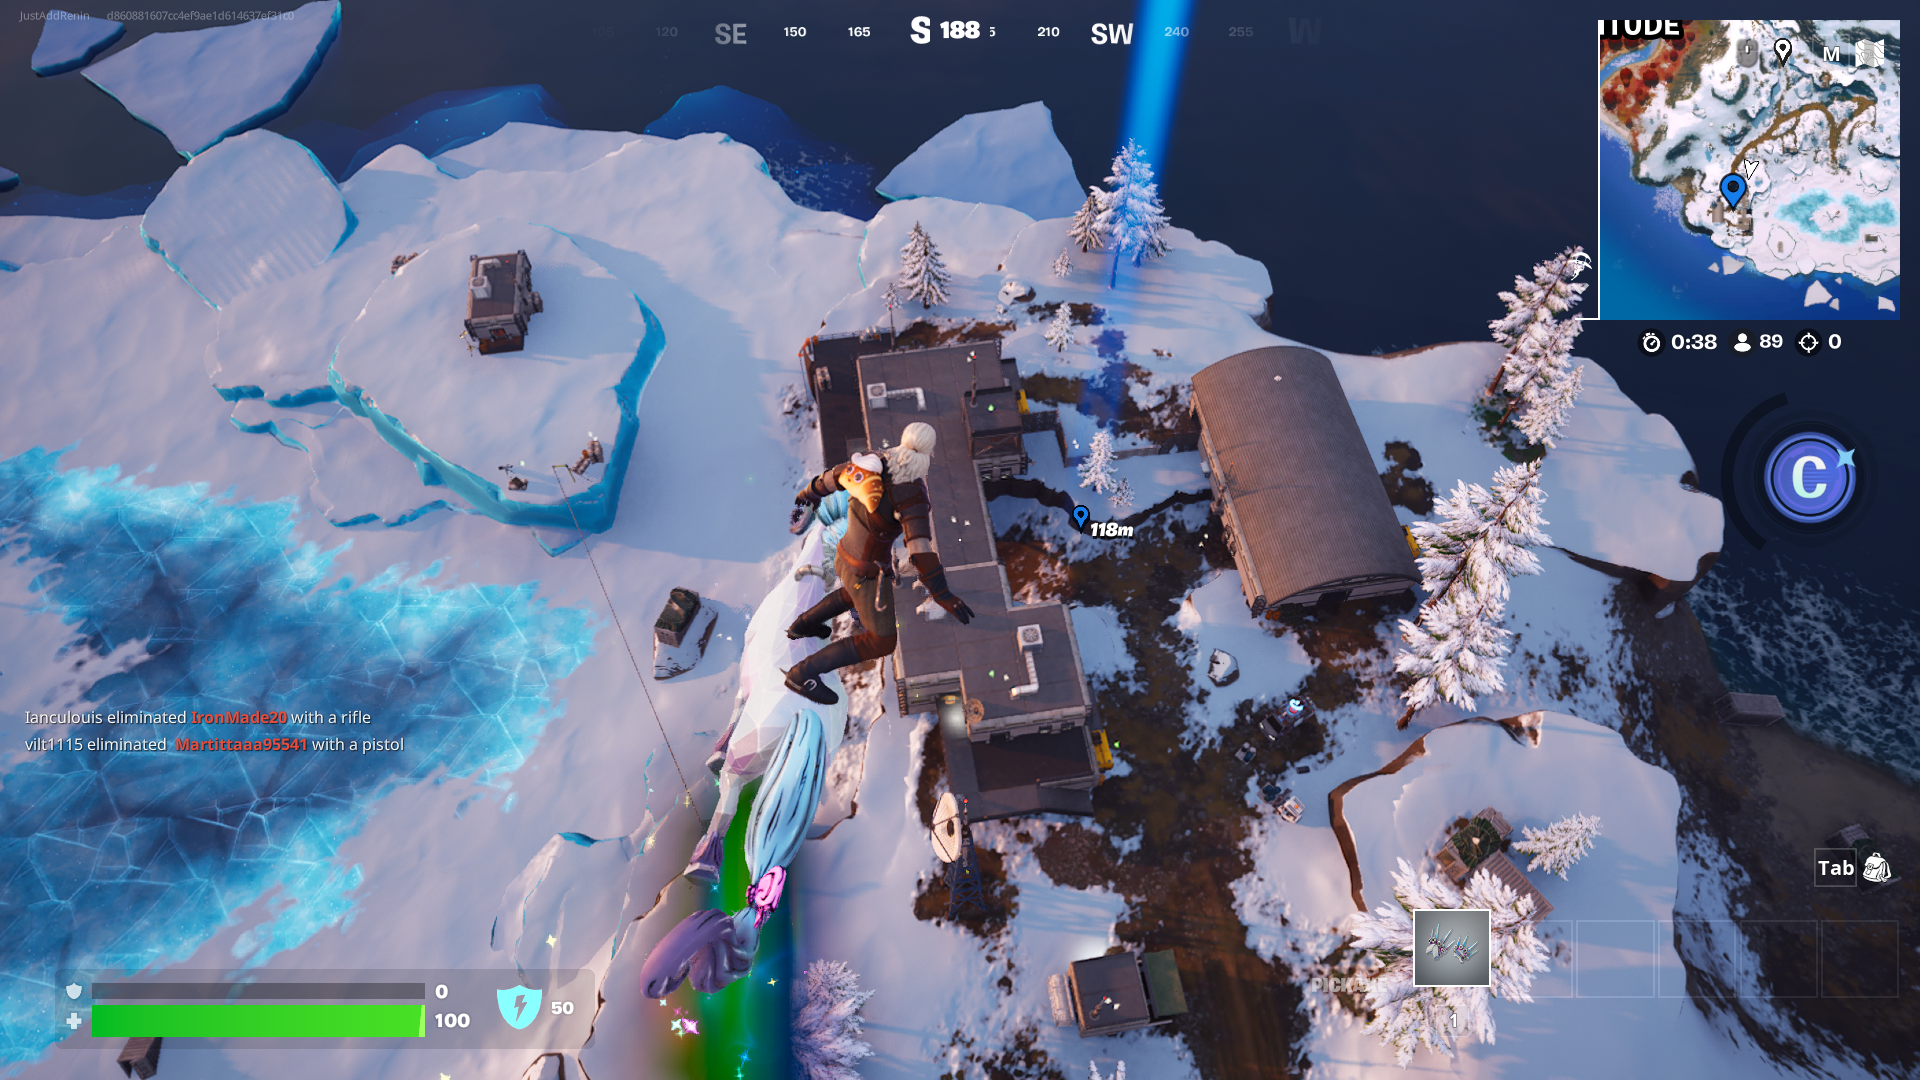
Southwest snow base
A new addition to the map is this sprawling POI in the southwest corner of the map, next to Shogun’s Solitude. I’ve marked the westside buildings above, but there are some to the east too, along with some chests in a collection of pink trees. If you’re playing with a team, it’s worth splitting up.
Prioritise the west side: there are a boatload of chests here, and a possible Academy Stand in the curved roof building shown in the picture above. When you’re done, head north for two possible Shrine locations. If the main POI looks busy as you drop, land directly on one of the Shrines instead.
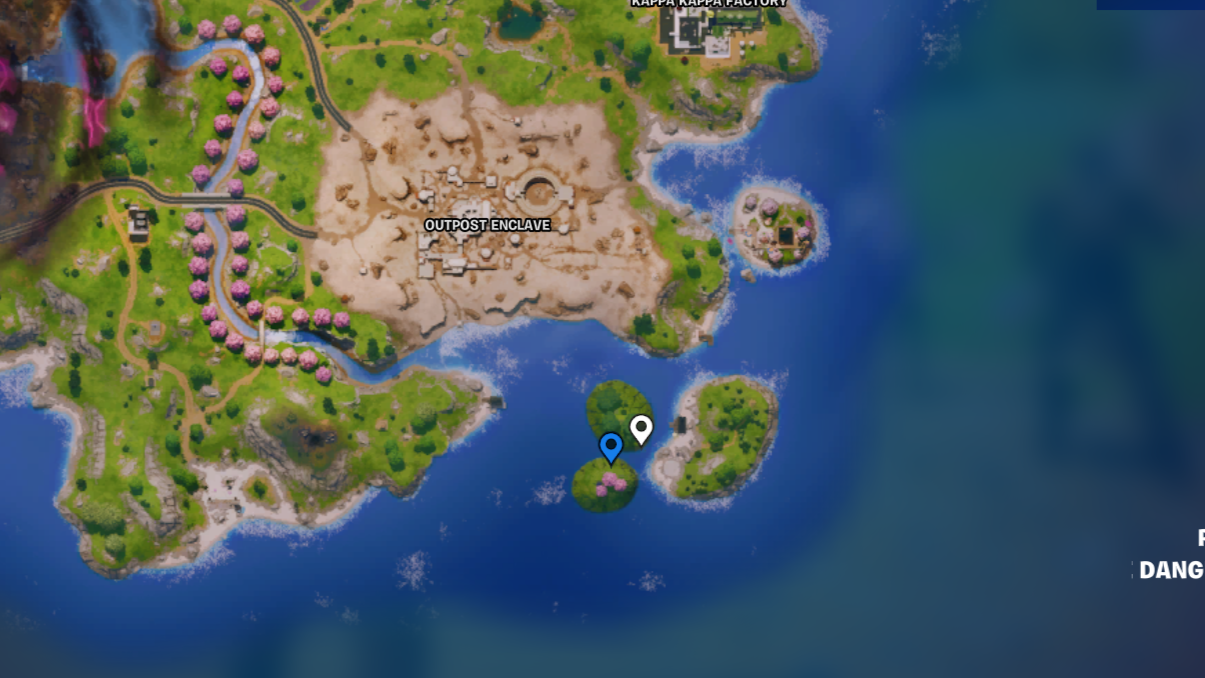
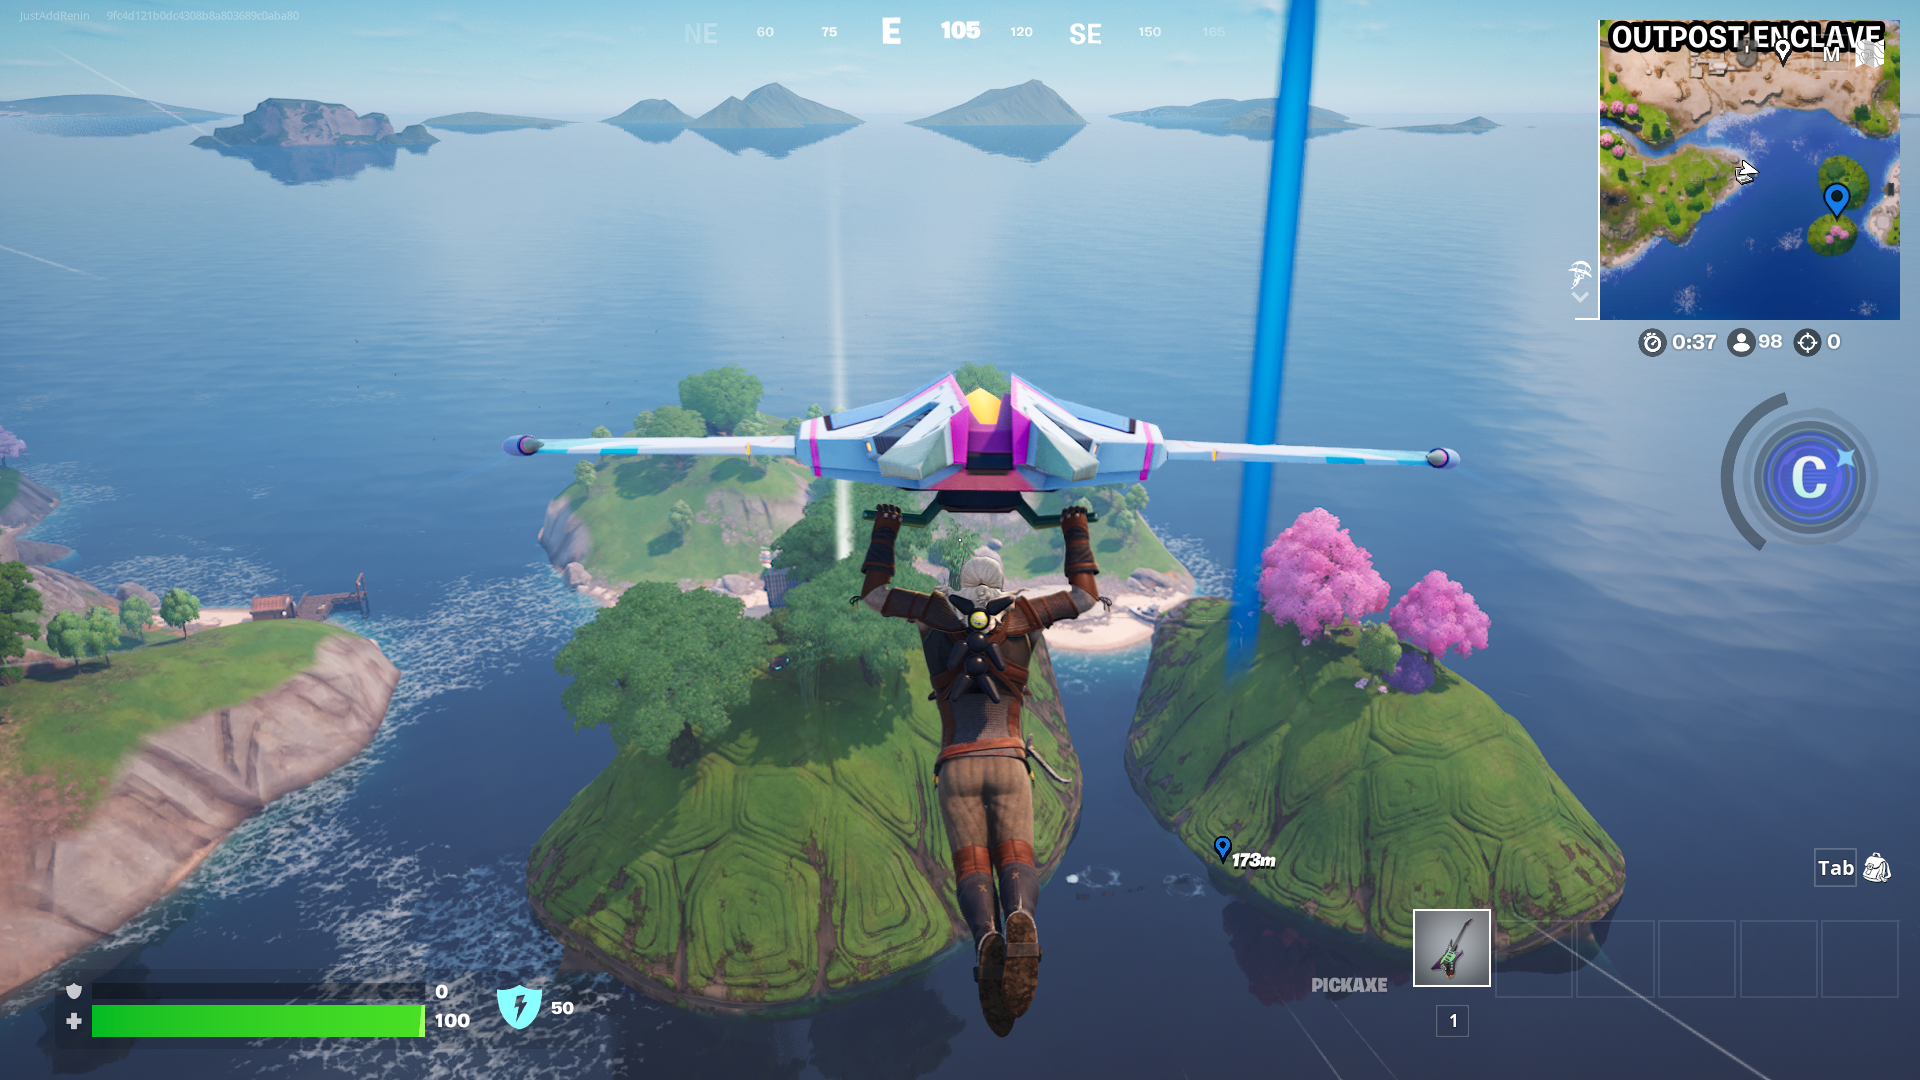
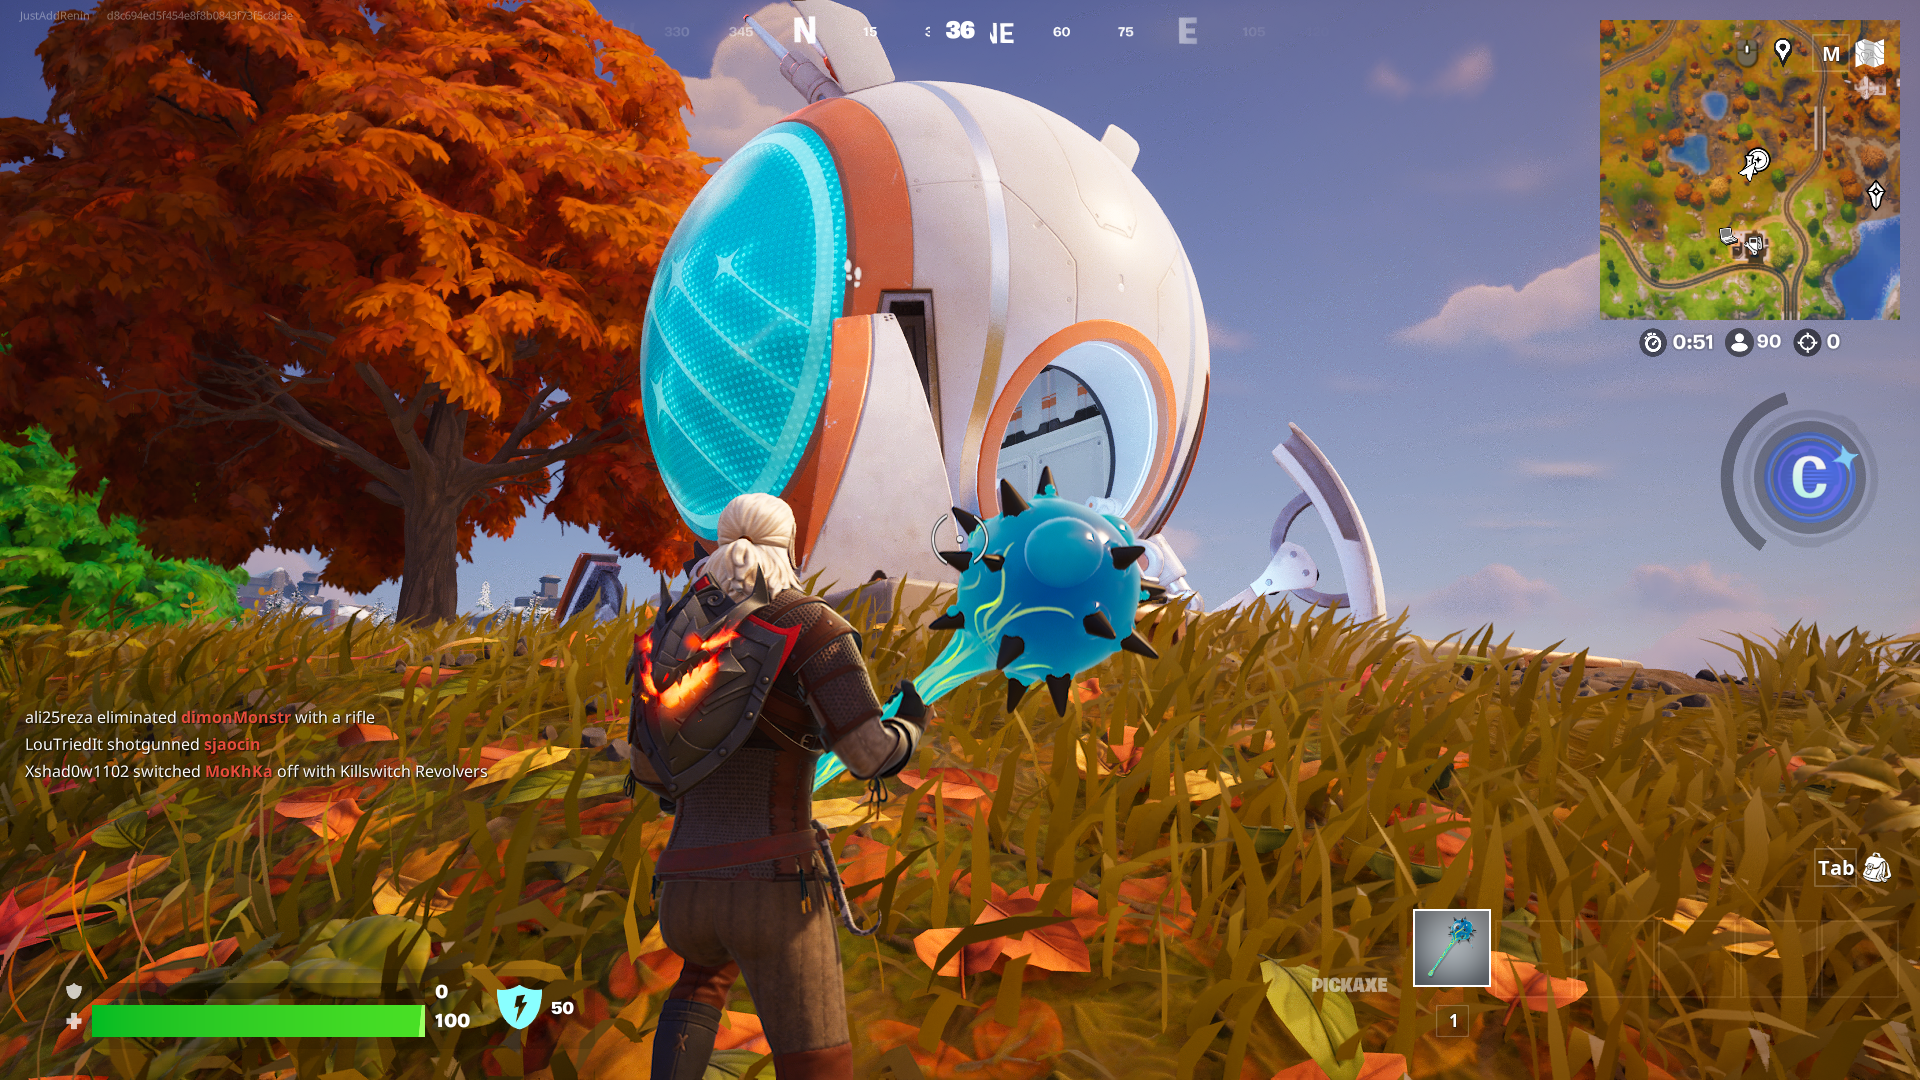
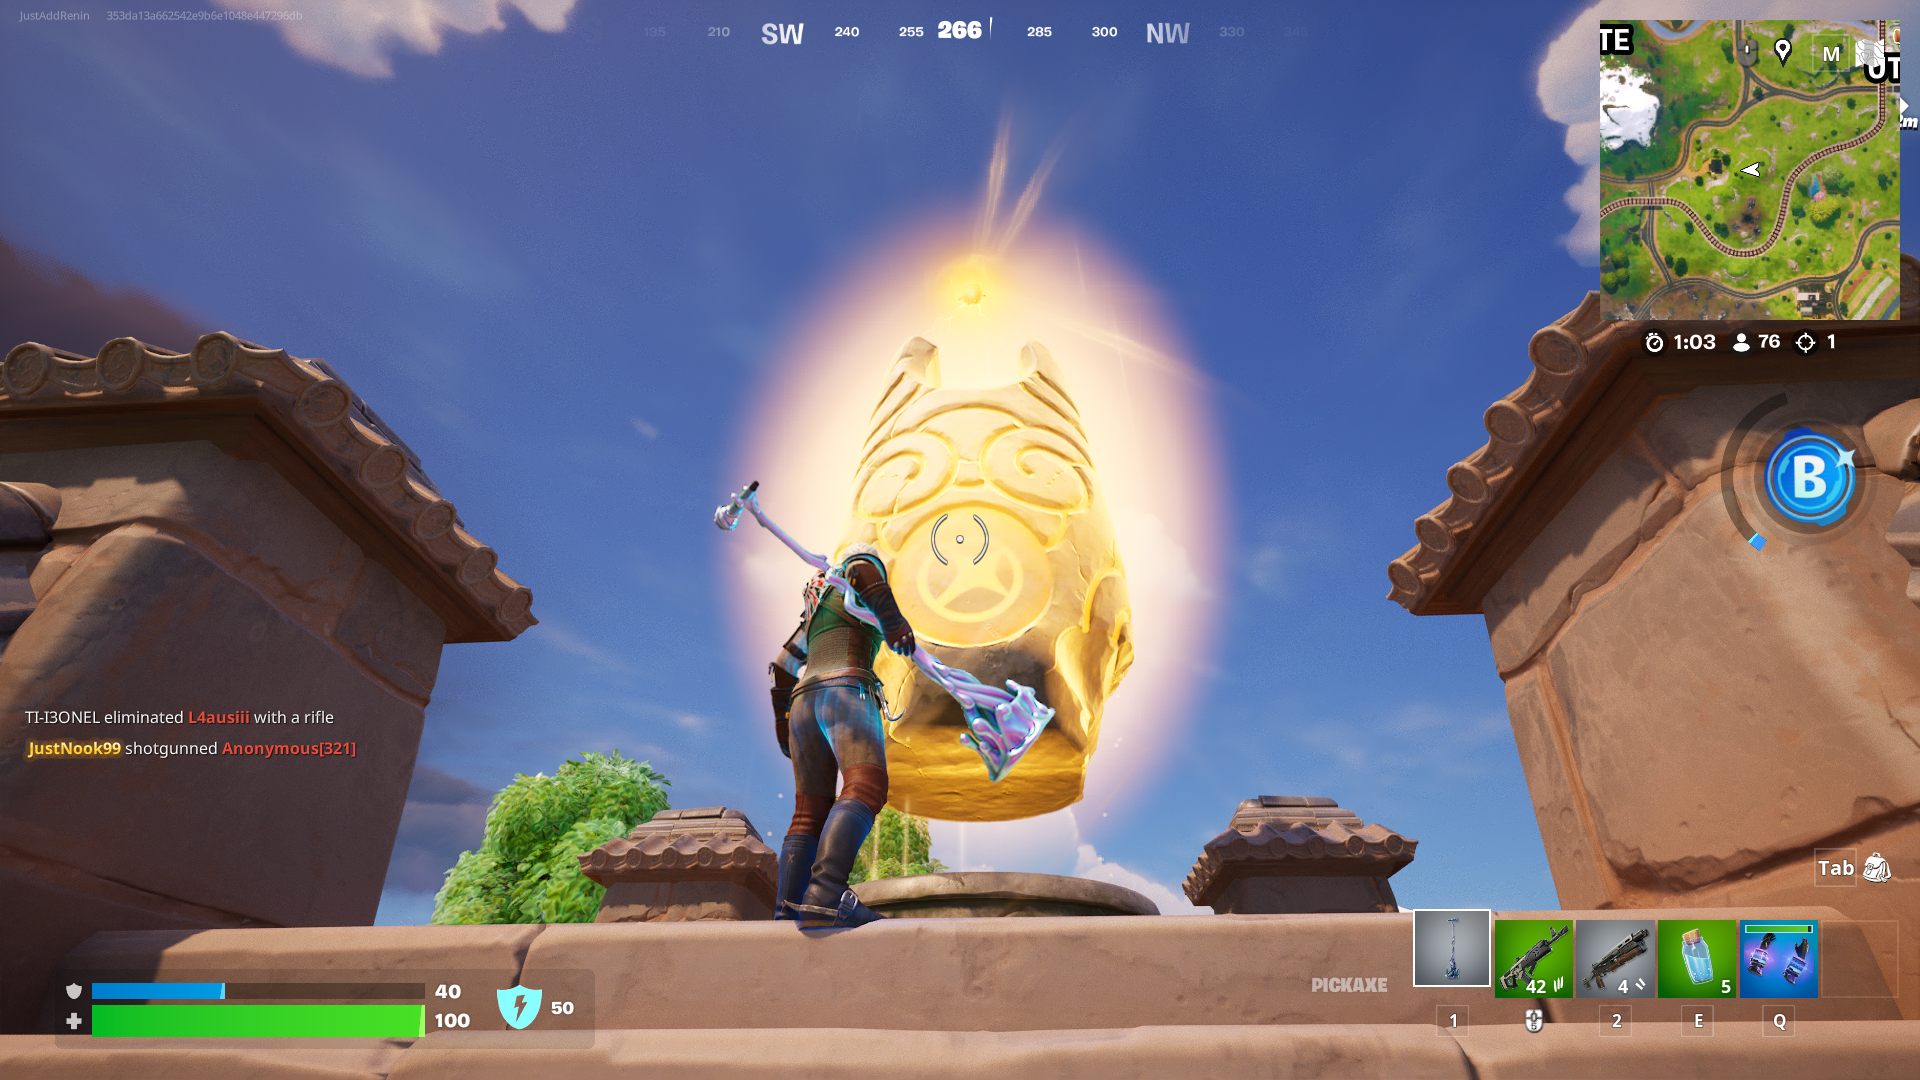
The Great Turtle
May they never leave Fortnite. These ancient turtles were a broken landing spot in previous chapters. Now, they’re merely good, with a bunch of chests, slurp barrels, a launch pad, and a possible Academy Stand on the bay. Don’t linger here: you’re right on the edge of the map, so loot quickly and dive into the action.

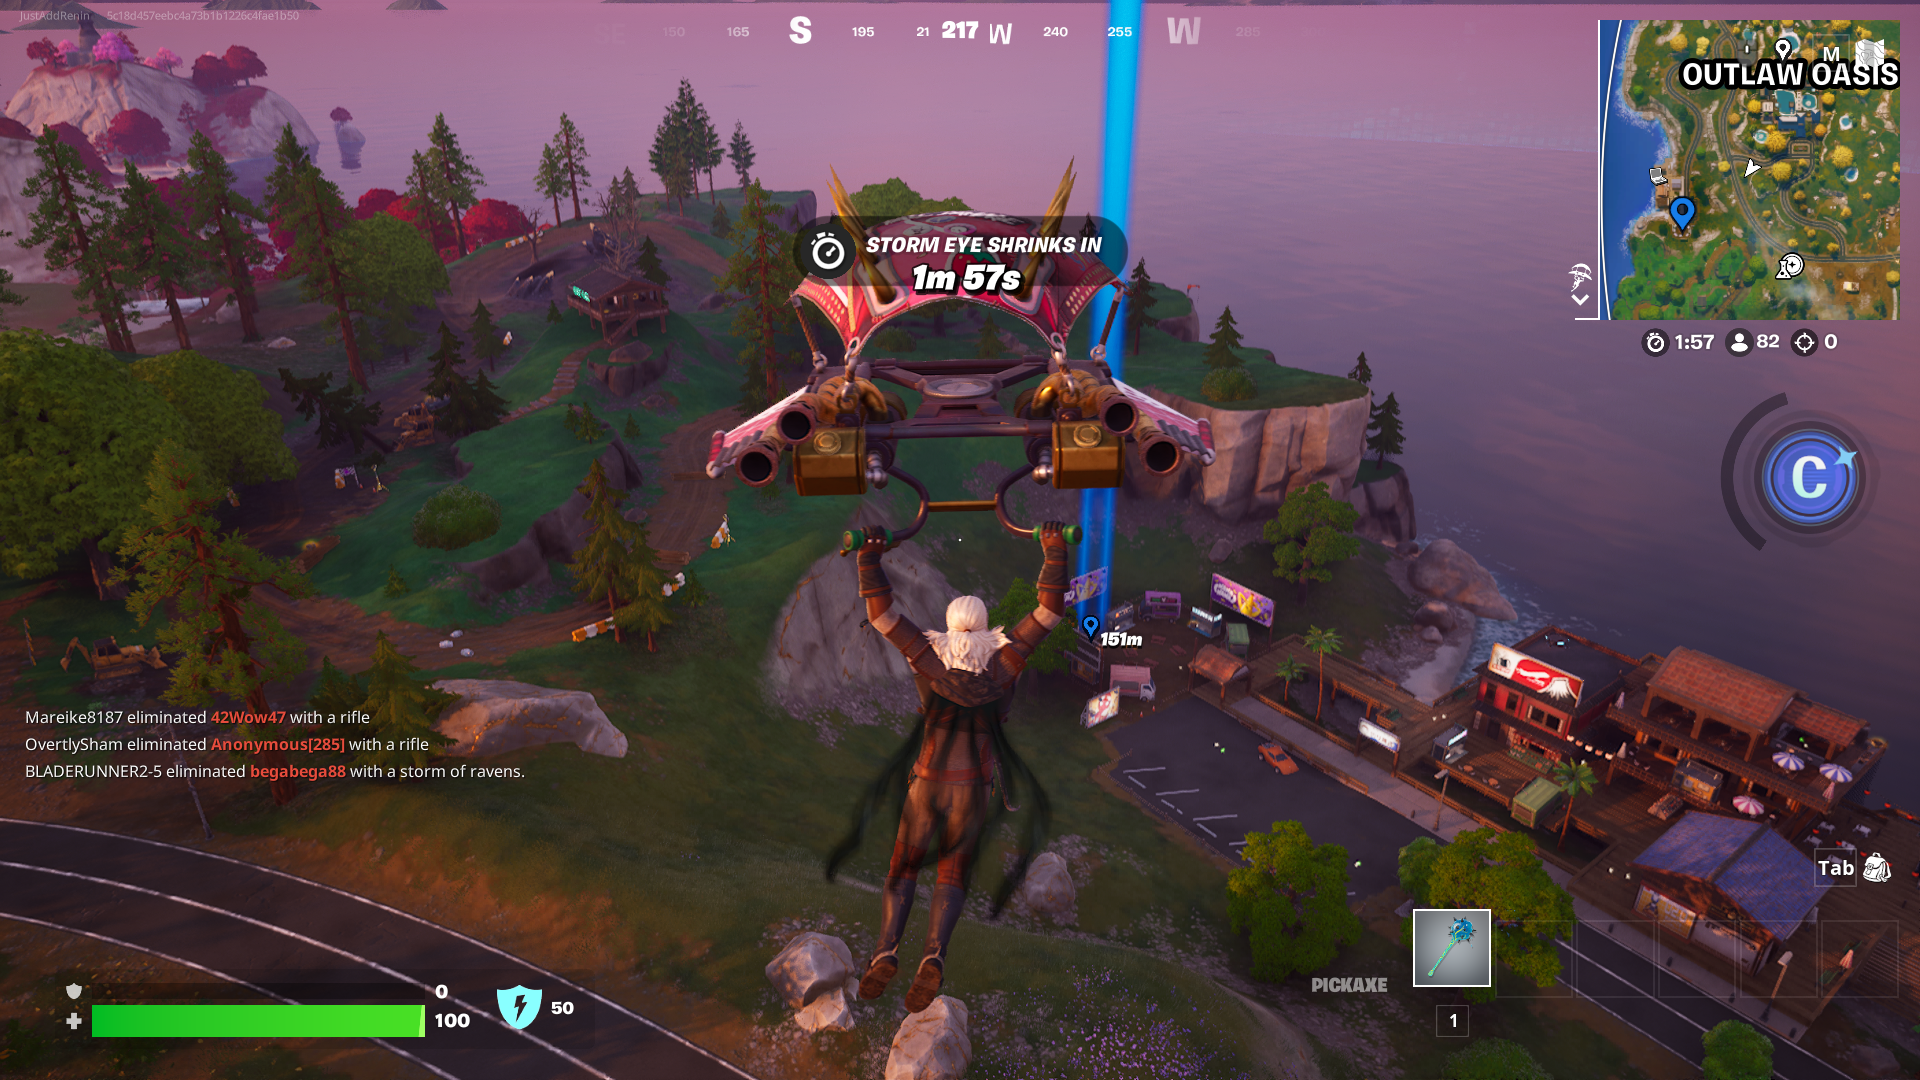
Robin’s head
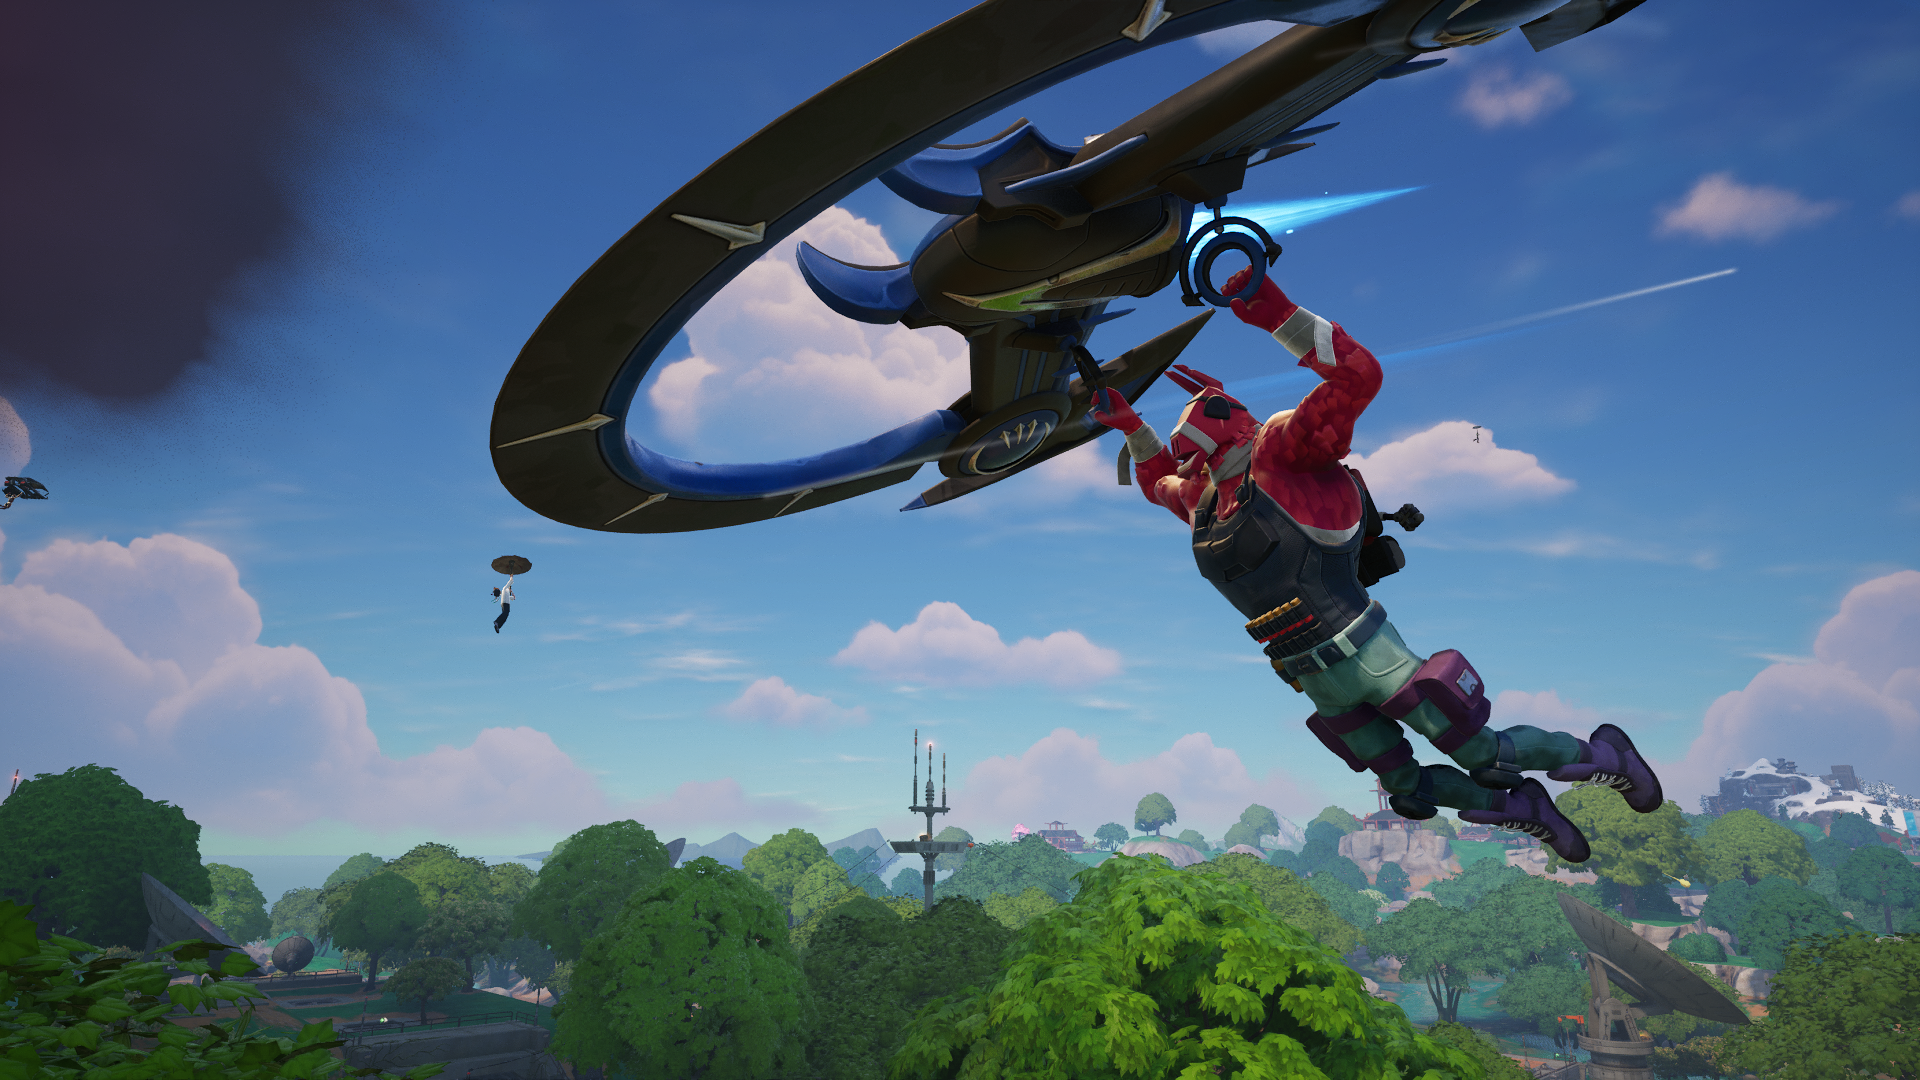
Robin sells the game’s best mobility item, the Wingshot Grappler, and there’s only one on the map. If you have 600 gold you can buy it immediately by landing on Robin’s location, just above and right of Demon’s Domain.
Chances are somebody else had the same idea, so try to get a weapon quickly and take them out. Don’t accidentally shoot Robin!

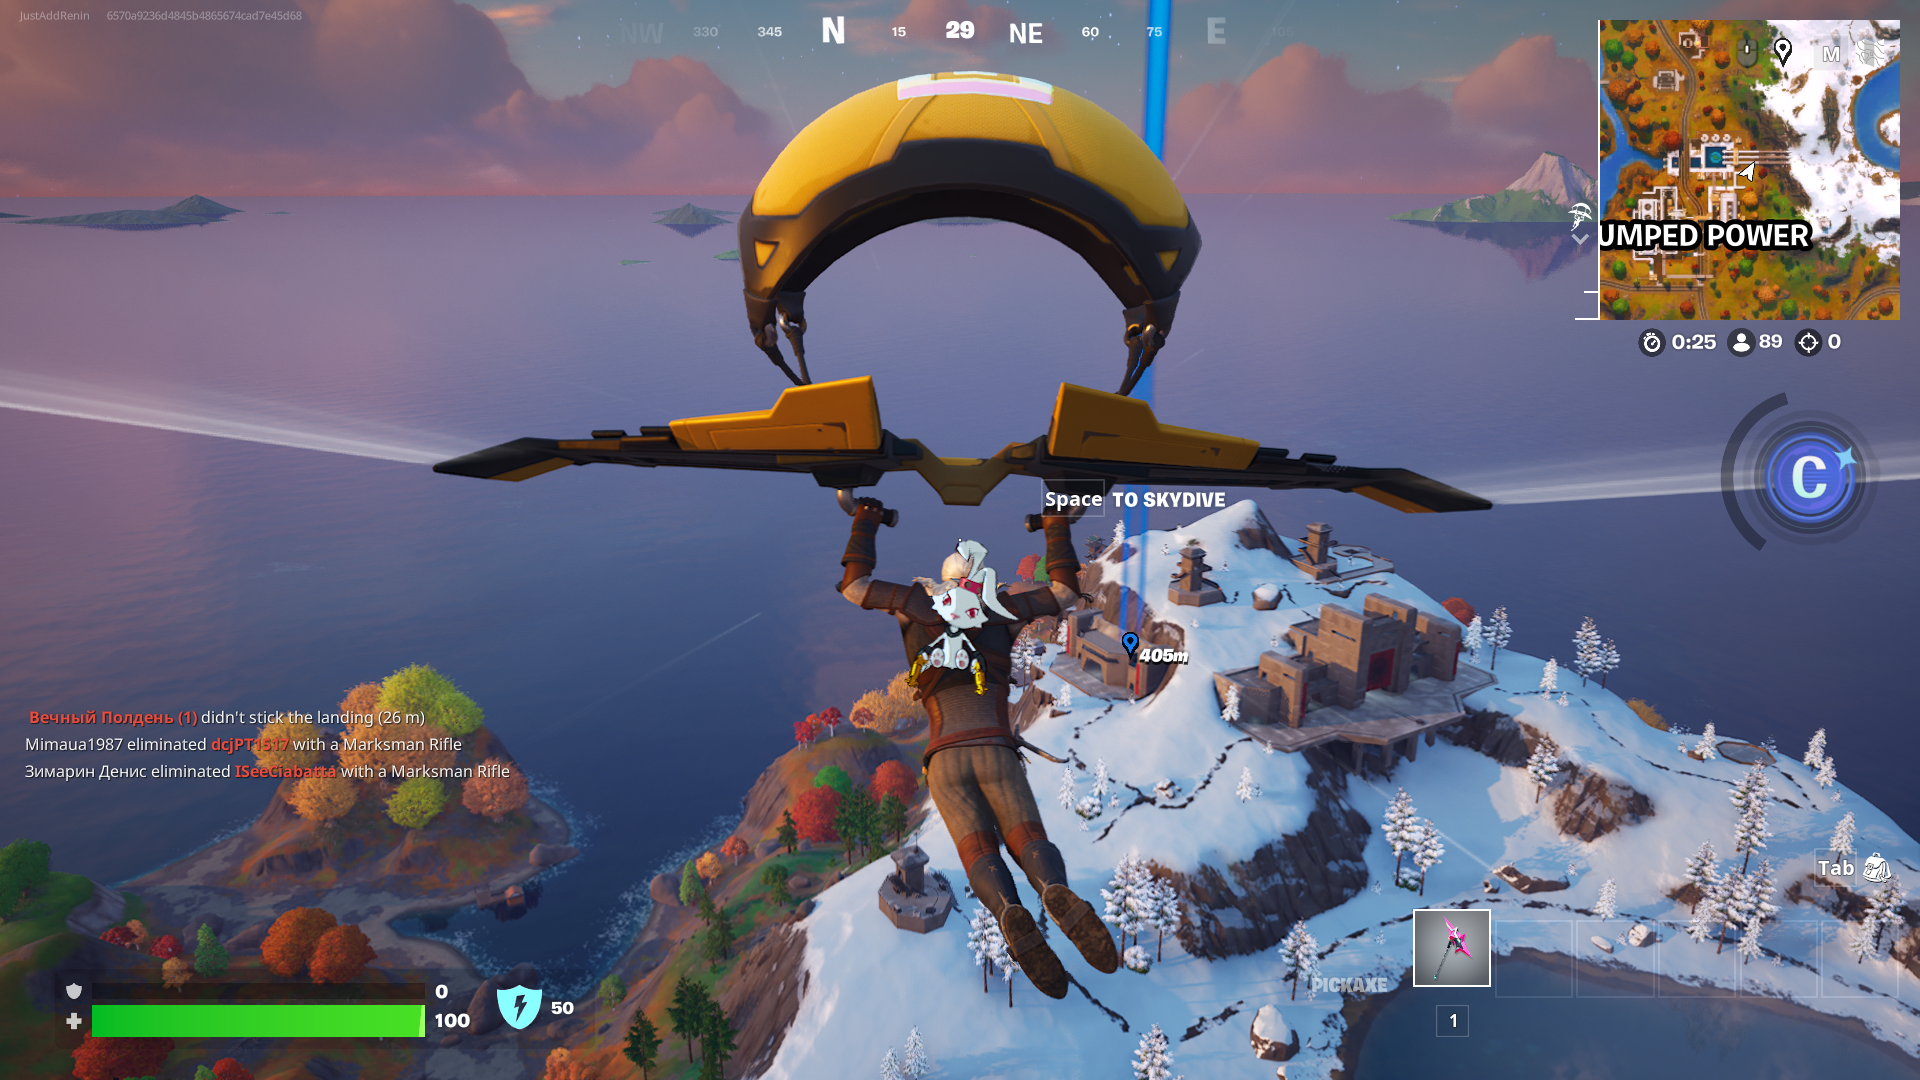
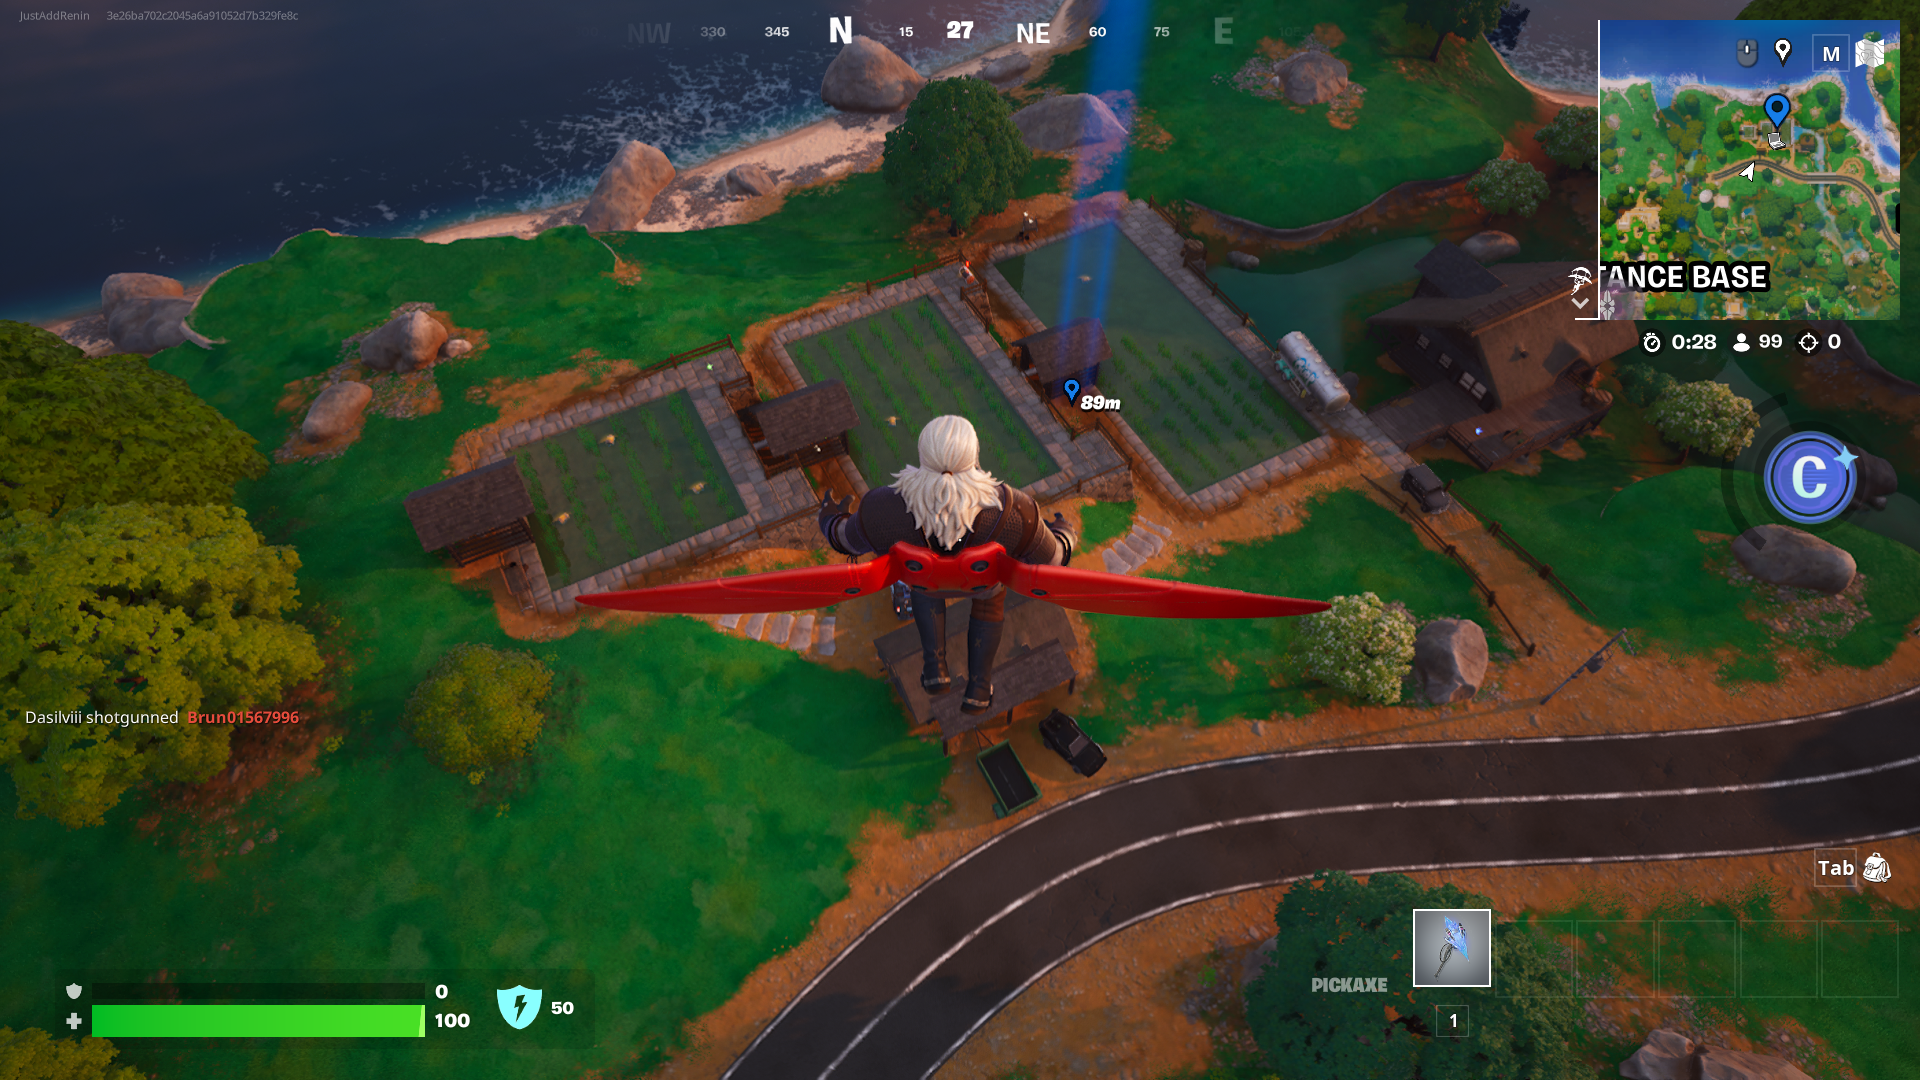
First Order Base
This can get quite busy, but as long as it’s not directly below the bus, and you head for the building on the west side (see image above), you should be alright. Loot up and make your way into the base to grab even better gear.
Listen for firefights above ground, and when you’re ready, pounce. Use the grind rails after you reach the surface to get about quicker, and when you’re ready, take one of the many launch pads to your next spot.
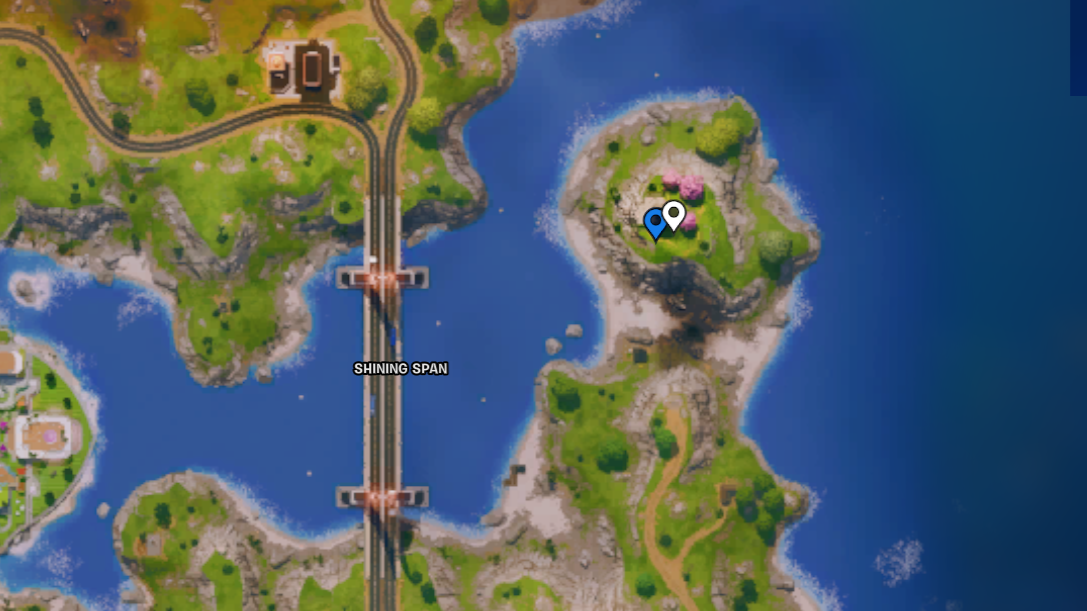
Overlook Lighthouse
If you fancy taking on a Spire early, this lighthouse to the east of the Shining Span bridge is an ideal quiet drop spot. You won’t pick up tons of loot, although there are guaranteed chests and the chance of an Academy Stand. There’s a Spire spawn point to the north across the water, and one nearby to the south, so you can rotate immediately.
If neither of those Spires have spawned, pick another spot instead.
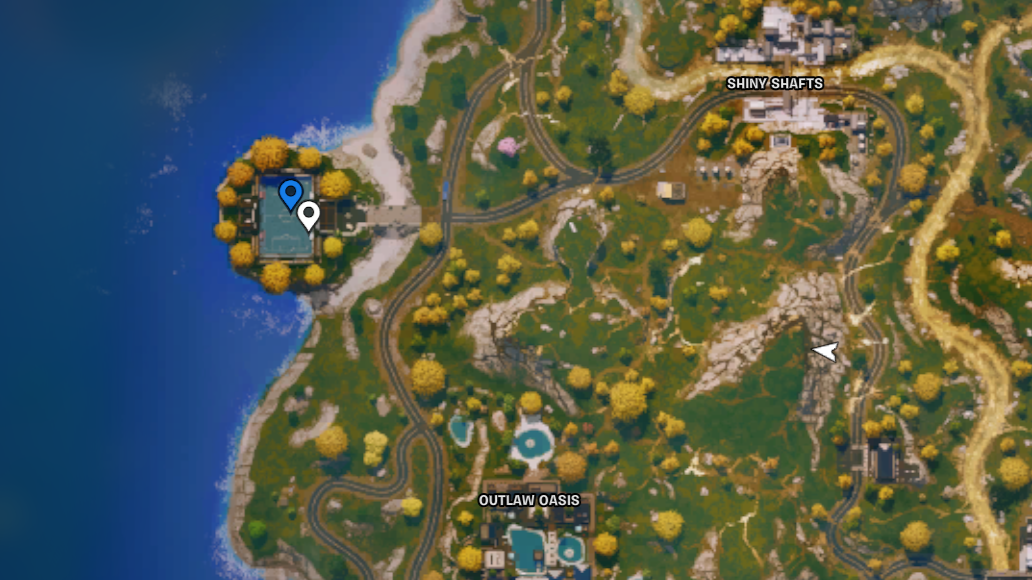

Sakura Stadium
This football/soccer pitch, way on the west side of the map, is rarely busy, but perhaps it should be. You’ll get half a dozen chests, a possible Academy Stand and, unless you’re unlucky, a vehicle. It’s small so you can loot it quickly, and then you’re free to push in whichever direction you feel. I normally go directly east to Shiny Shafts, stopping to pick up more chests on the way.

Yōkina Boardwalk
Just south of Sakura Stadium is Yōkina Boardwalk, which is just as good a drop spot, and because they’re so close together you can often decide between them as you arrive. You want to head for the small clearing at the southern end of the POI to grab the Academy Stand and chest before looting the rest of it and jumping in a car.
There’s a Spire location just south, so that’s normally my next stop, picking up slurp barrels along the way.
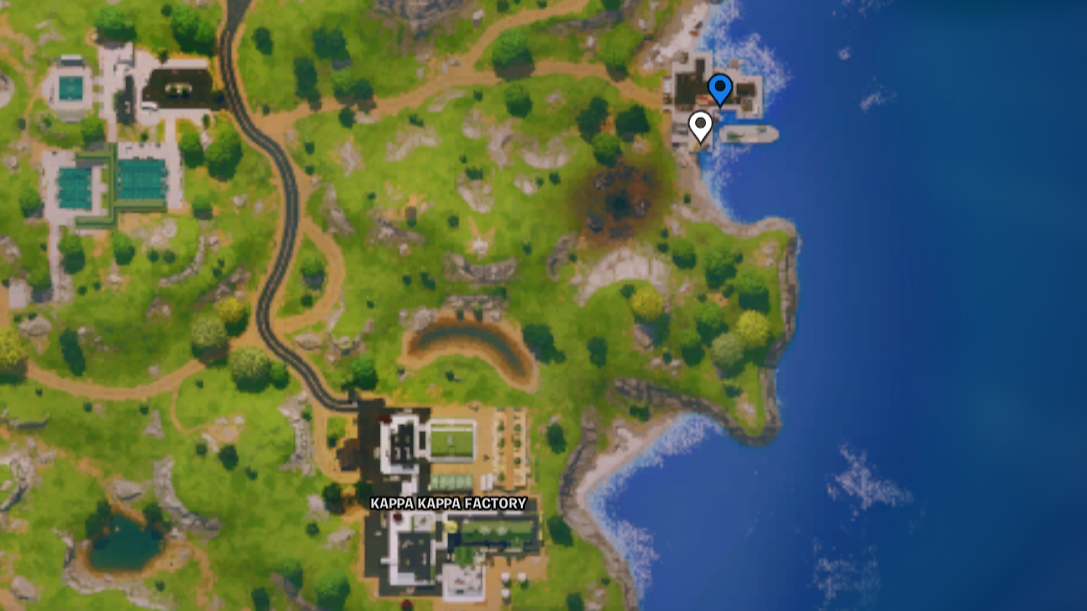
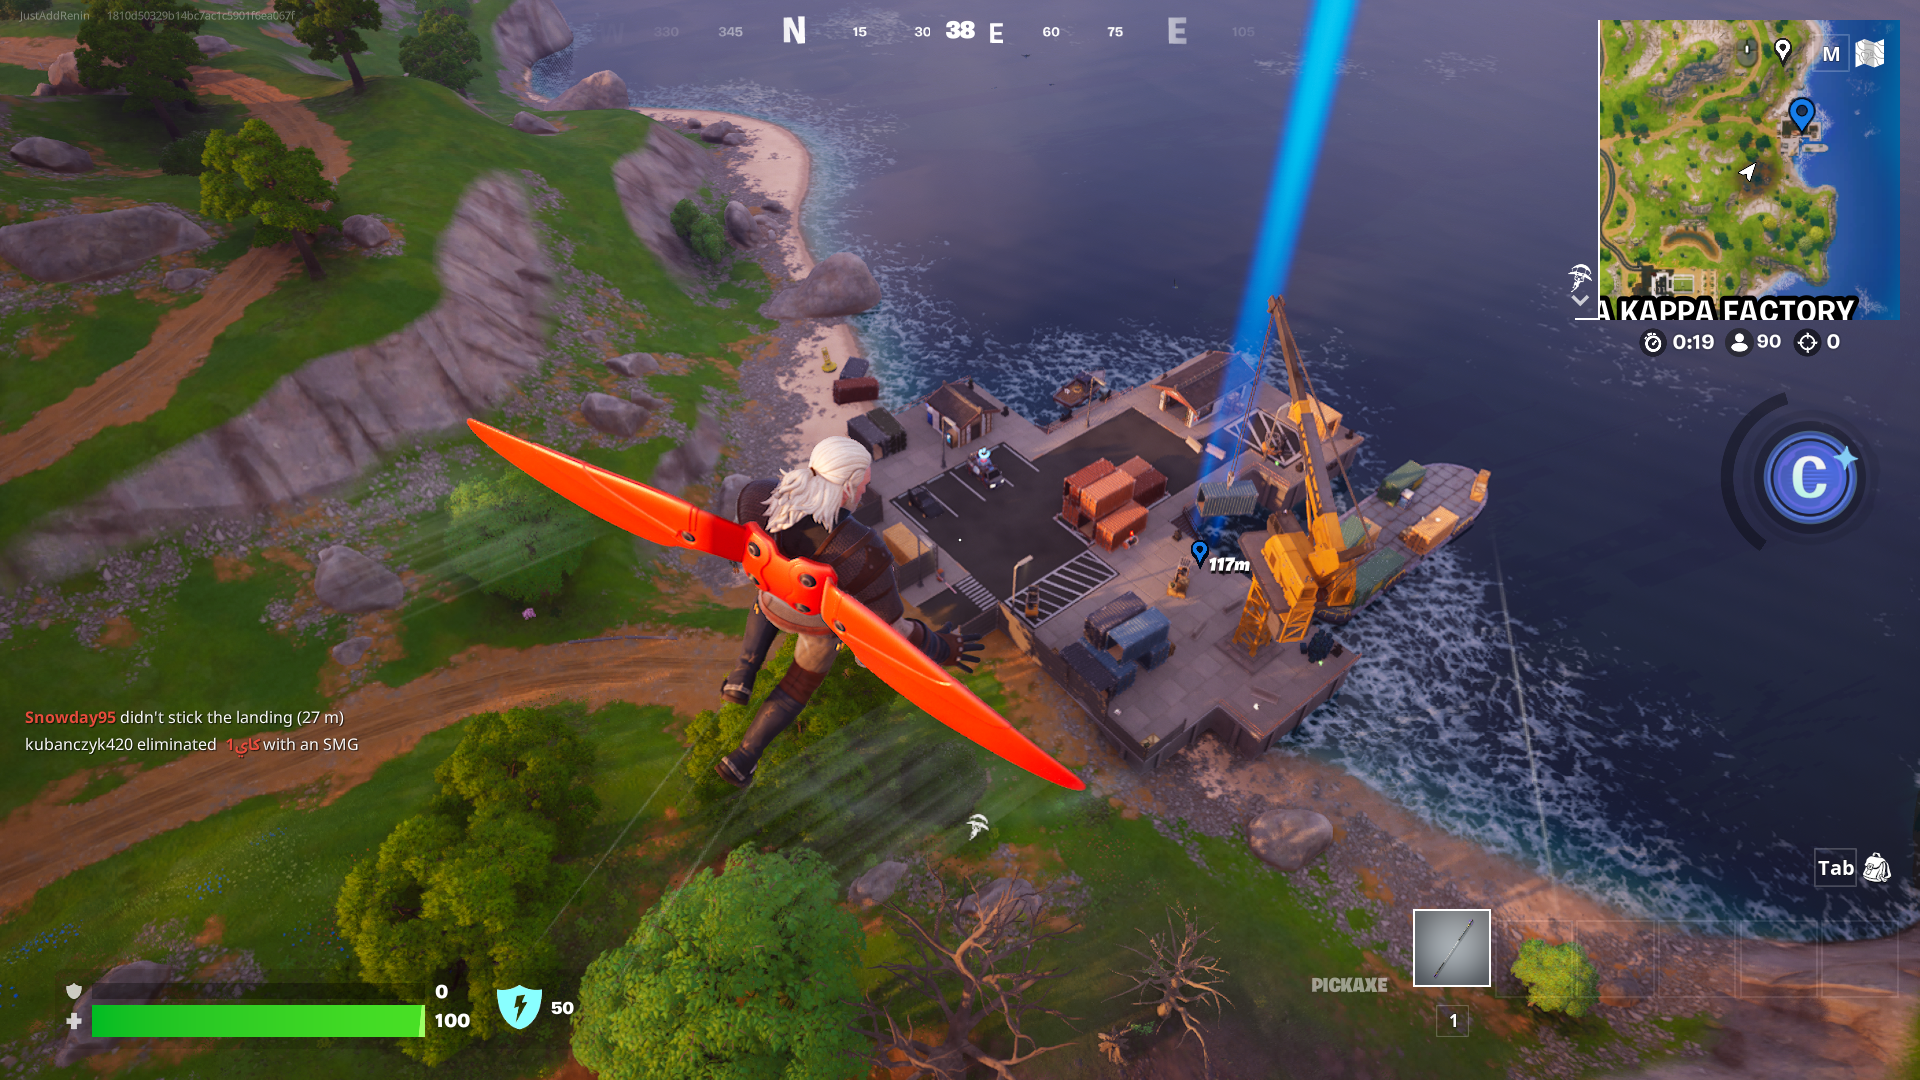
Salty Docks
A quiet drop spot with everything you need to start your round: plenty of chests, some slurp barrels, a vending machine and a vehicle, with a nearby Spire spawn location to boot. The Academy Stand is by the blue crates you see above, so check there, and break the crates for metal if you’re planning to build.
If the Academy Stand didn’t spawn, there’s another on the hill just to the west, so make that your next stop.
7 tips for landing spots in Fortnite
Be aggressive after securing a decent loadout
Once you’ve got a solid few guns and utility—maybe even some of Fornite’s best weapons and items—go aggressive. The most efficient way to get the best loot is to kill players who have already opened lots of chests. As you’re landing, think about your next move: where will you push when you’re done looting?
Prioritise Shrines and Spires
Their positions shuffle between set locations each round, so look at your map as the game begins. The mini-boss Spires are easy to kill and drop solid loot. Shrines, meanwhile, are the best way to get movement items early: find a Dash Sprite and bring it to the Shrine for shockwaves, a boon, and you even get to keep the Dash Sprite for good measure.
I’ve picked locations that are mostly close to Spire spawn points. As you’re dropping in, scour the map for white pillars of light that signal a Shrine.
Academy Stands: Tracking Scanner and Bass Boost gloves are all-powerful
Many of the locations I’ve picked have Academy Stands, which will give you strong items immediately and are worth dropping directly onto—you can use third-party site Fortnite.GG to look at their exact location on each POI. The best loot is the Bass Boost gloves, which keep you mobile and can push other players away, and the Tracking Visor, which is particularly overpowered early on when enemies lack the mobility to escape.
Save your shield items when you can
One of your first tasks is to top up your shields—but think twice before drinking that big Shield Potion. Slurp Barrels dotted around the map are worth 10 points each, provide both healing and shields, and are a great way to get to max while saving your precious resources.
At the very least, use Small Shield Potions to get yourself up to 50 before touching your big pots, and keep an eye out for vending machines to replenish your supply.
Know where your enemies are dropping
As you’re dropping, scan the area.
If an enemy picked the same location as you, prioritise getting a weapon, any weapon, and ambushing them, not giving them time to loot. The best time to fight them is when they’re opening a chest or shuffling their inventory.
If they’ve dropped at the next spot over, get them before they get you. Again, timing is key: if you can loot quickly and leave, you can often catch them leaving their own POI, or you can third-party them if they’re distracted fighting someone else.
Distance from the bus matters
It sounds obvious, but the closer a location is to the Battle Bus’ path, the busier it’s likely to be. If you really want to explore a big named POI, do it when it’s far away from the bus’ path. Pull your glider out early to travel further.