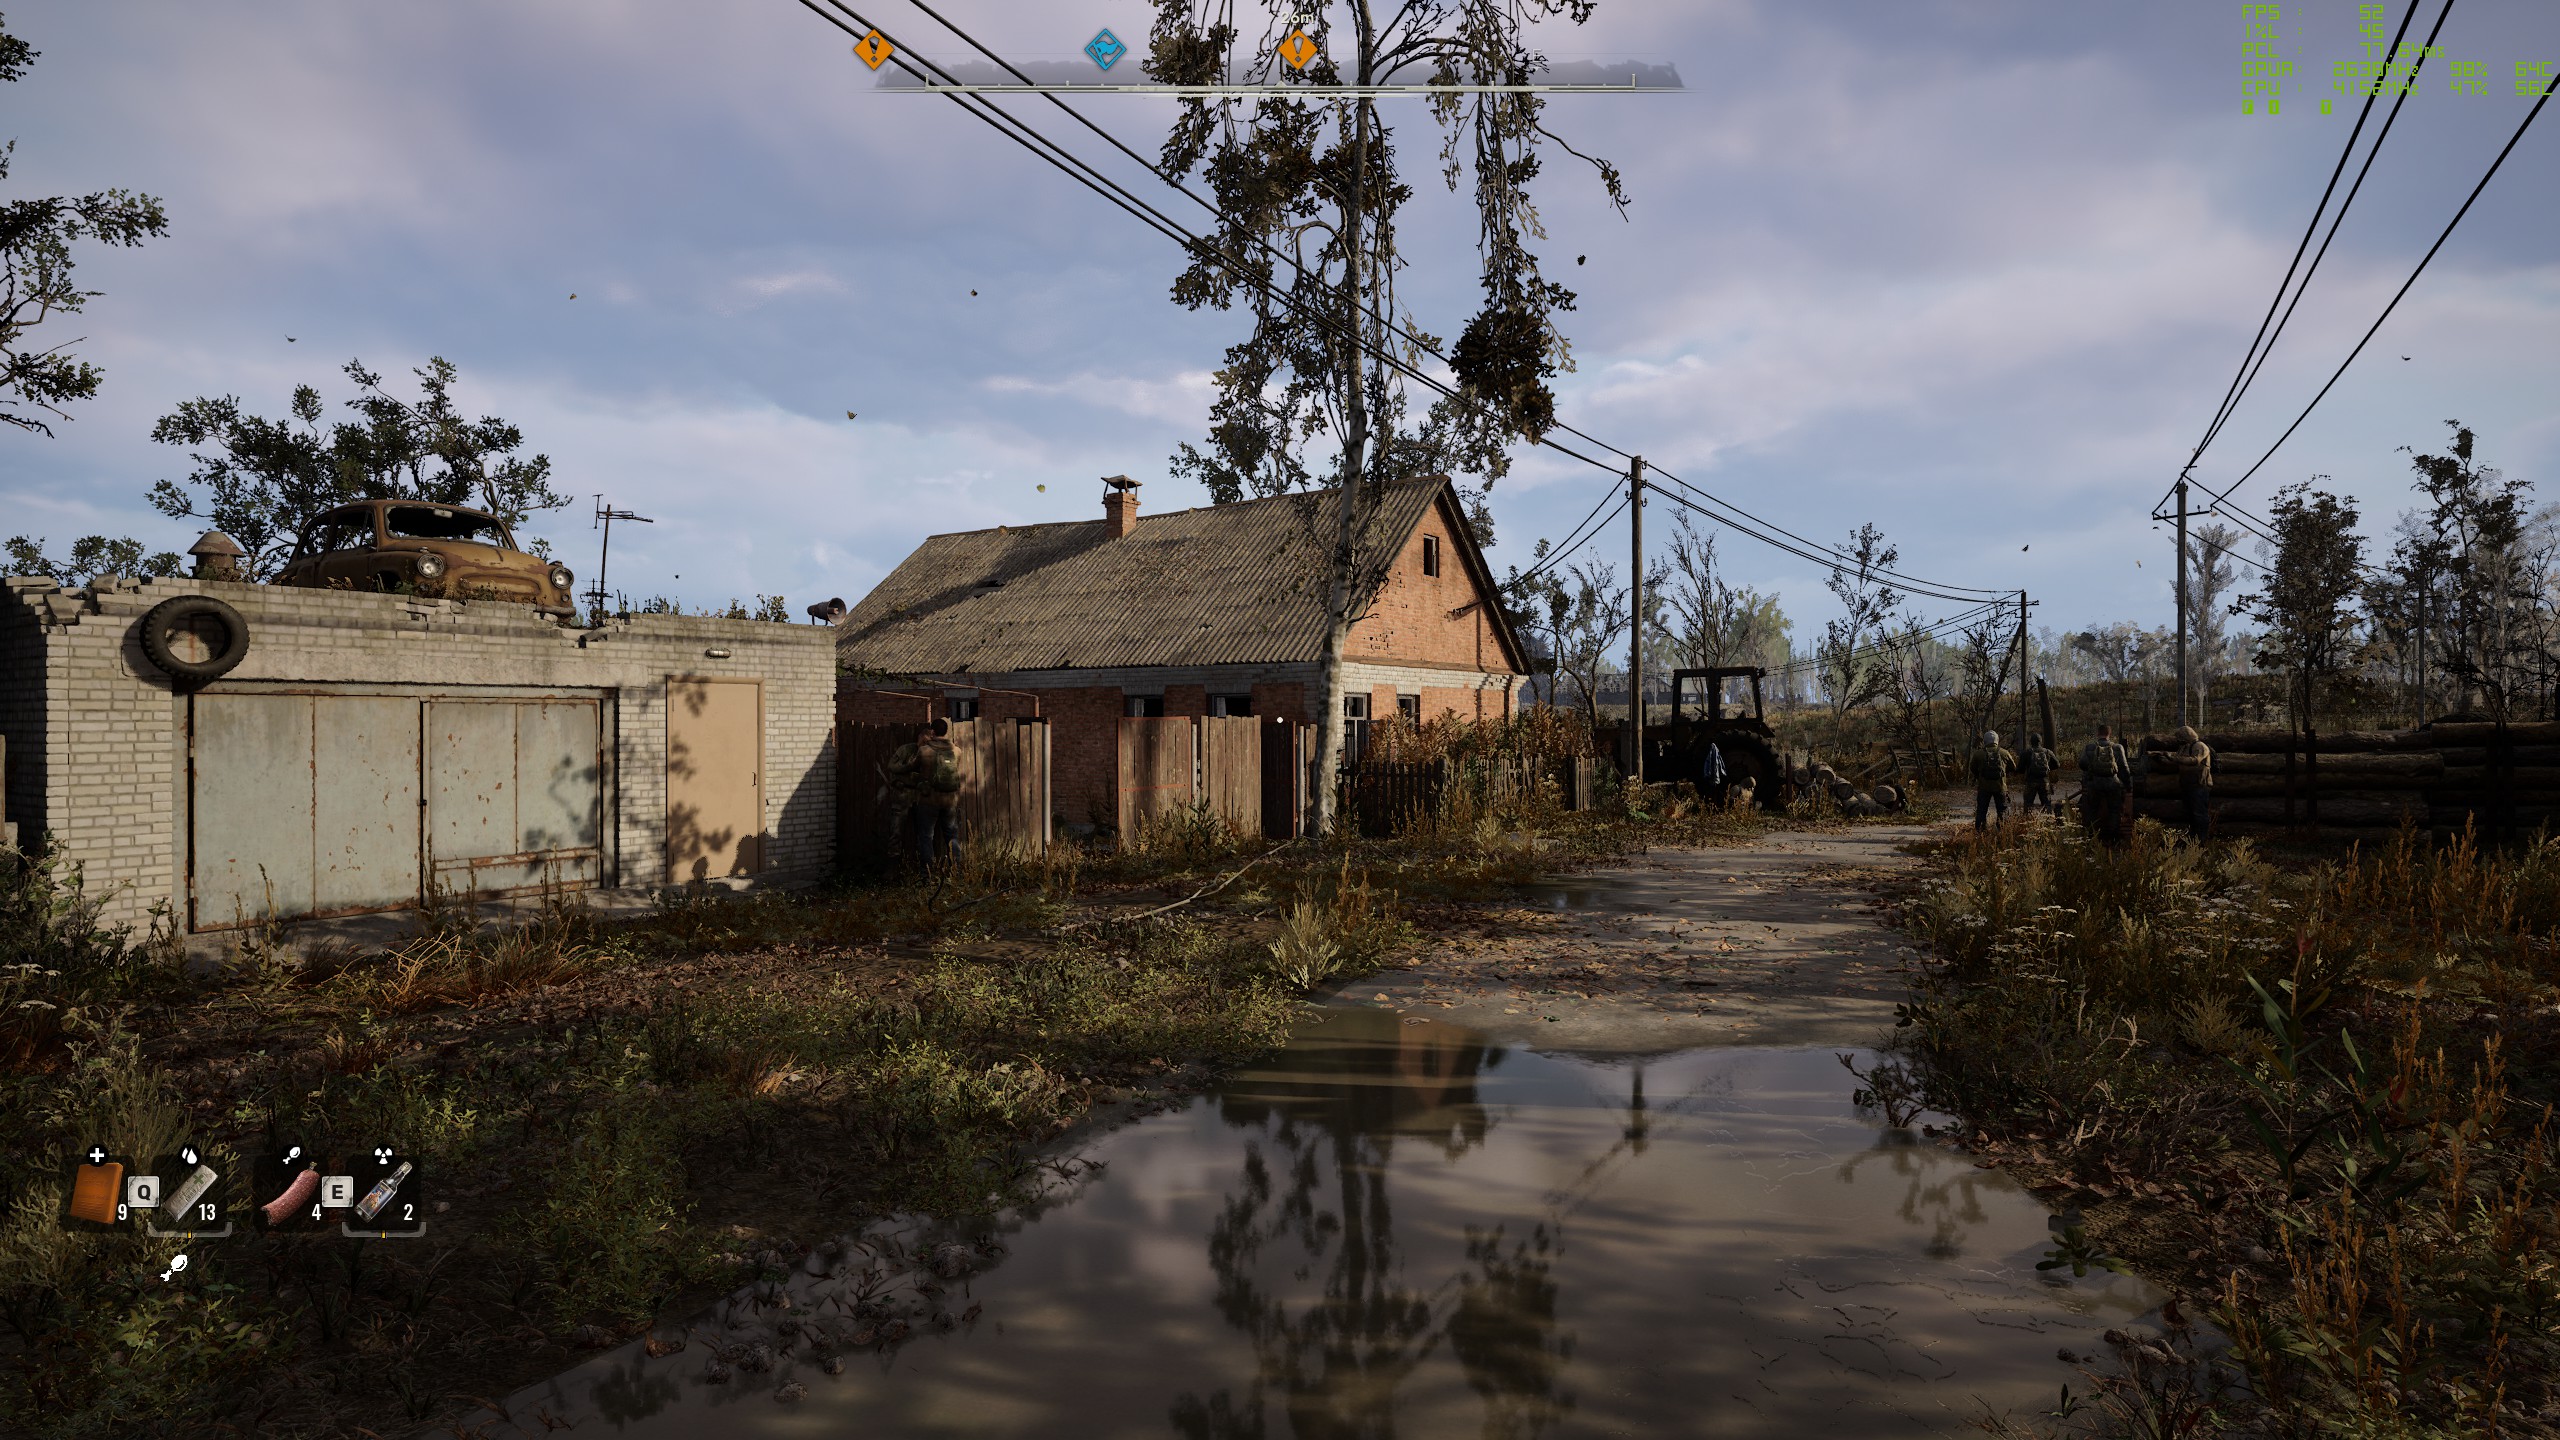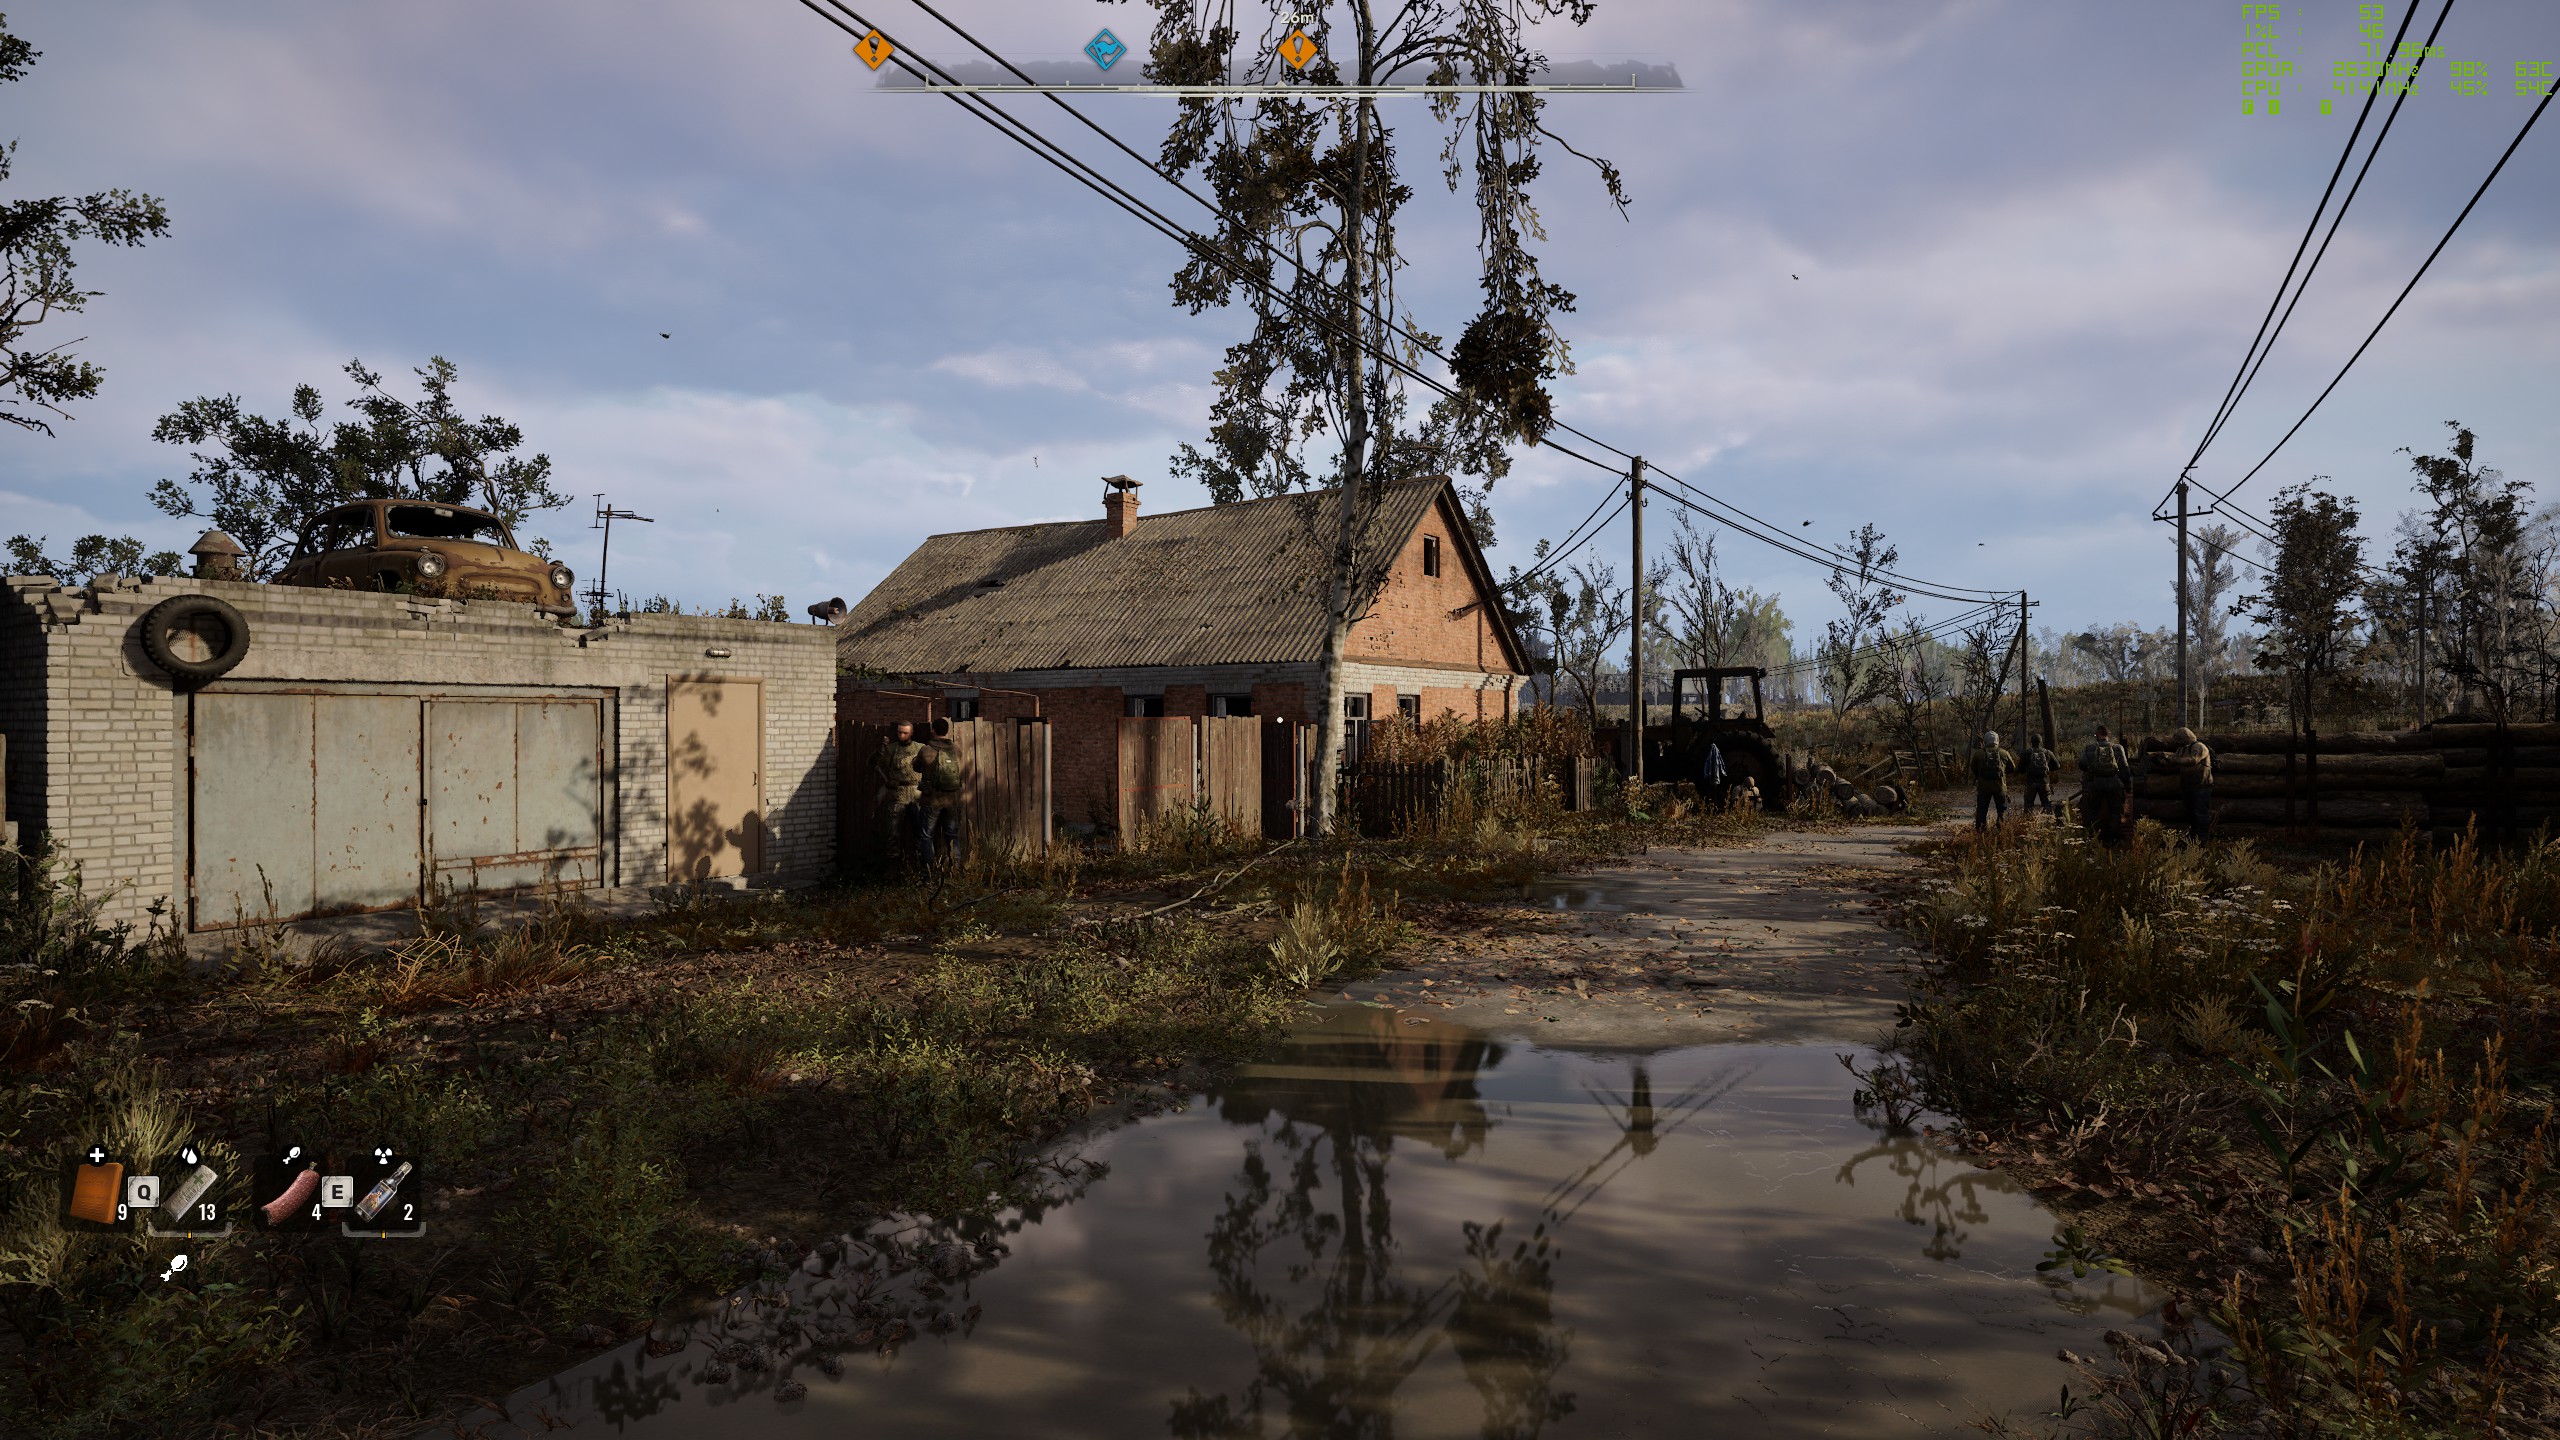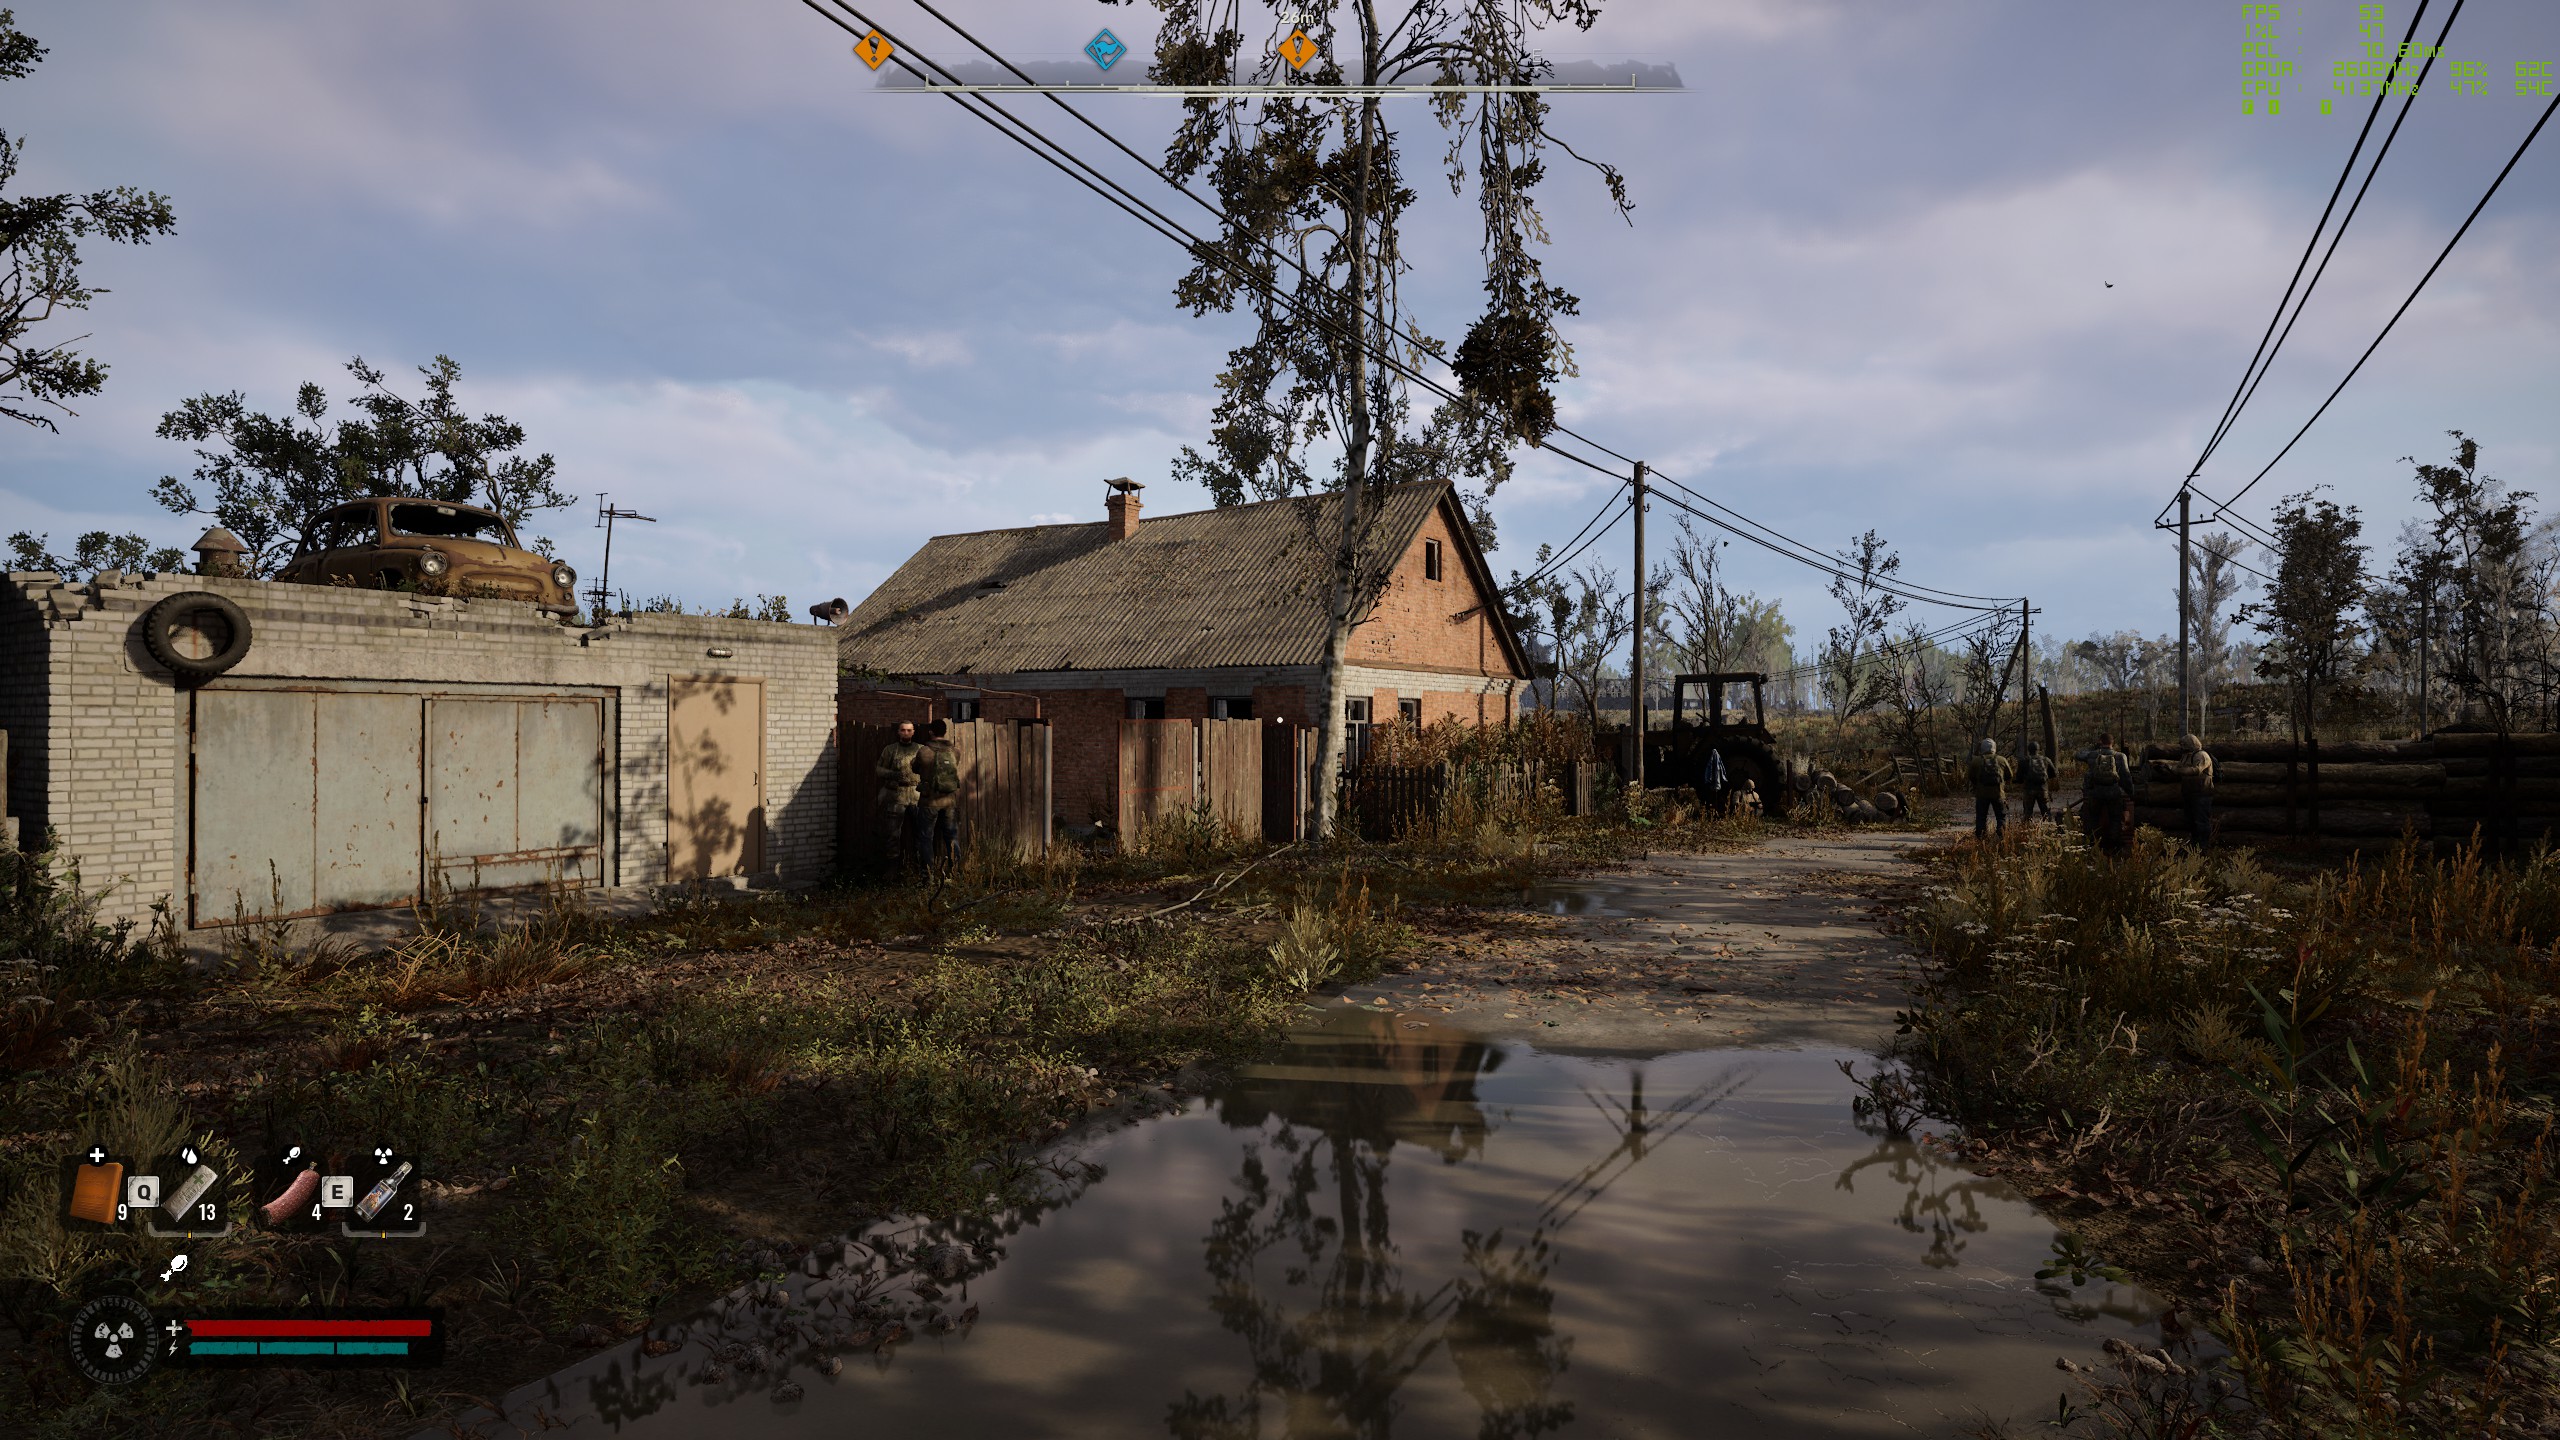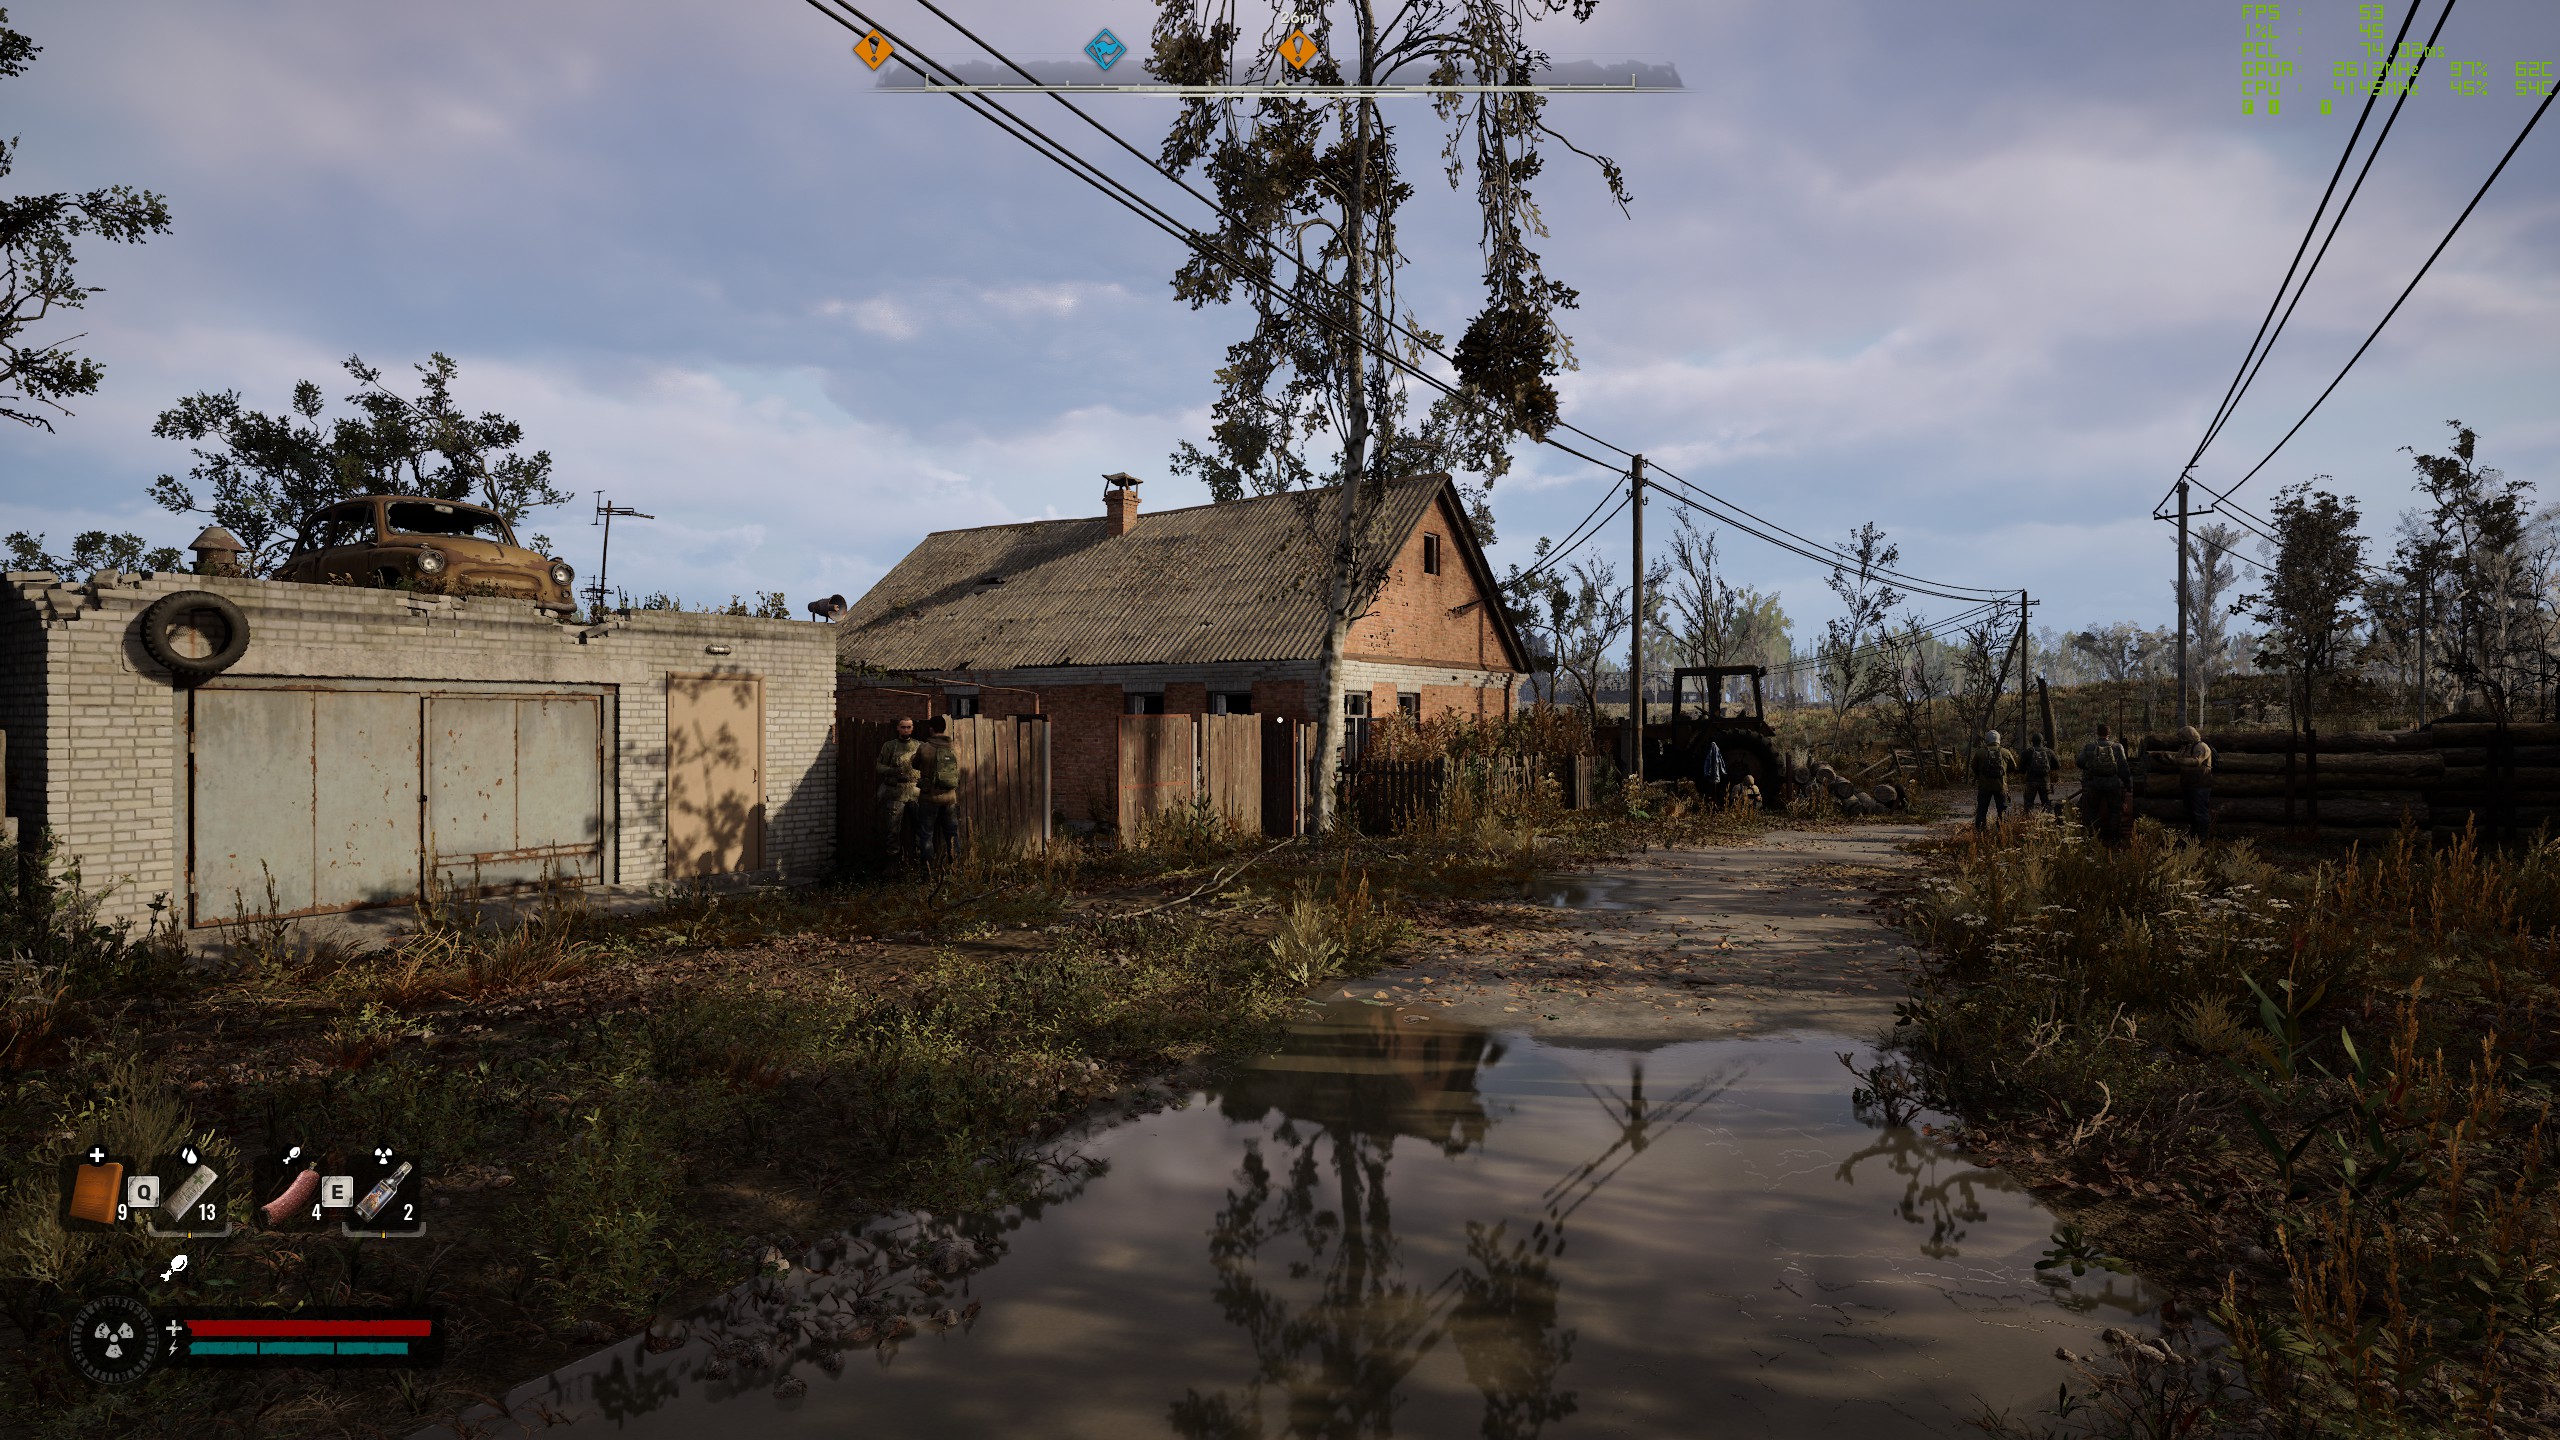
Know how to prep your gaming PC before it heads into the Zone.
So, you’ve read the Stalker 2 review and checked out my Stalker 2 performance analysis. And, happy with what you’ve seen, you’ve made the plunge and grabbed a copy of Stalker 2: Heart of Chornobyl. But what settings should you use? How do you get the best balance between graphics and frame rate? Well, you’ve come to the right place.
I’ve been testing Stalker 2 for a week now and I’ve experimented with every graphics option the game has to offer. While the performance you get will mostly be down to the hardware inside your gaming PC, there are some things you can do to make it run as best as possible, without sacrificing the visual fidelity.
If you just want a quick rundown on what to do, that’s just below here, but if you want a bit more knowledge about some of the more important settings, read on for the full skinny.
Quick summary
Just use one of the game’s quality presets (Low, Medium, High, or Epic).
For fine-tuning, increase the settings for texture quality, object detail, and global illumination. Then decrease the settings for shadow quality, foliage, and environment draw distance to get the performance required.
In all cases, make sure you’re using upscaling (DLSS, FSR, or XeSS) in Quality mode to get the best overall performance.
Avoid 4K resolution, unless you have a genuinely powerful gaming PC, with a high-end GPU (e.g. RX 7900 XTX, RTX 4080).
Resolution
Stalker 2 uses Unreal Engine 5’s software Lumen ray tracing for rendering all lighting, shadows, and reflections. The good thing about this is that your GPU doesn’t need to have dedicated hardware for handling ray tracing; the bad news is that this mode involves an awful lot of asynchronous compute shading.
If your gaming PC has one of the latest and greatest graphics cards, you’ll be fine (within reason) but if it’s a couple of generations old, then this level and type of shading will be very demanding for it.
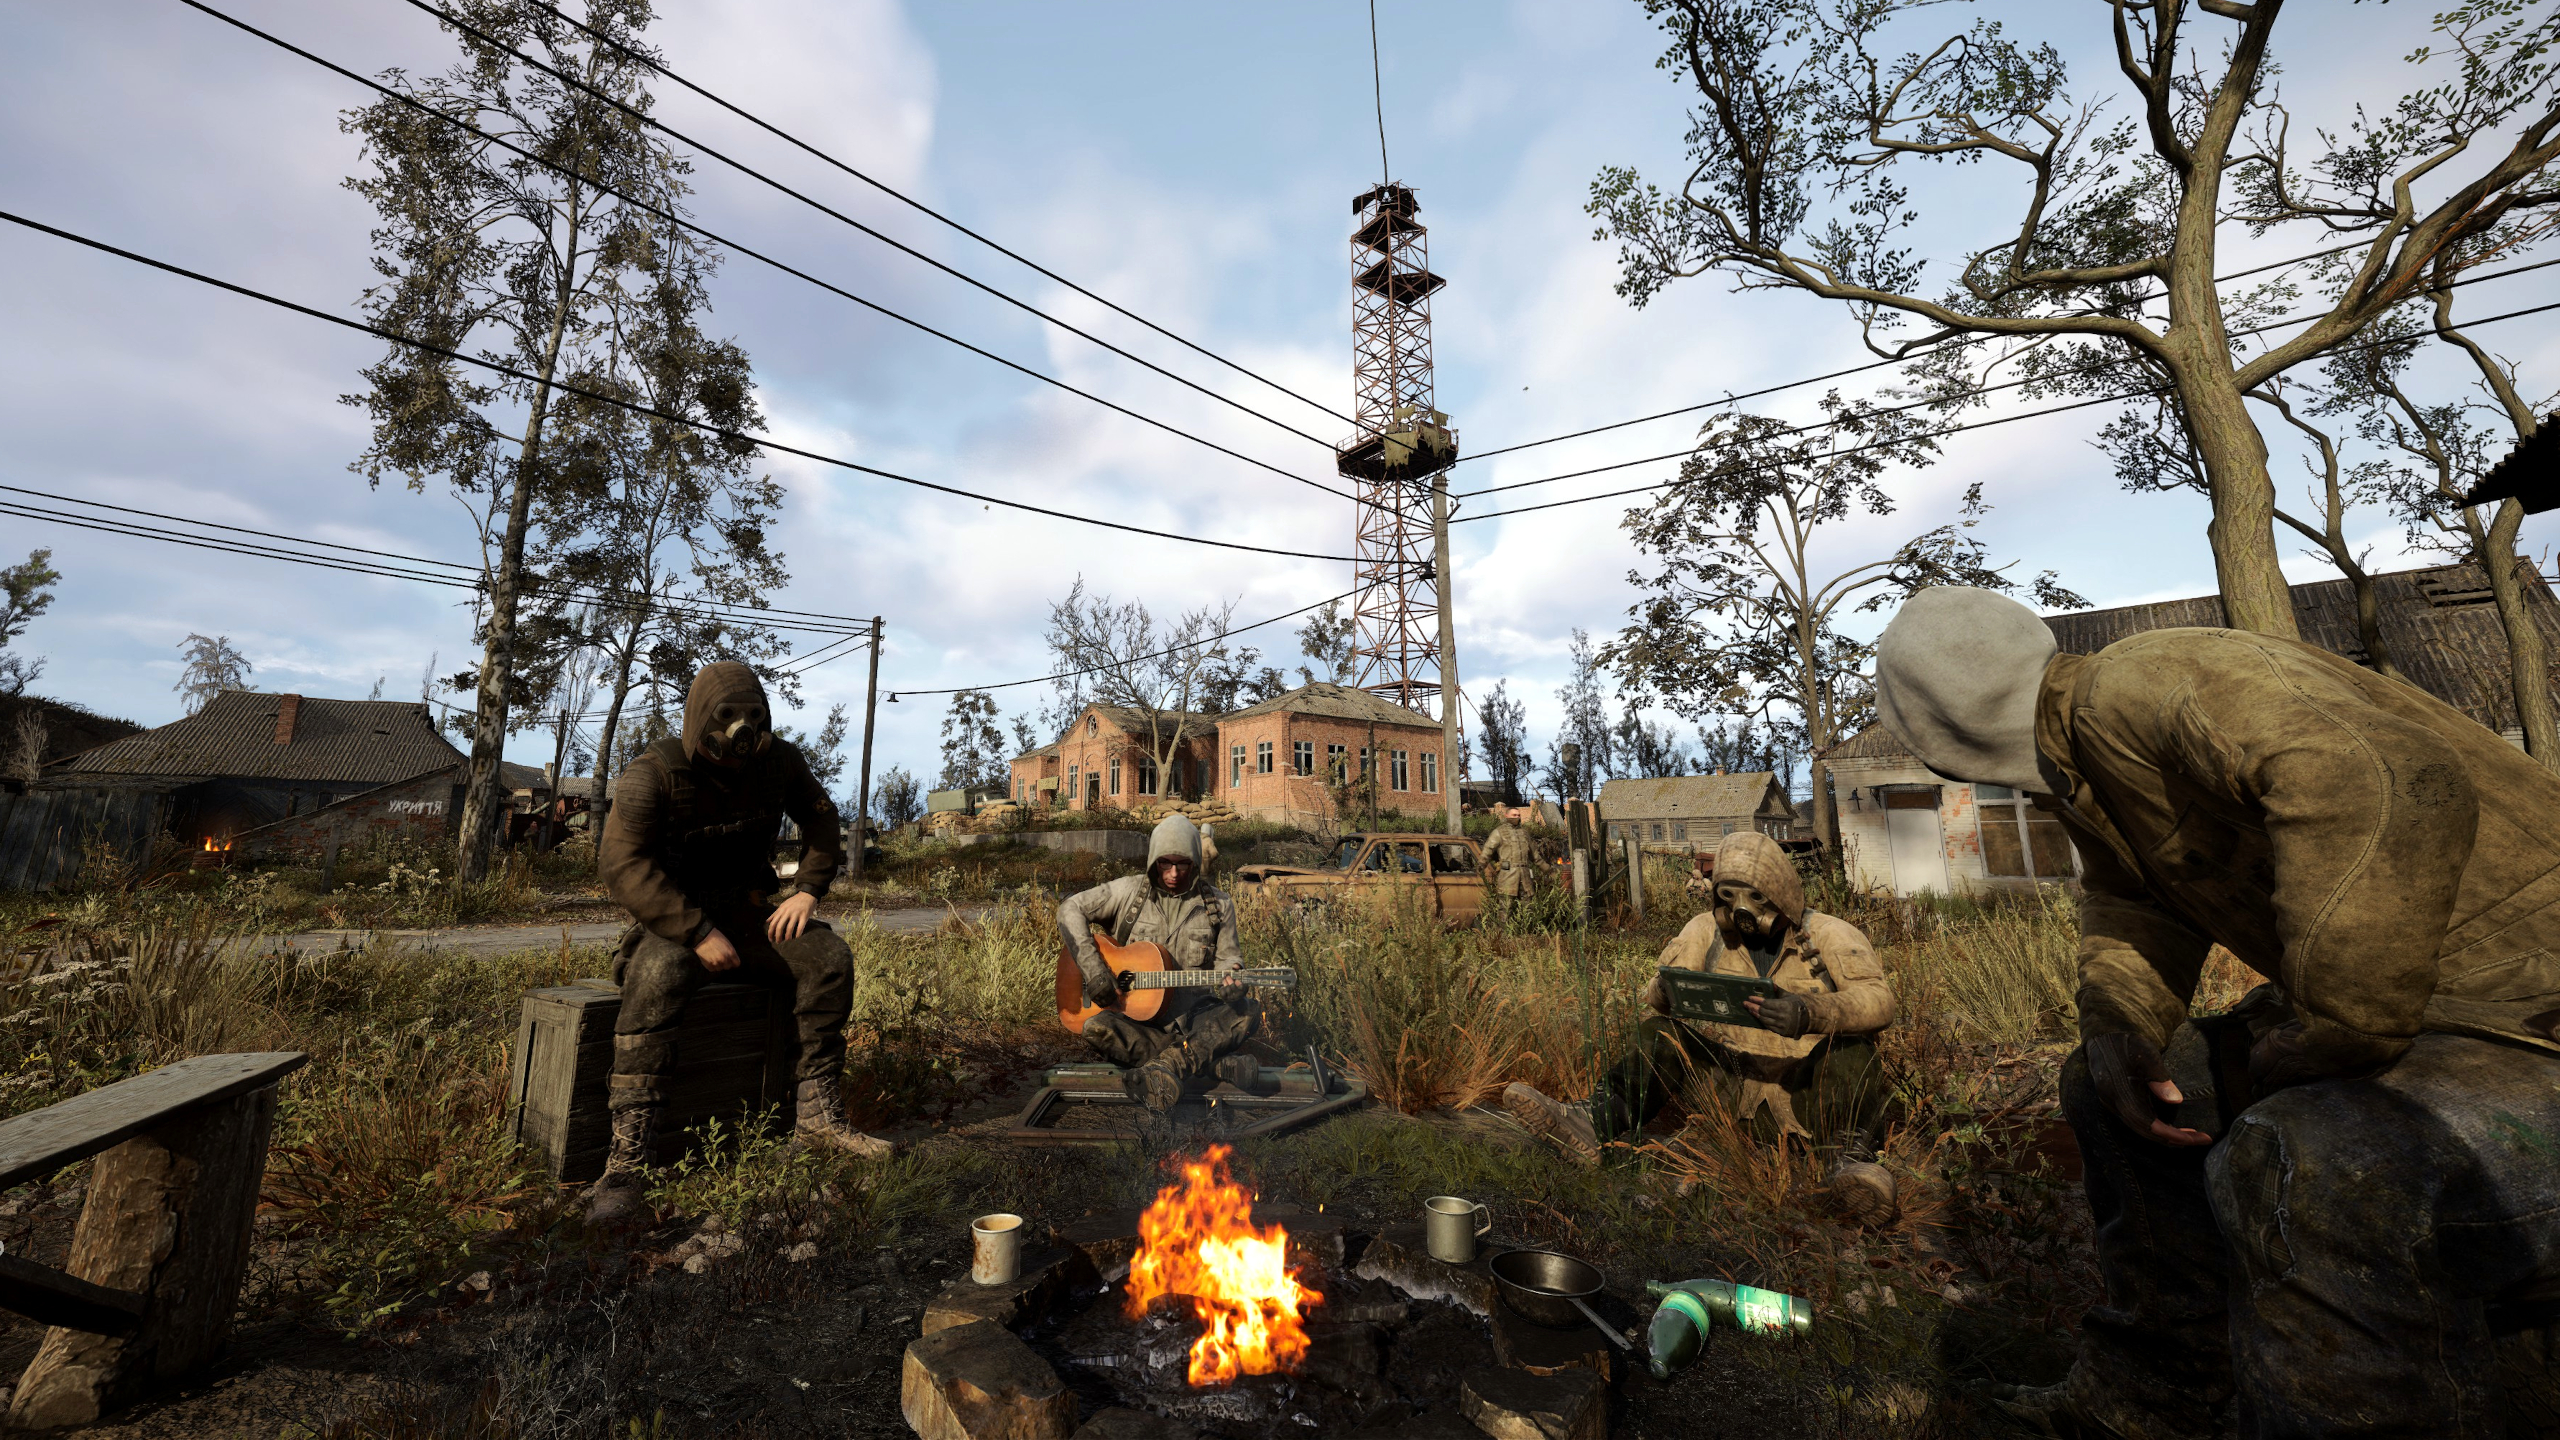
The way to manage this is easy, though: Reduce the amount of shading it has to do and the best way to achieve this is to lower the resolution. Stalker 2 looks perfectly fine at 1080p and in some ways, gives off an original Stalker: Call of Pripyat vibe.
Medium preset, 1080p resolution, no upscaling
Core i7 14700KF, RTX 4080 Super, 32 GB DDR5-6400
Depending on your hardware, things become more serious at 1440p but again, it’s manageable. However, 4K is the preserve of the very latest, high-end graphics cards, even if you use lots of upscaling and frame generation.
Performance boosters such as DLSS, FSR, and XeSS lower the resolution at the game renders everything before scaling it back up to be displayed at your monitor’s resolution. Stalker 2 does look best natively but it’s so sensitive to how many pixels it has to process, that you’re better off using upscaling anyway.
Some individual graphics settings are worth paying attention to, though, as some can be raised without much of a performance impact, whereas others will hit your frame rate quite hard.
I’ve used a Ryzen 5 5600X gaming PC, with a Radeon RX 6750 XT graphics card and 32 GB of DDR4-3200 CL16 RAM to capture the images below, using the medium quality preset as the baseline setting.
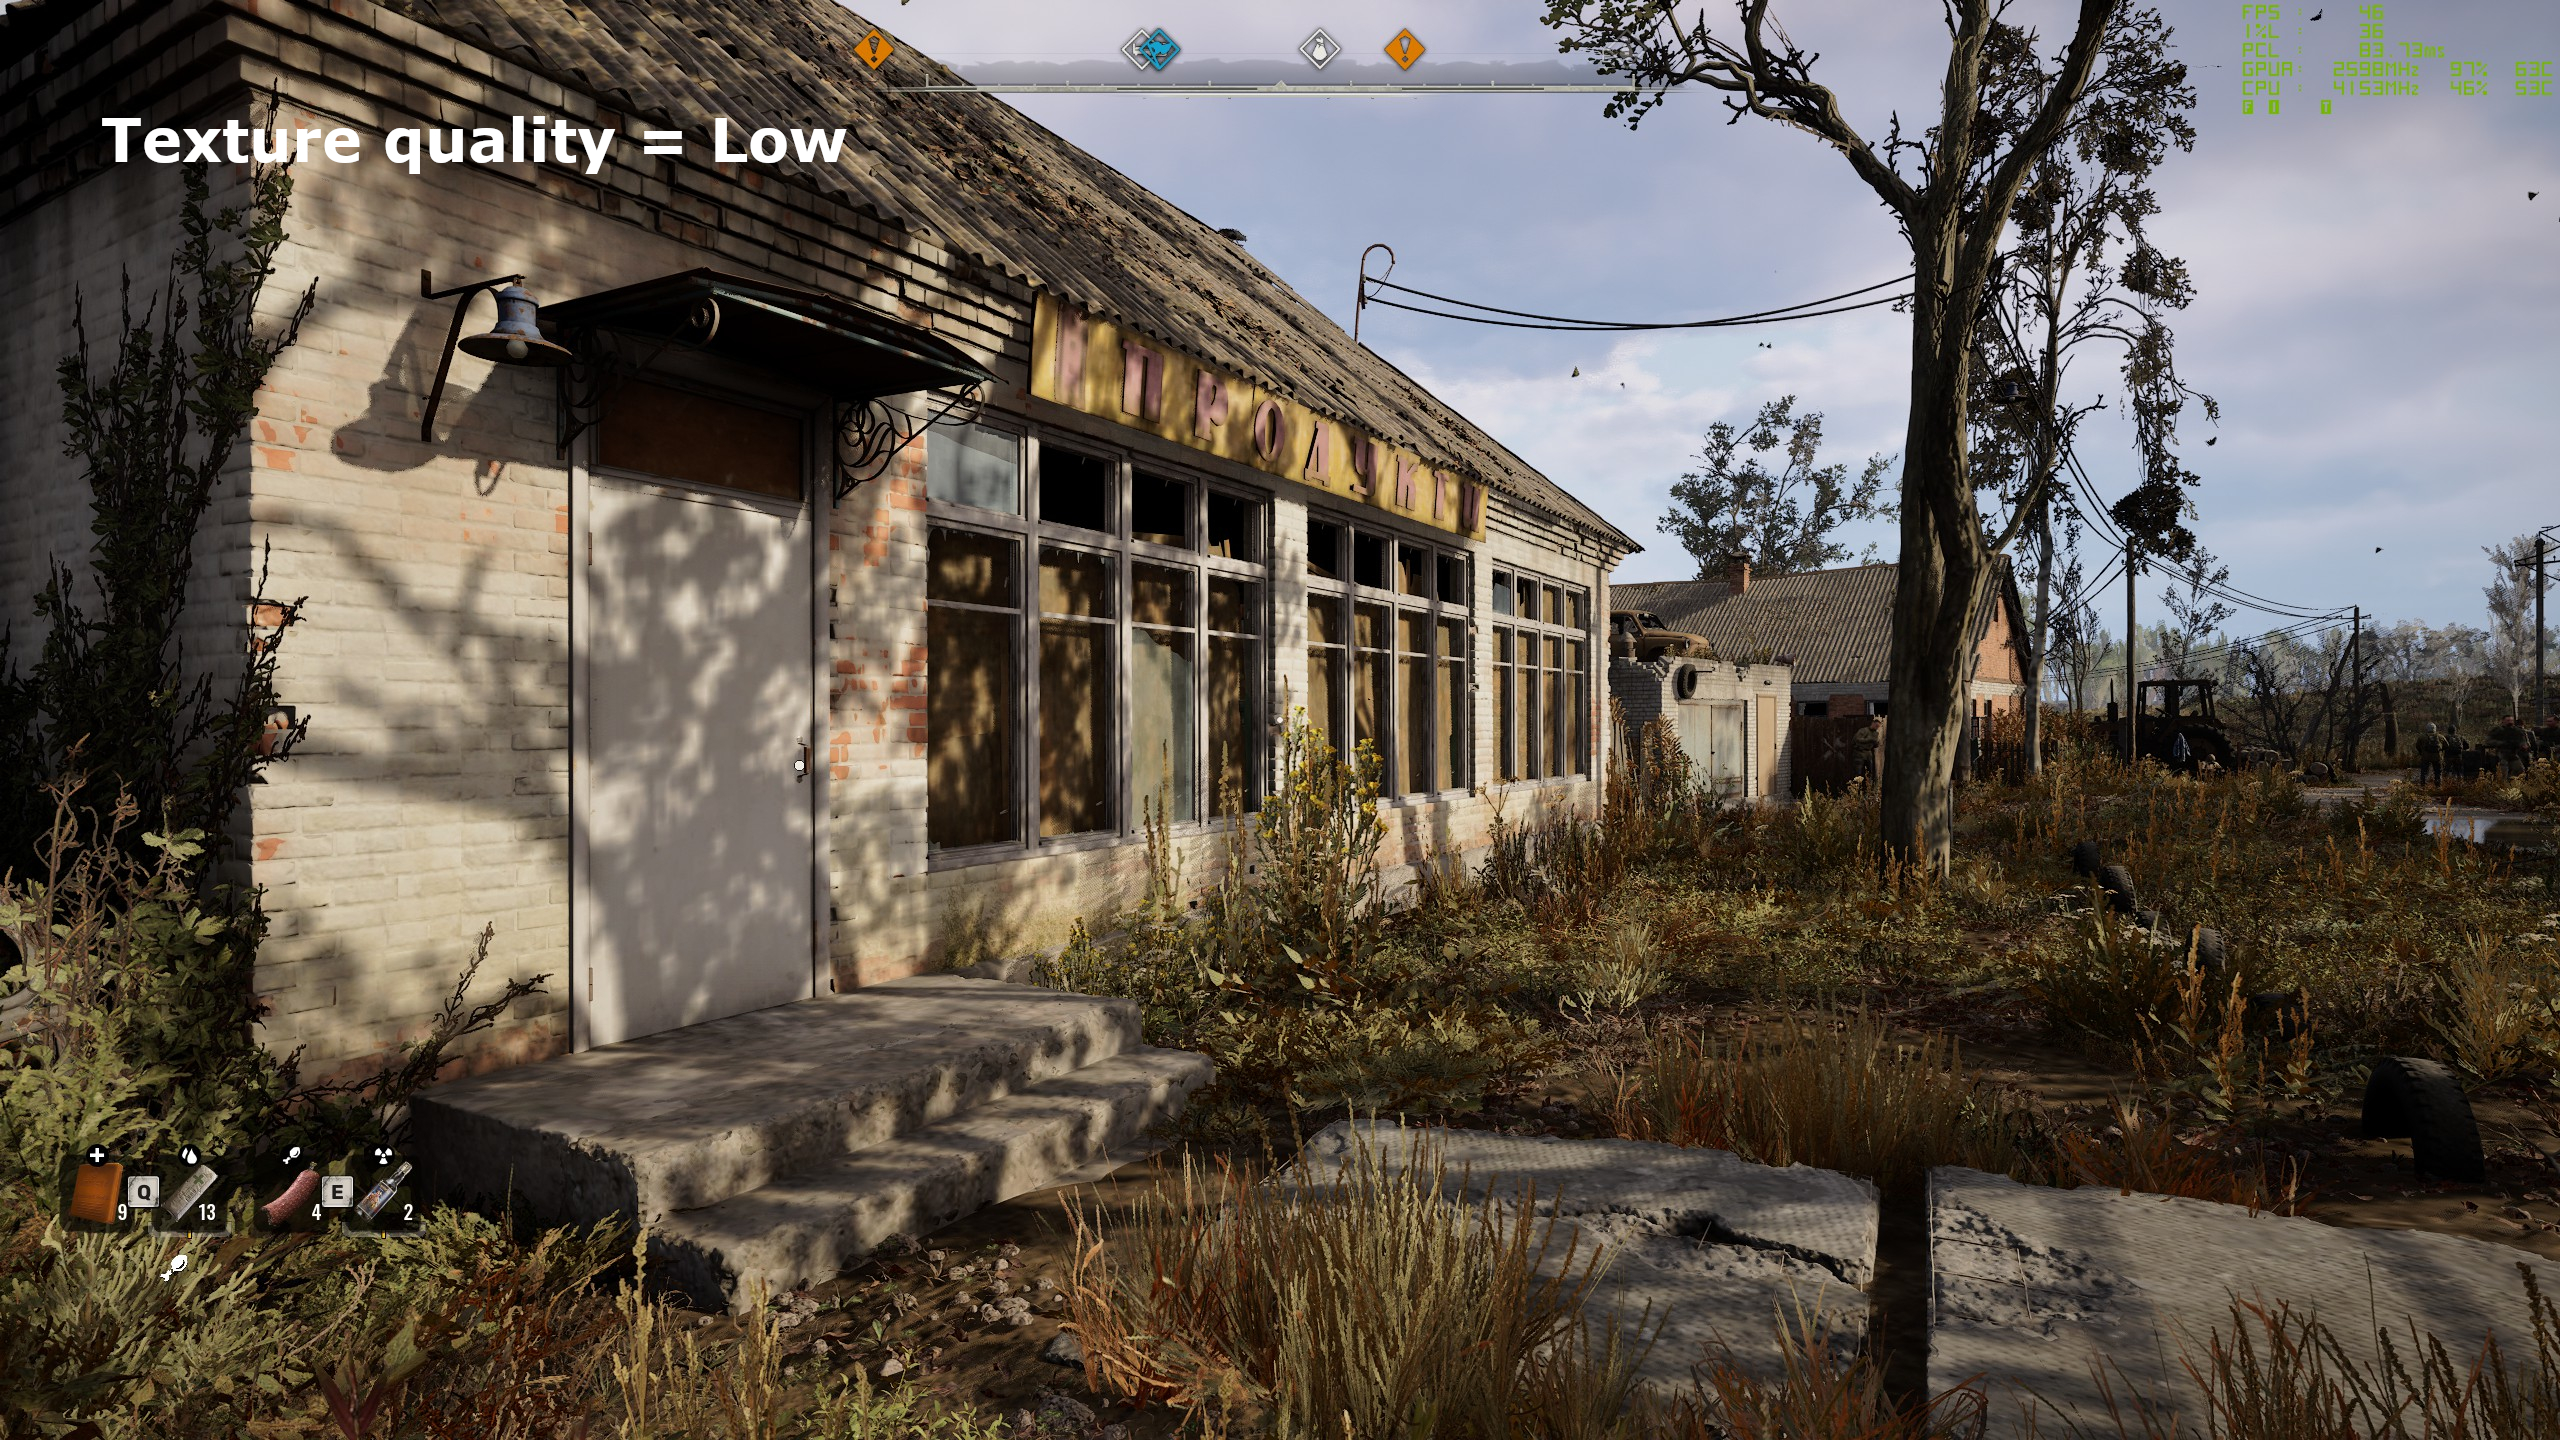
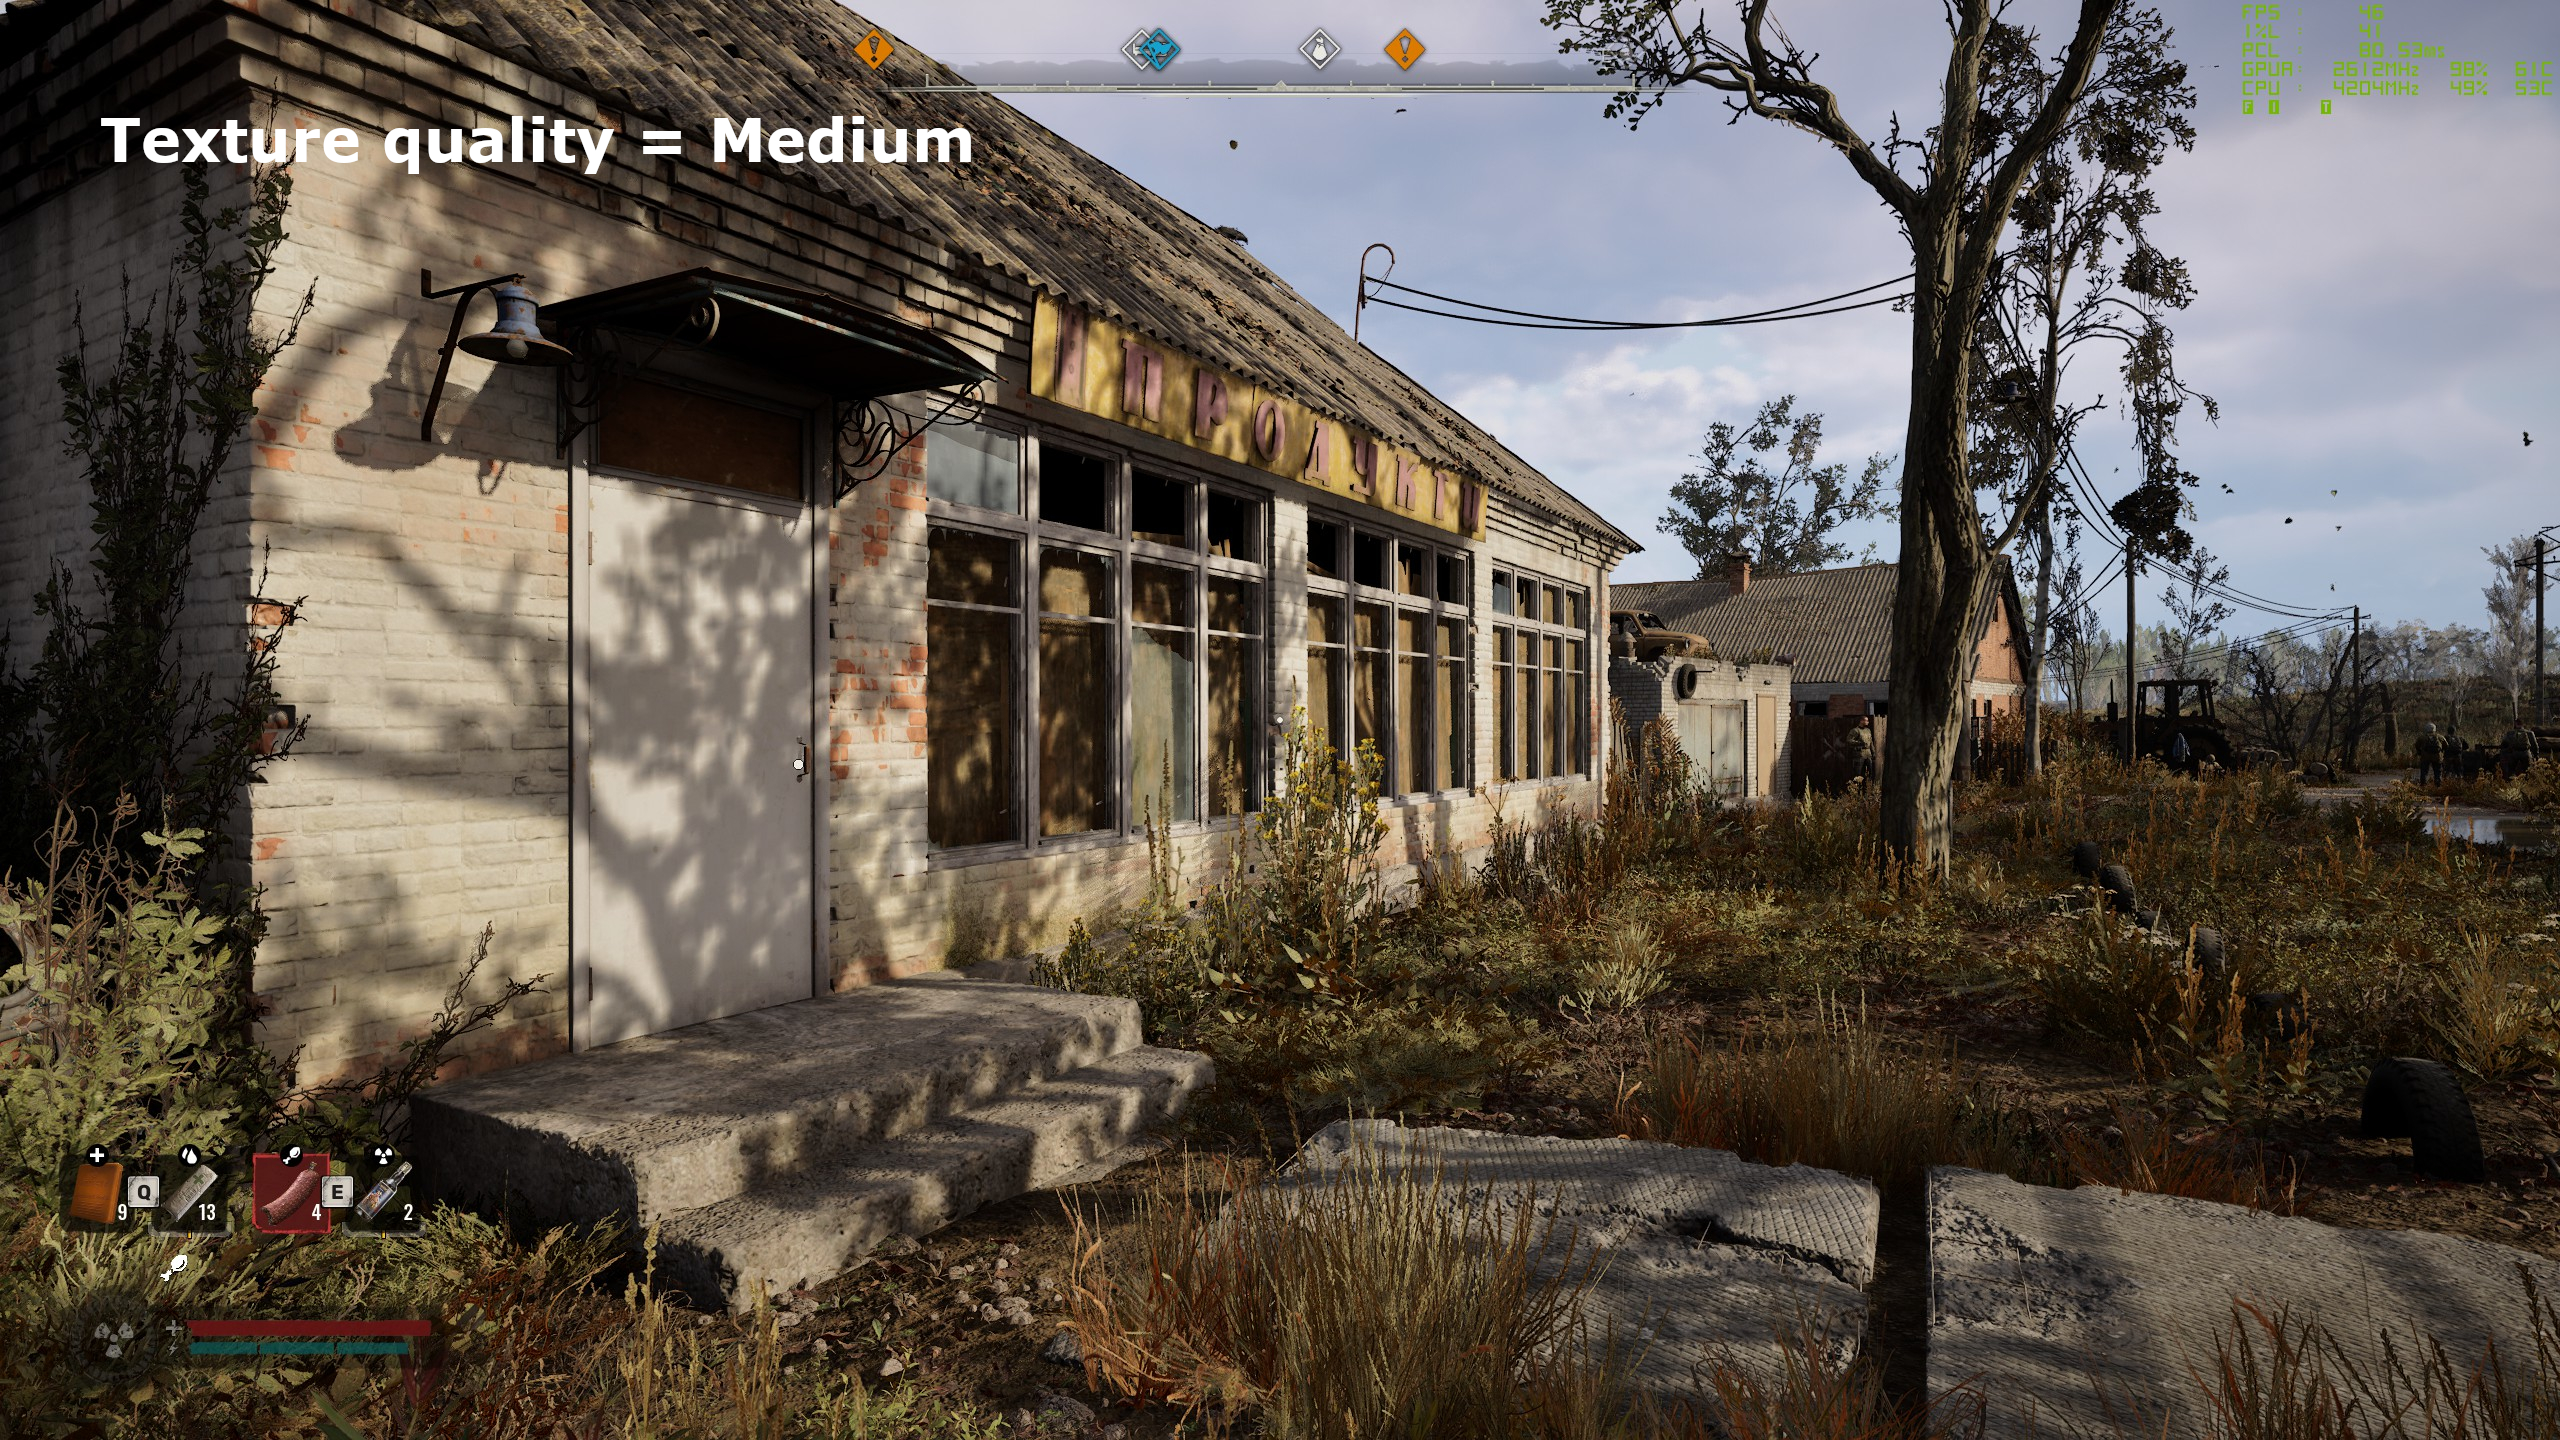
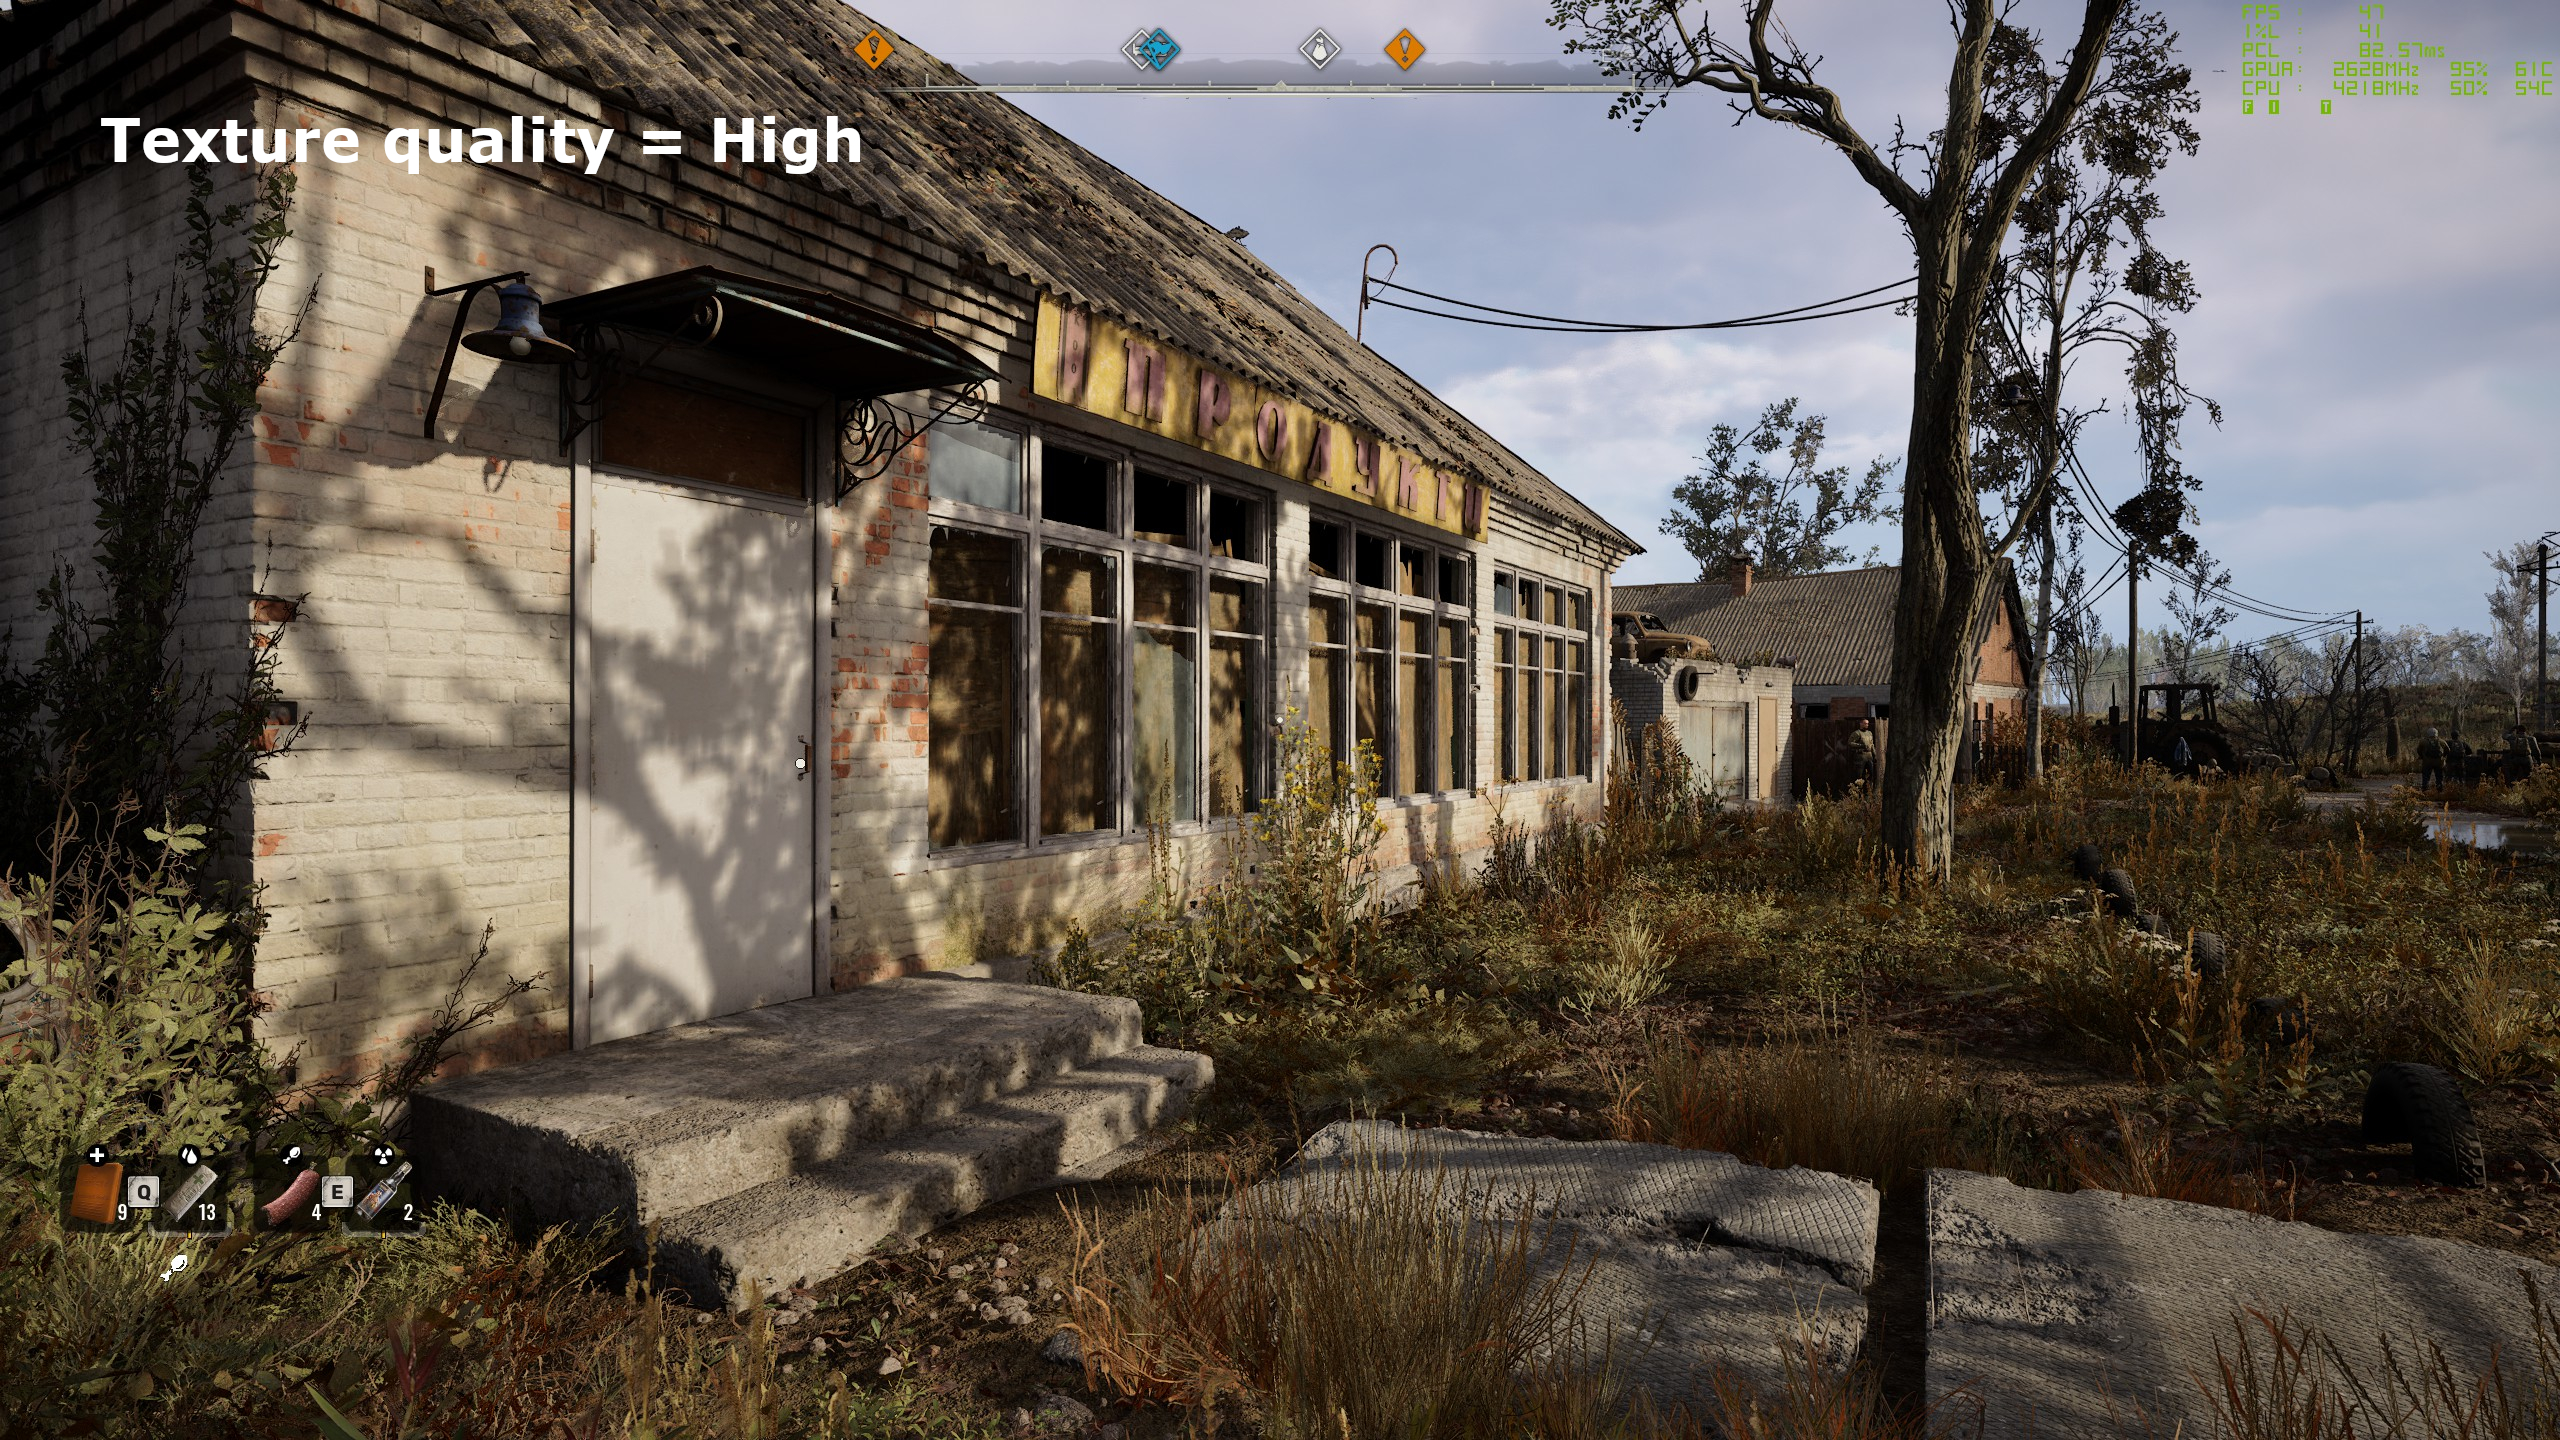
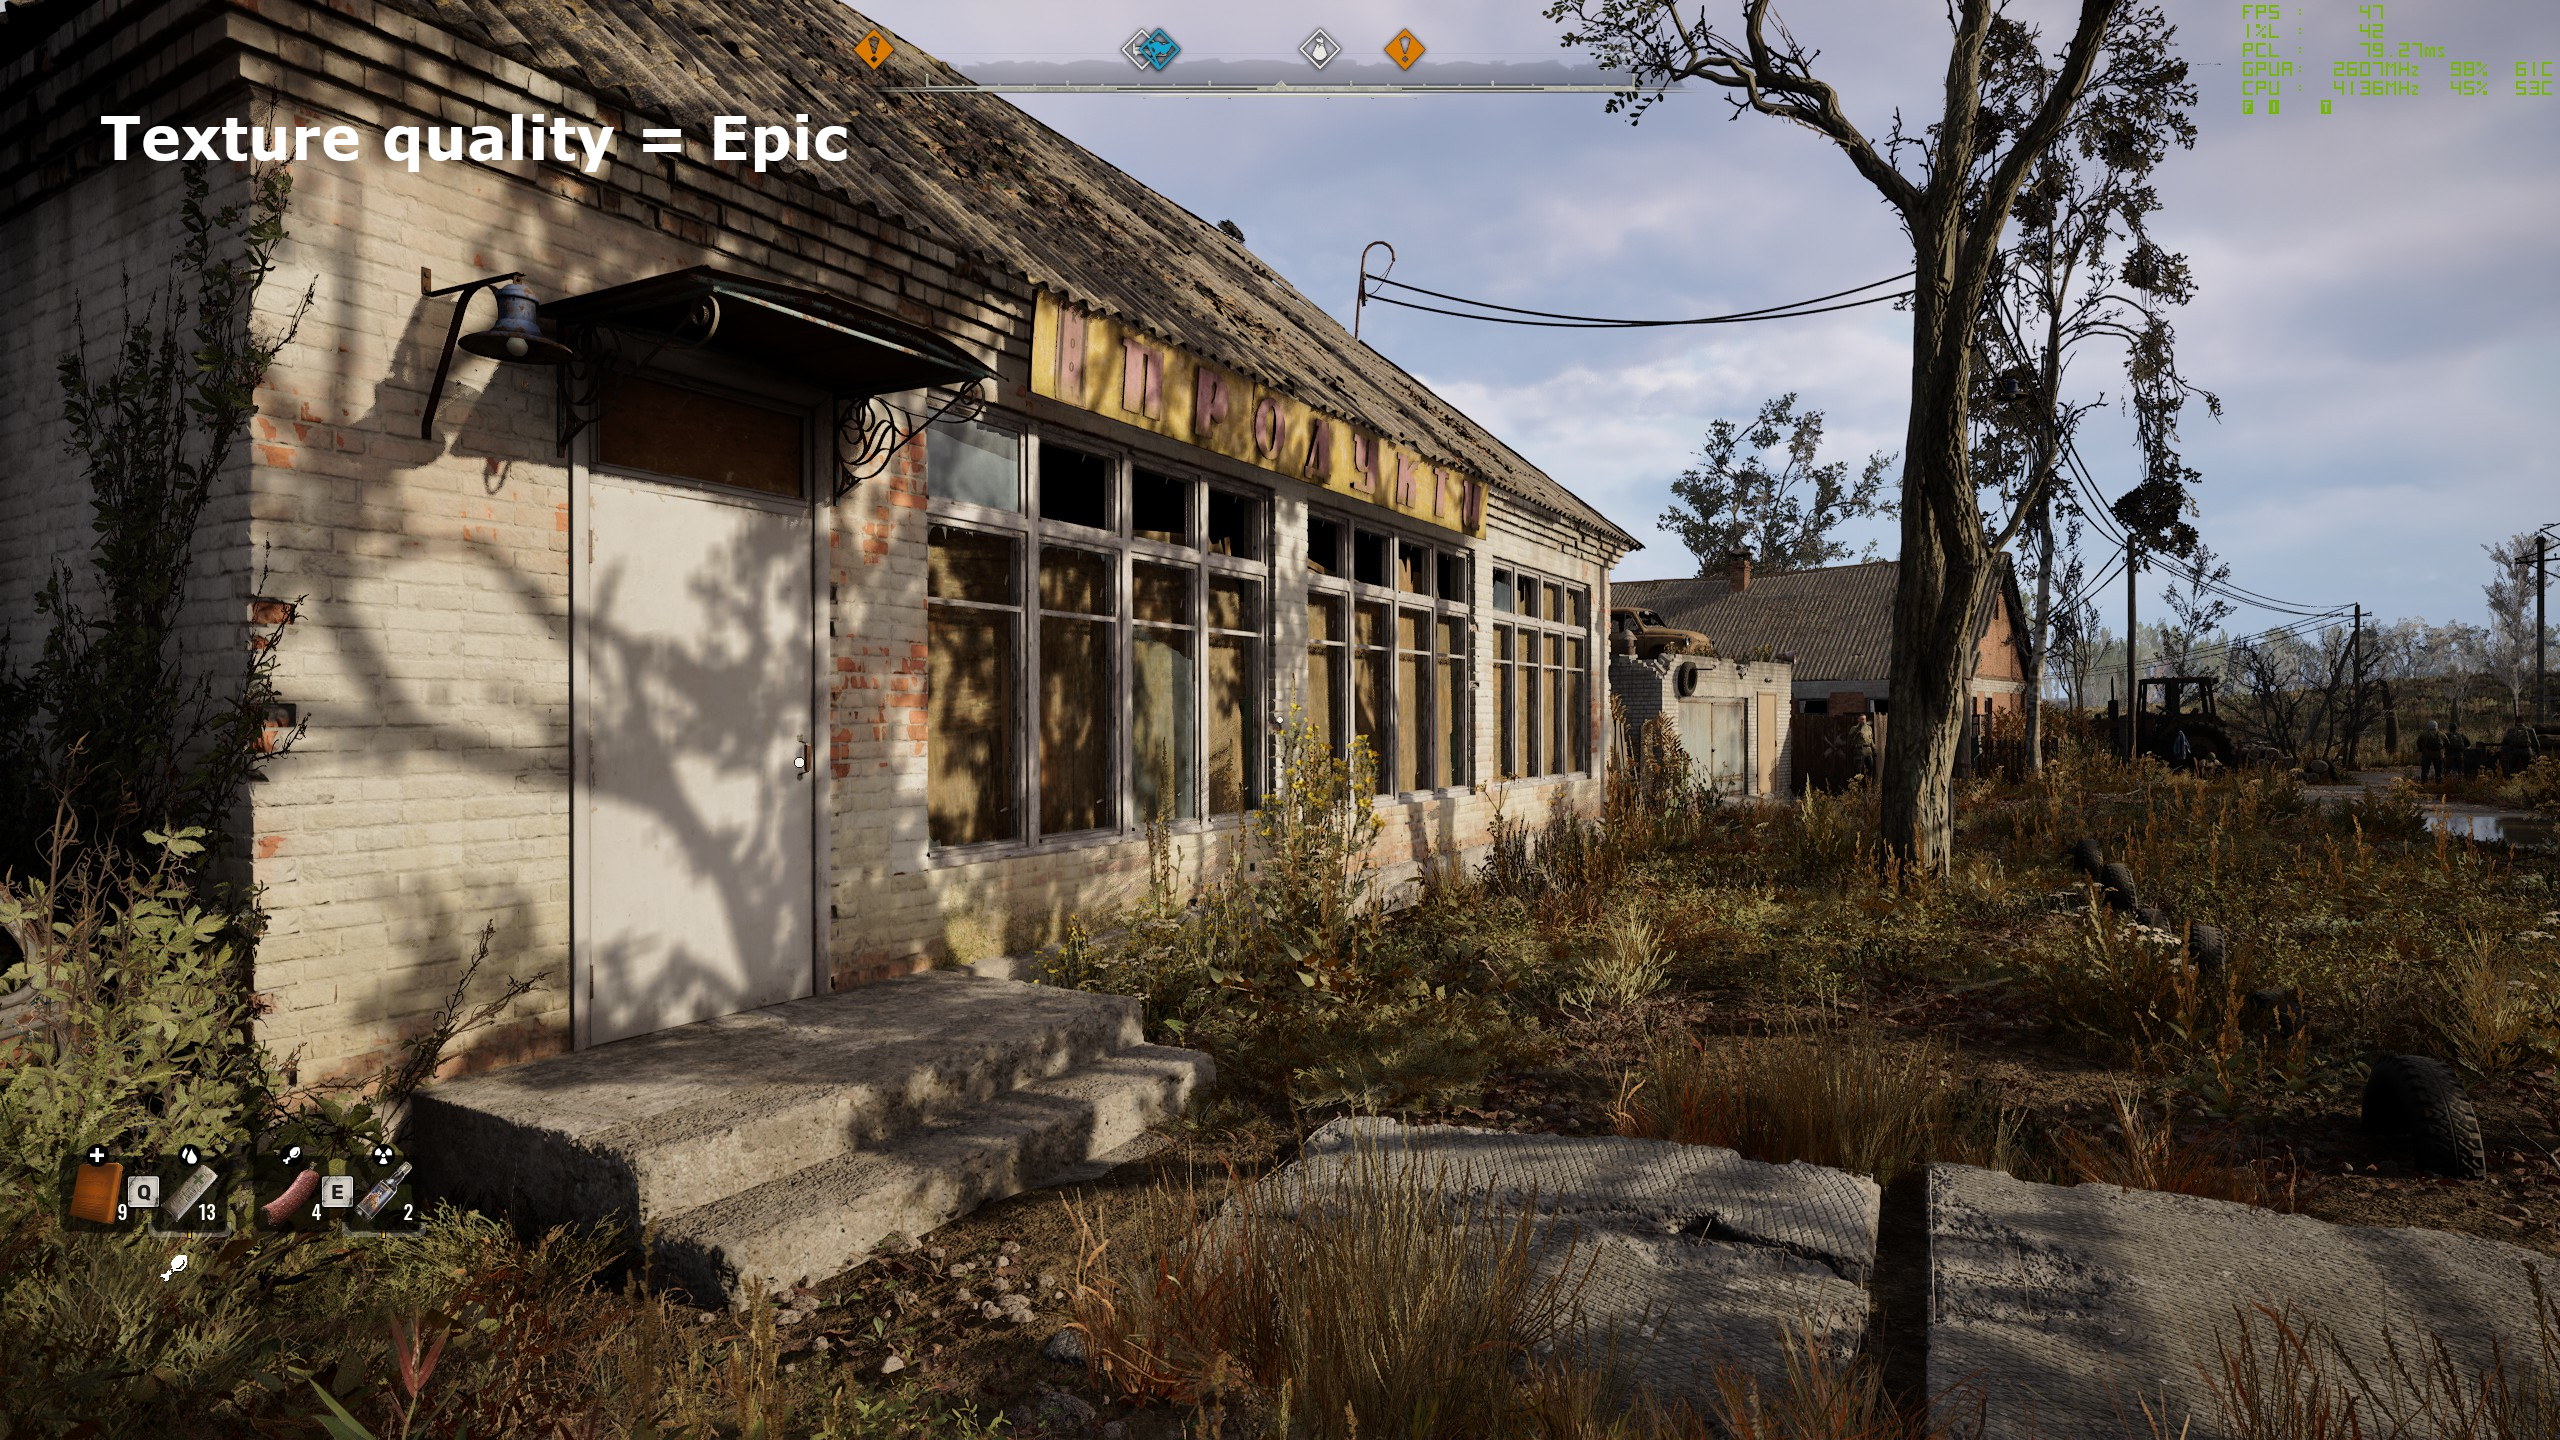
Texture quality
Stalker 2 isn’t especially demanding on your graphics card’s VRAM. If you have 8 GB, then that will be enough to cope with the epic preset at 1080p, the high preset at 1440p, and the medium preset at 4K. In my testing, I recorded no higher than 11 GB of VRAM being used, although that’s not to say no part of the game will demand more than this.
The benefit of the relatively light VRAM load is that you can pump up the texture quality without much of a performance impact, if at all. You can see in the gallery above that the low setting is somewhat fuzzy but clears up nicely at medium or higher.
There’s not a wealth of difference between high and epic, but since the RX 6750 XT displayed no difference in frame rates between the two settings either, it should be fine to use the maximum texture setting at all times.
However, if you do get stutters as you’re moving about the open world (aka traversal stutters), then it might be worth knocking the texture quality down a notch.
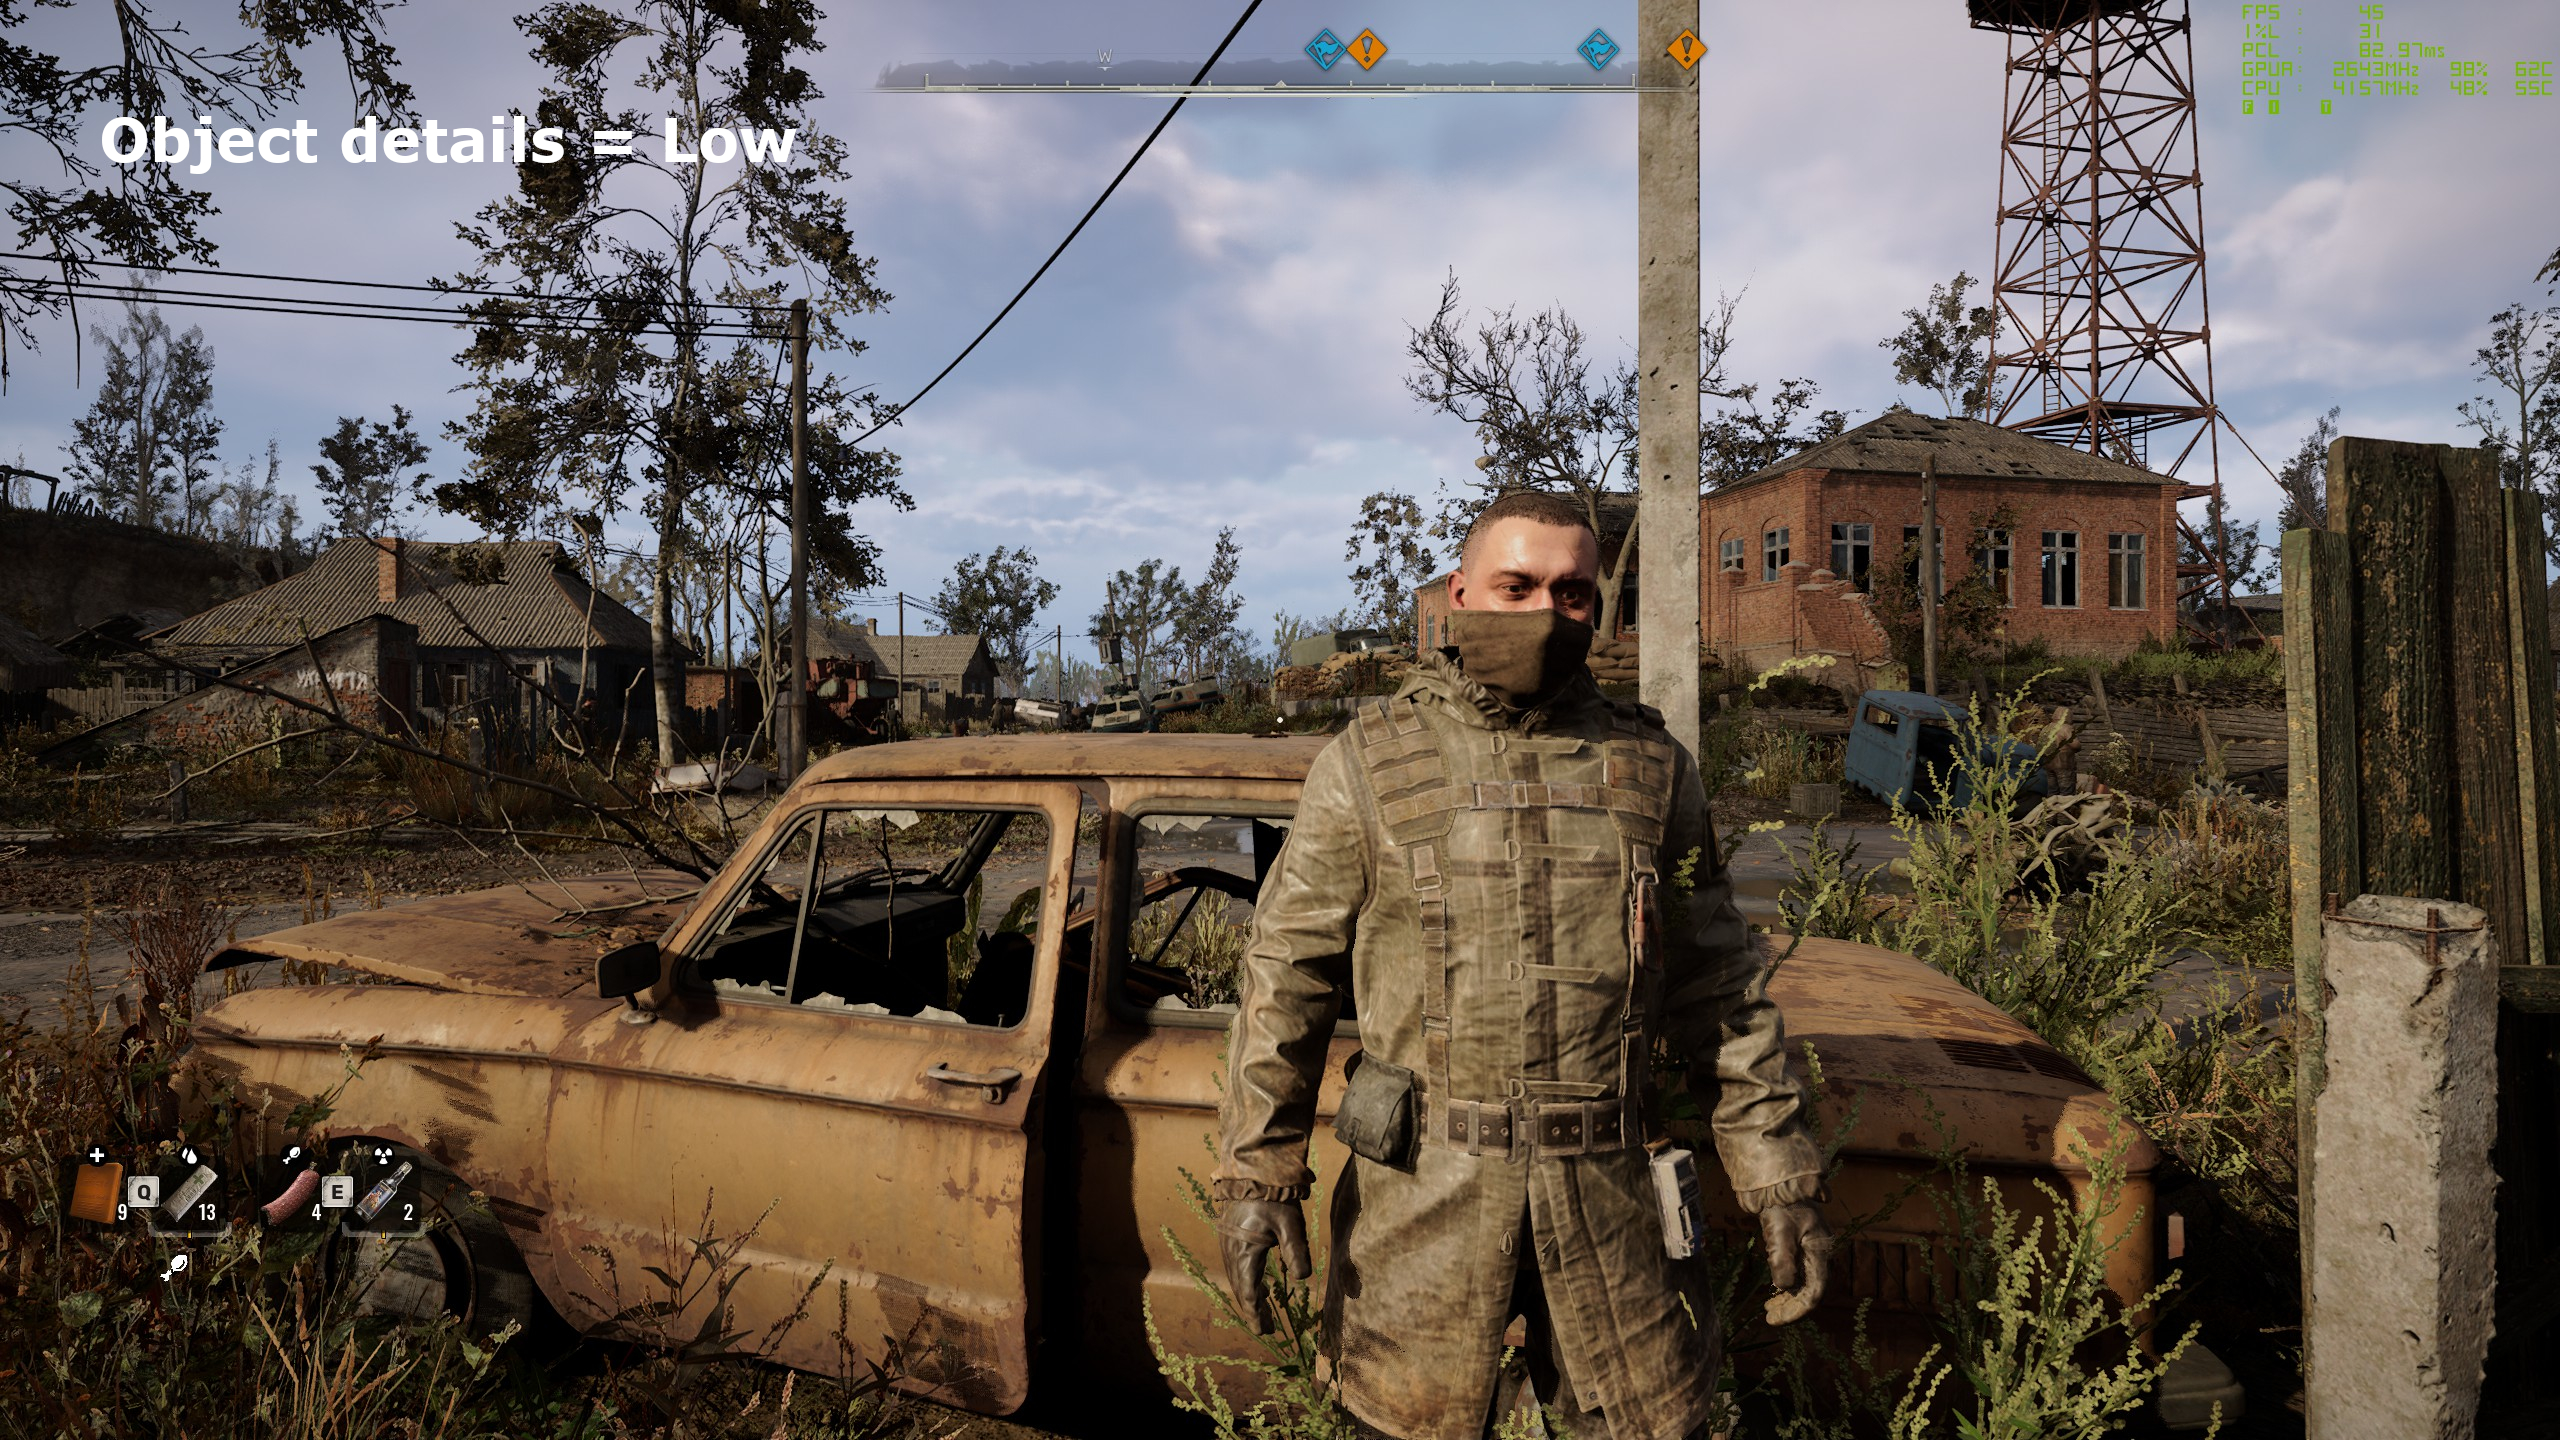
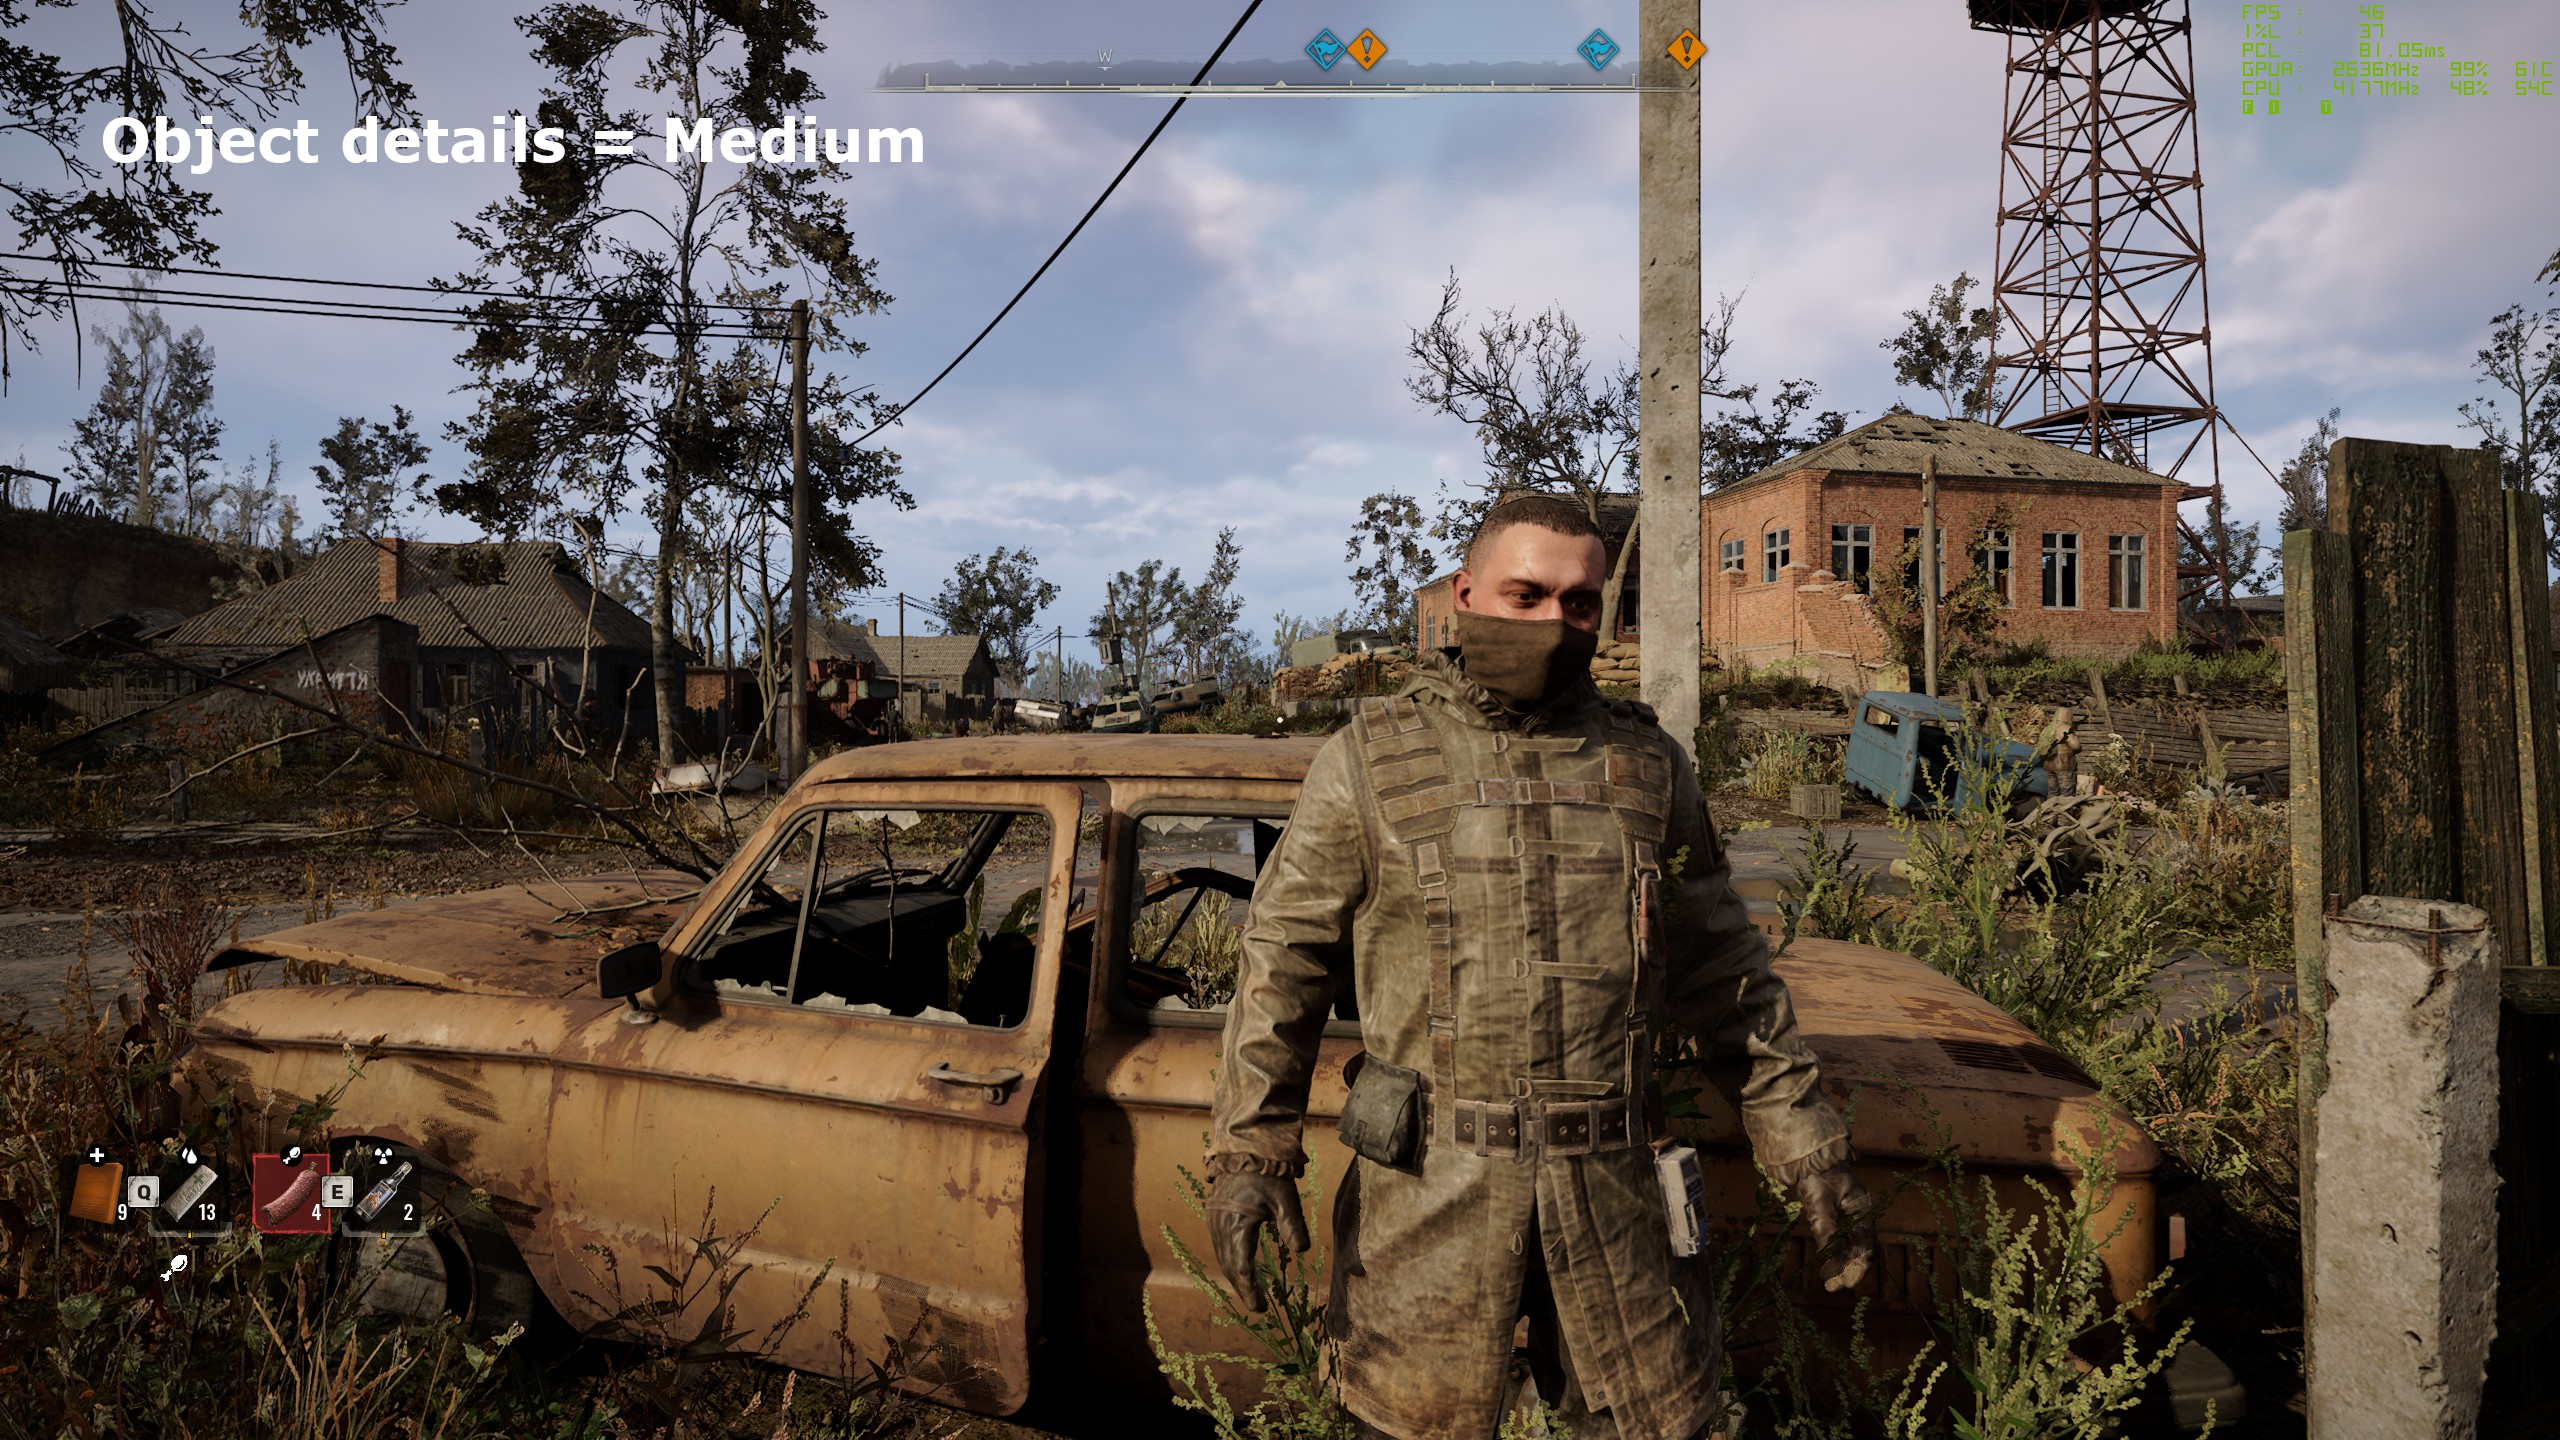
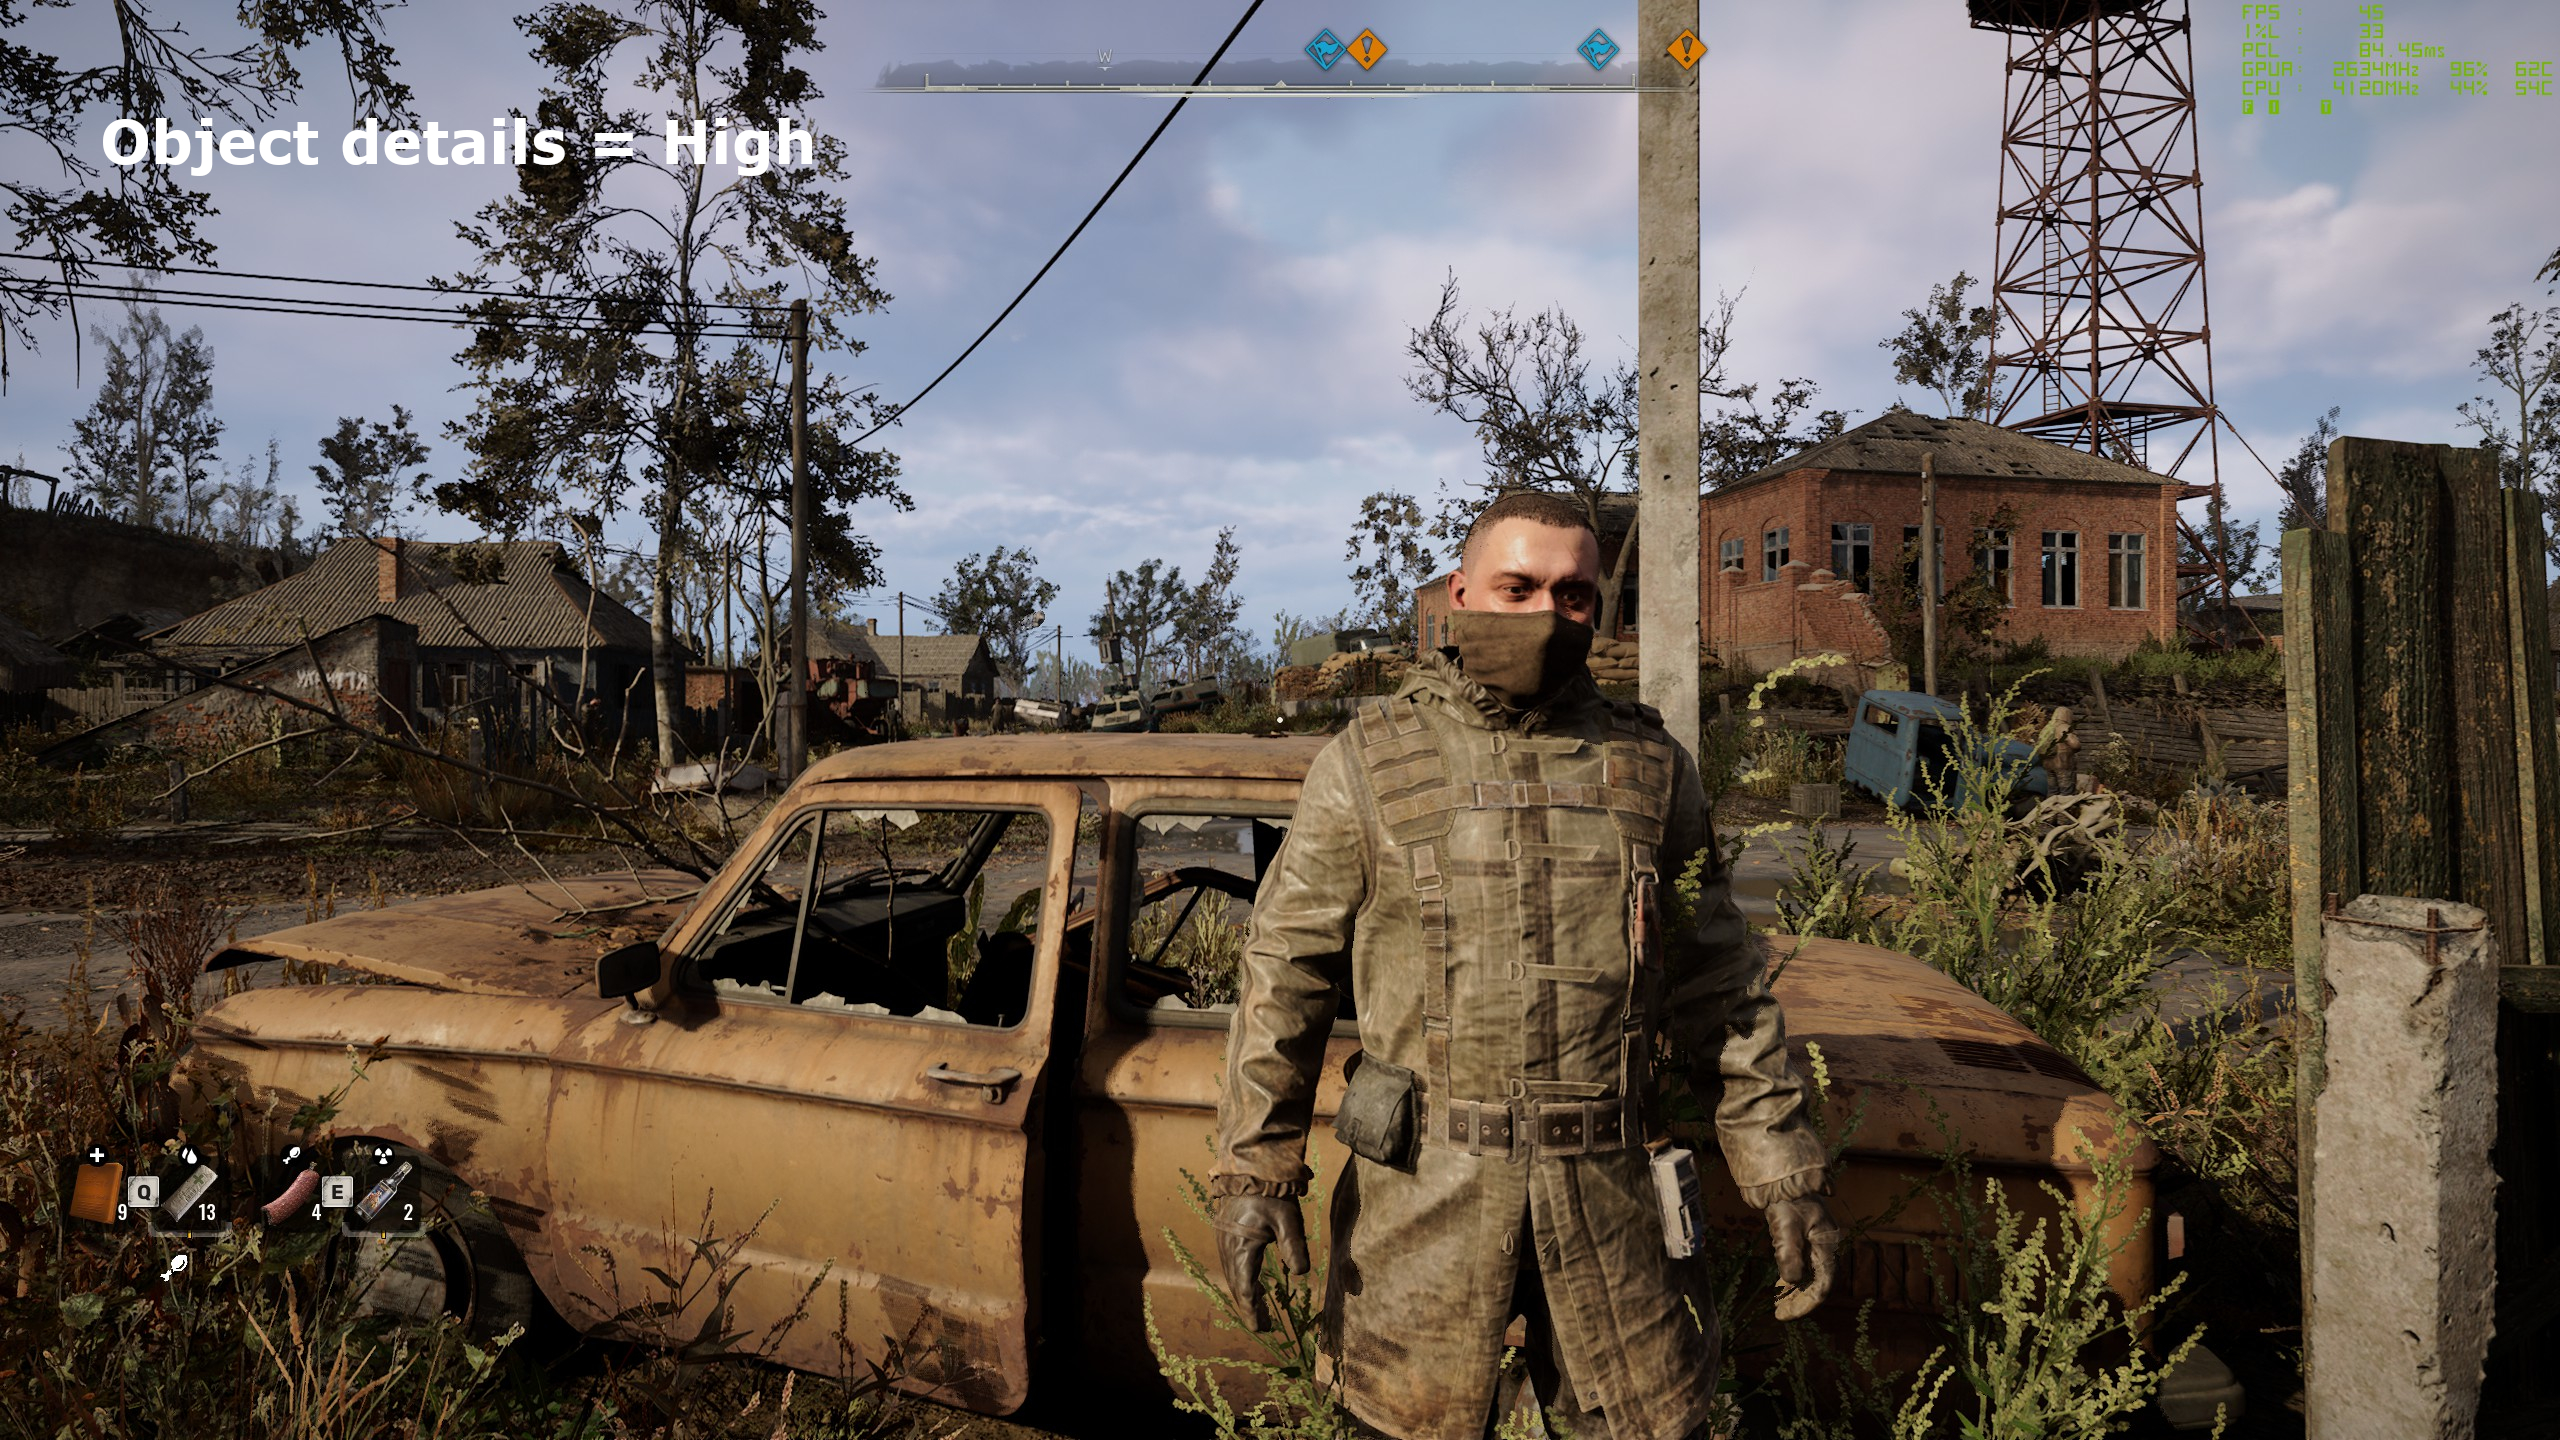
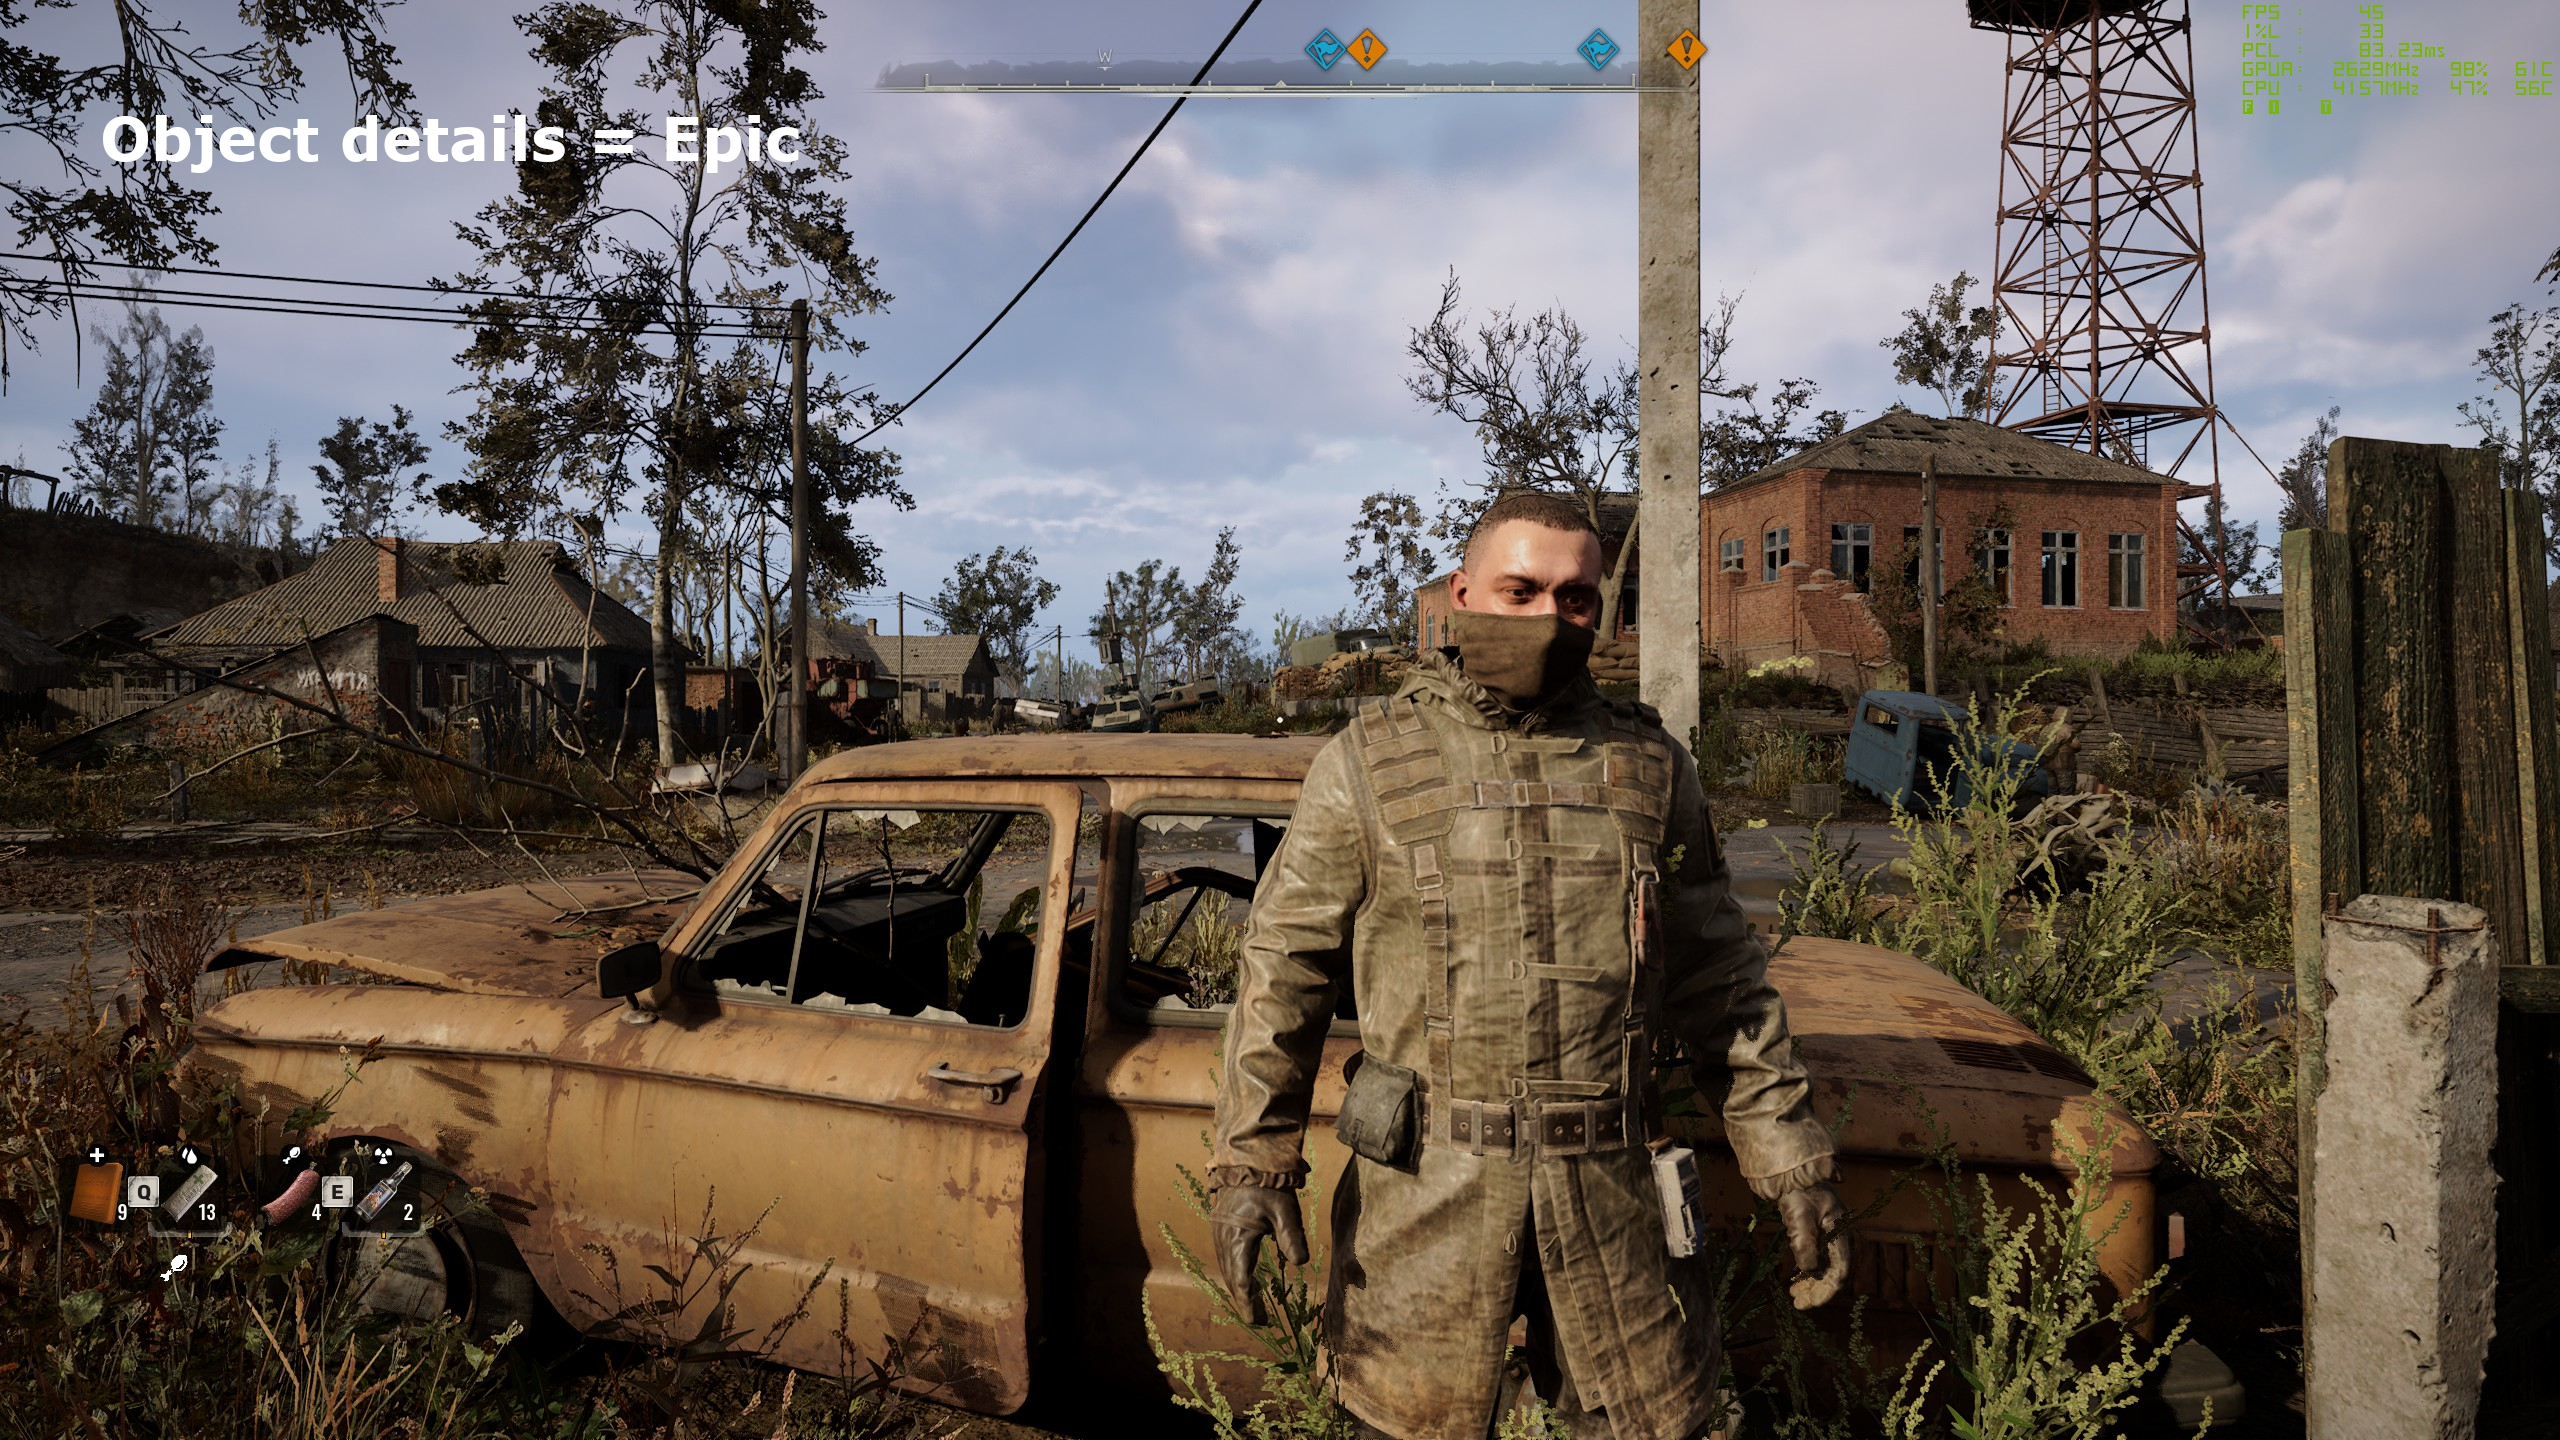
Object detail
Another setting that has a subtle change in both the visual fidelity of Stalker 2 and how well it runs is object detail. From my testing, it would seem that you can set this as high as you can with relatively little cost in frame rates.
However, I say this with one large caveat. The performance impact of using a higher object detail setting will become more pronounced in areas that are packed full of structures, buildings, debris, and so on. Large factories and urban areas being prime examples.
Increasing object complexity may also increase the load on the CPU and GPU, if you’re using an especially high setting for the shading quality, as this seems to affect how good an object’s self-shadowing appears.
Global illumination
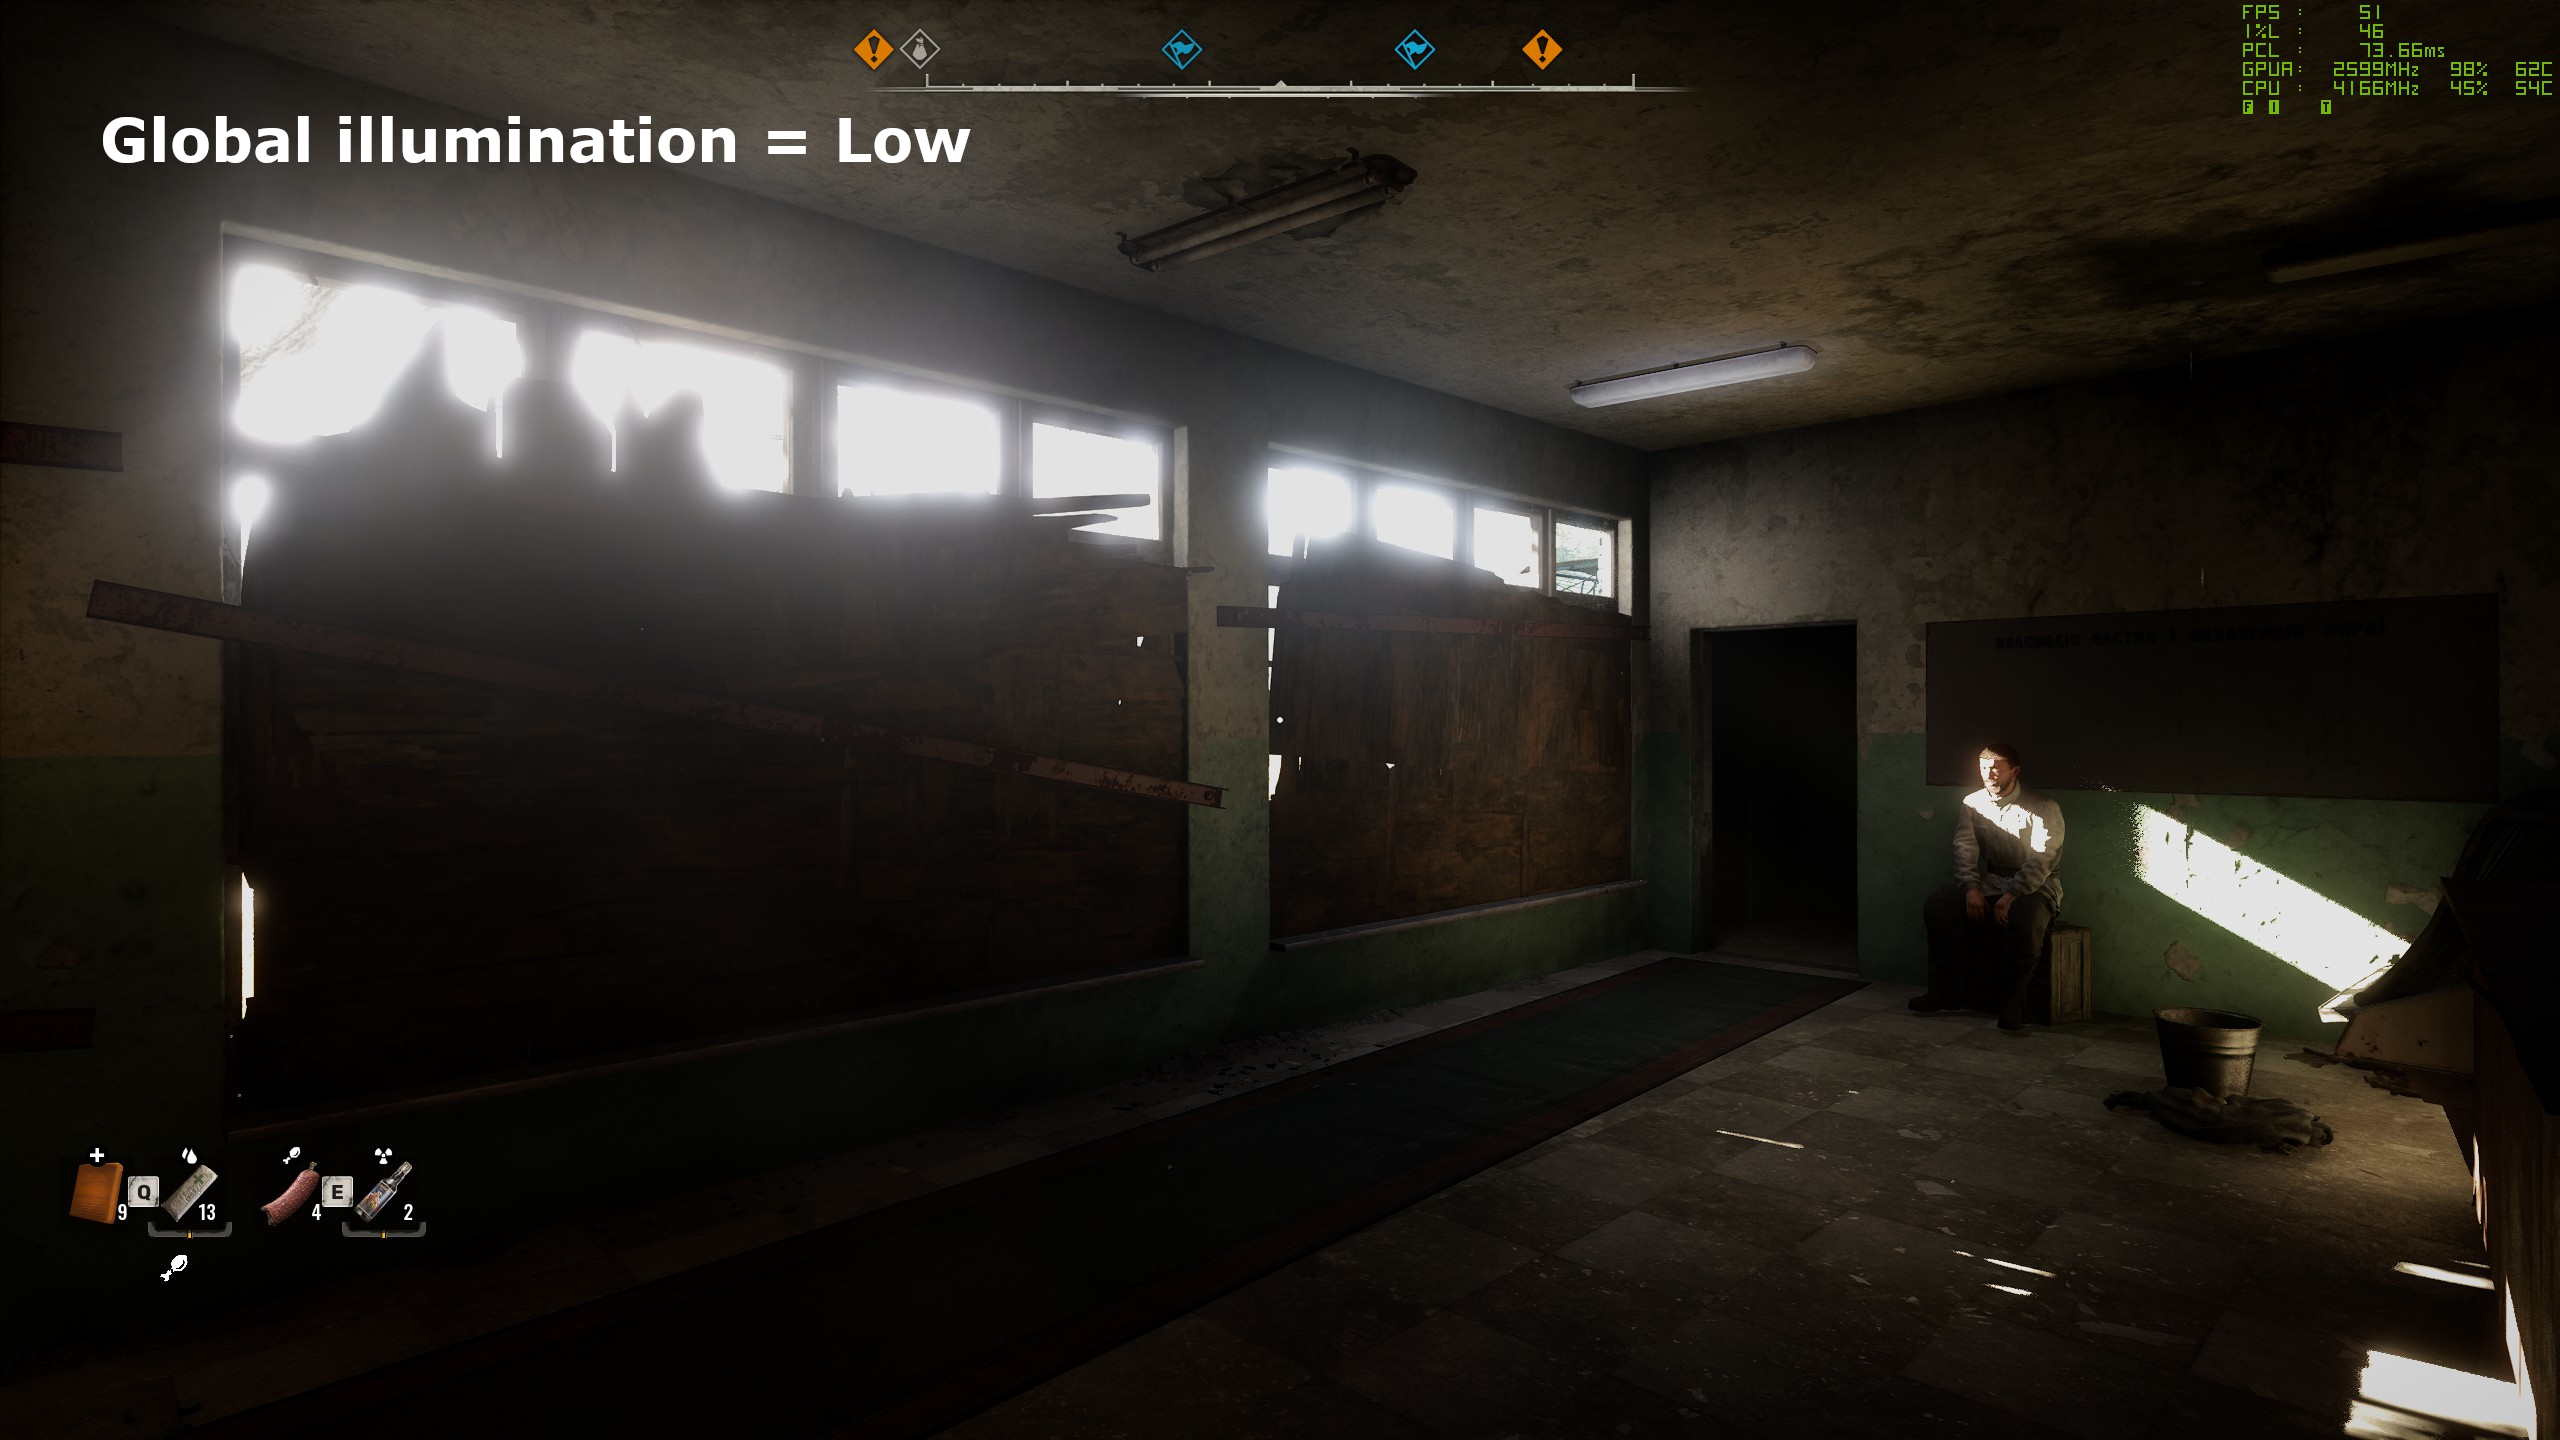
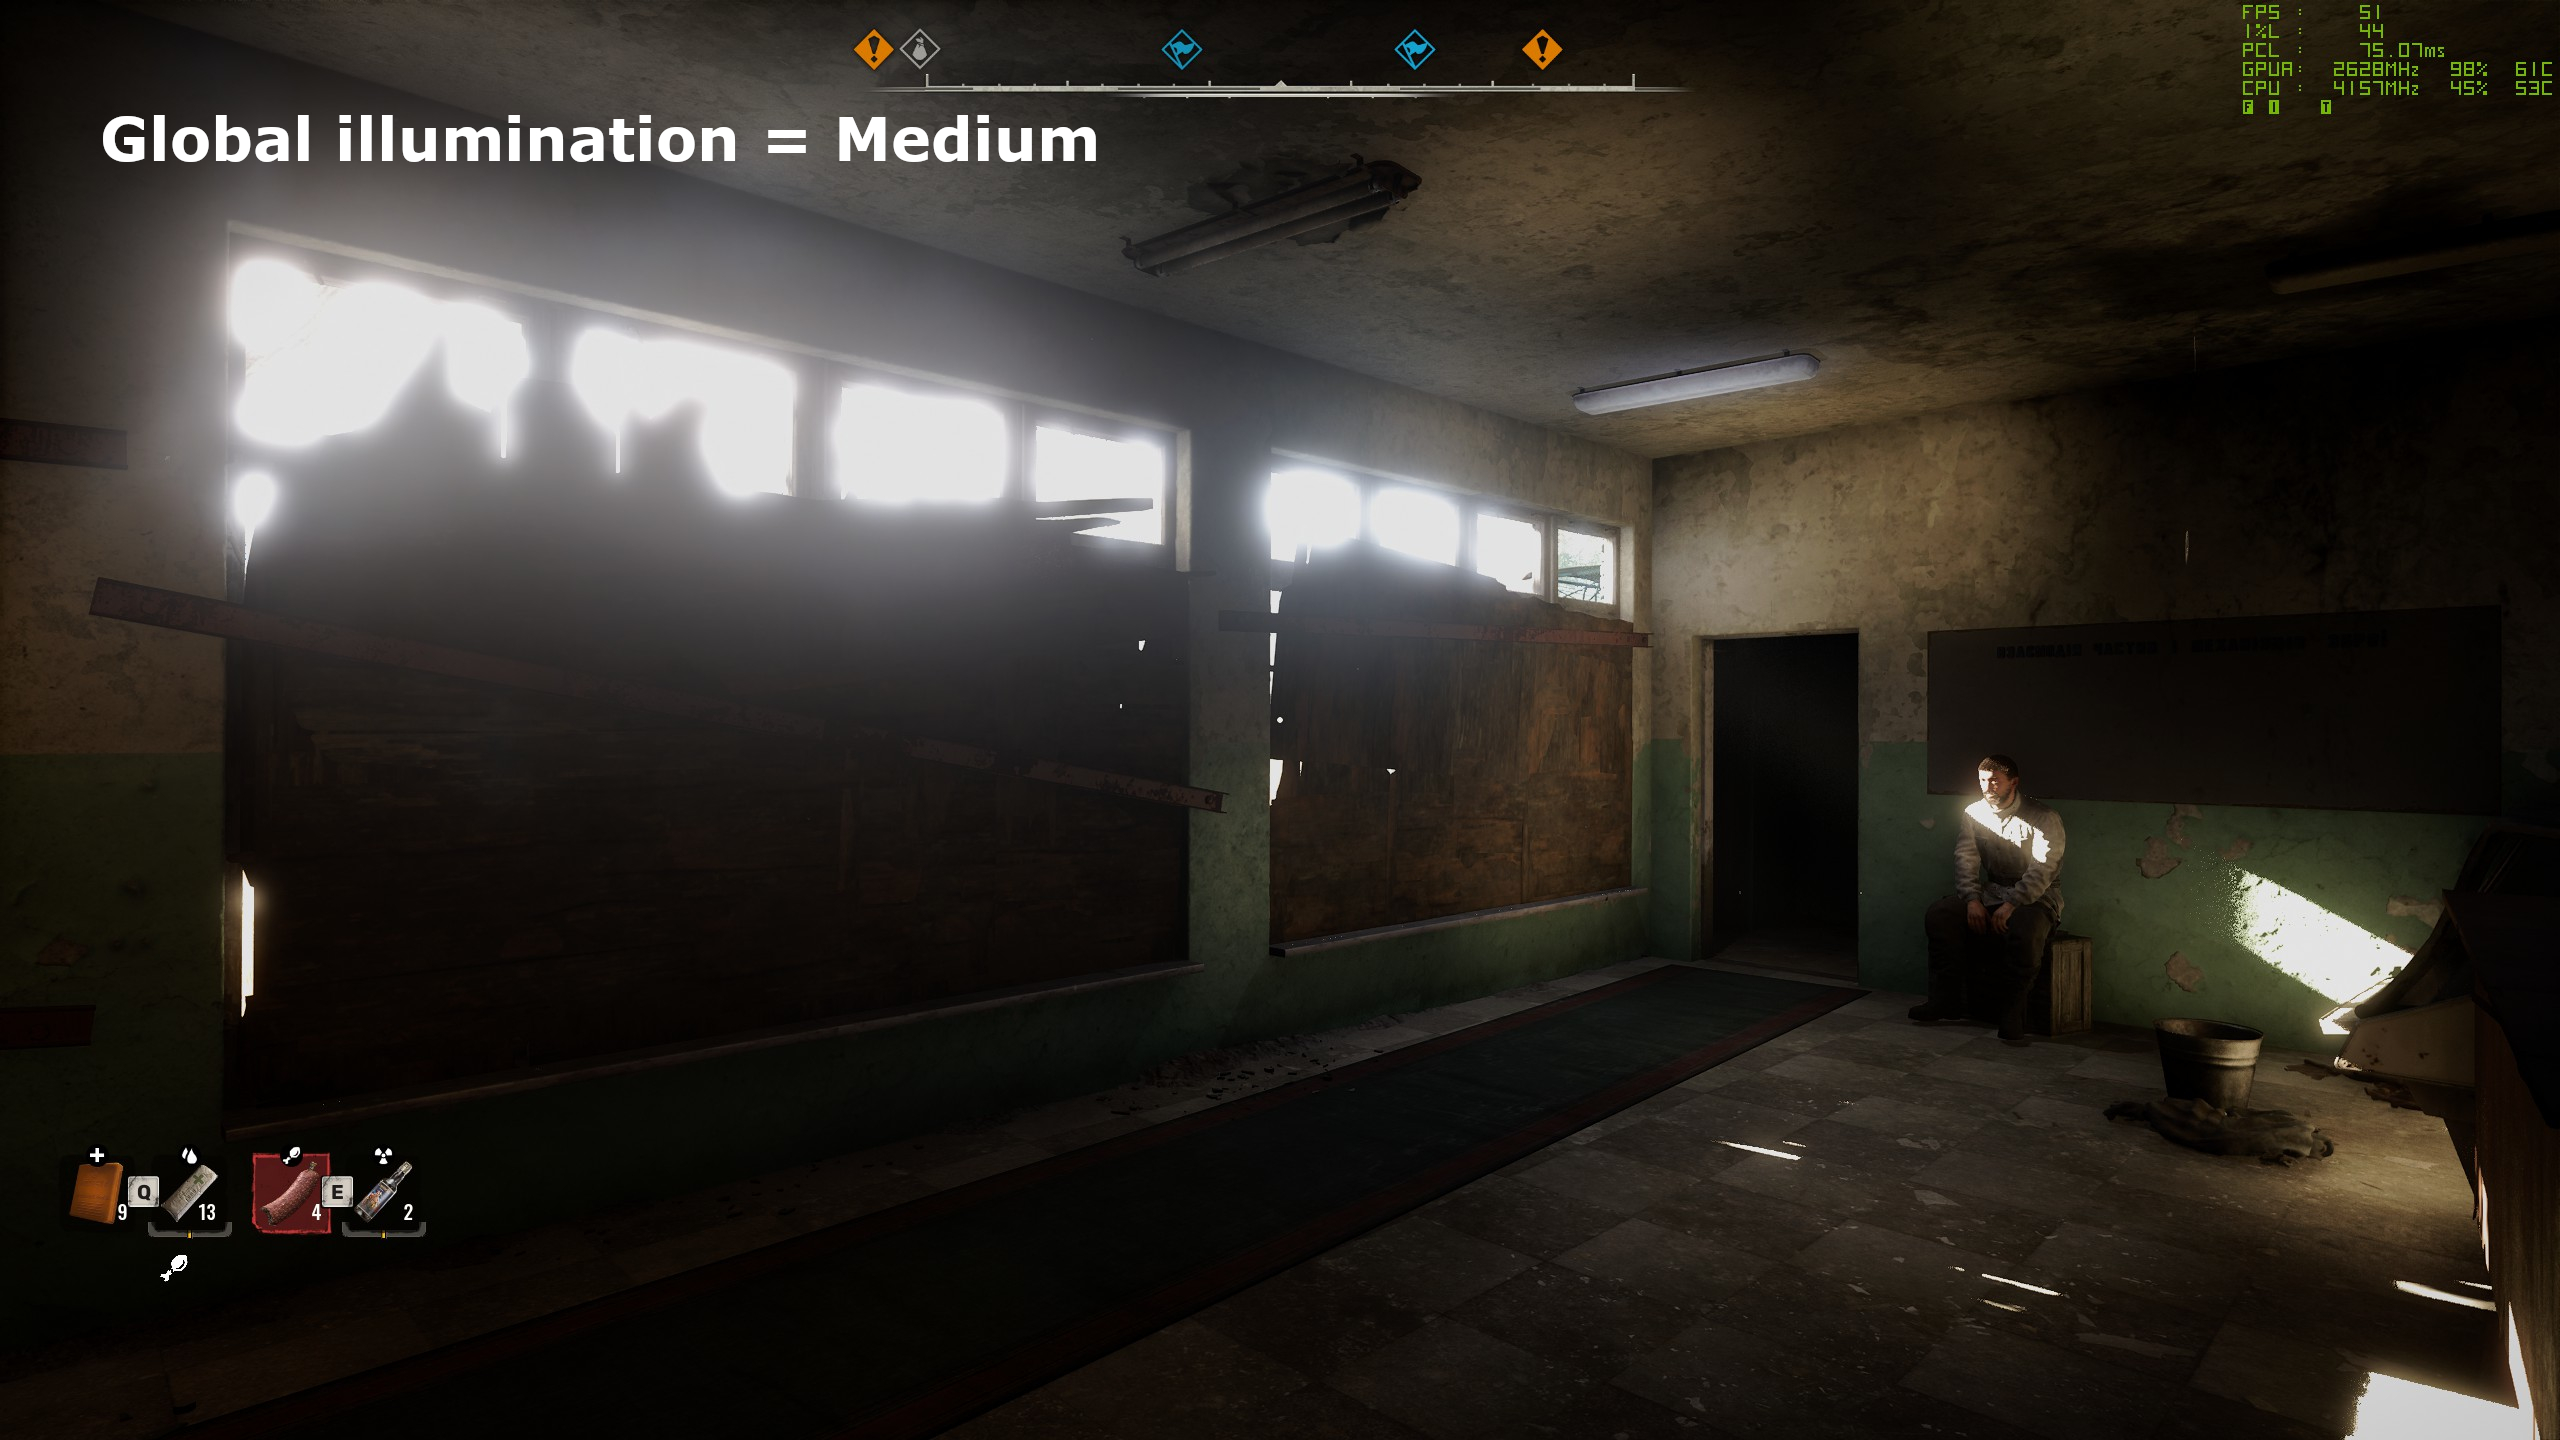
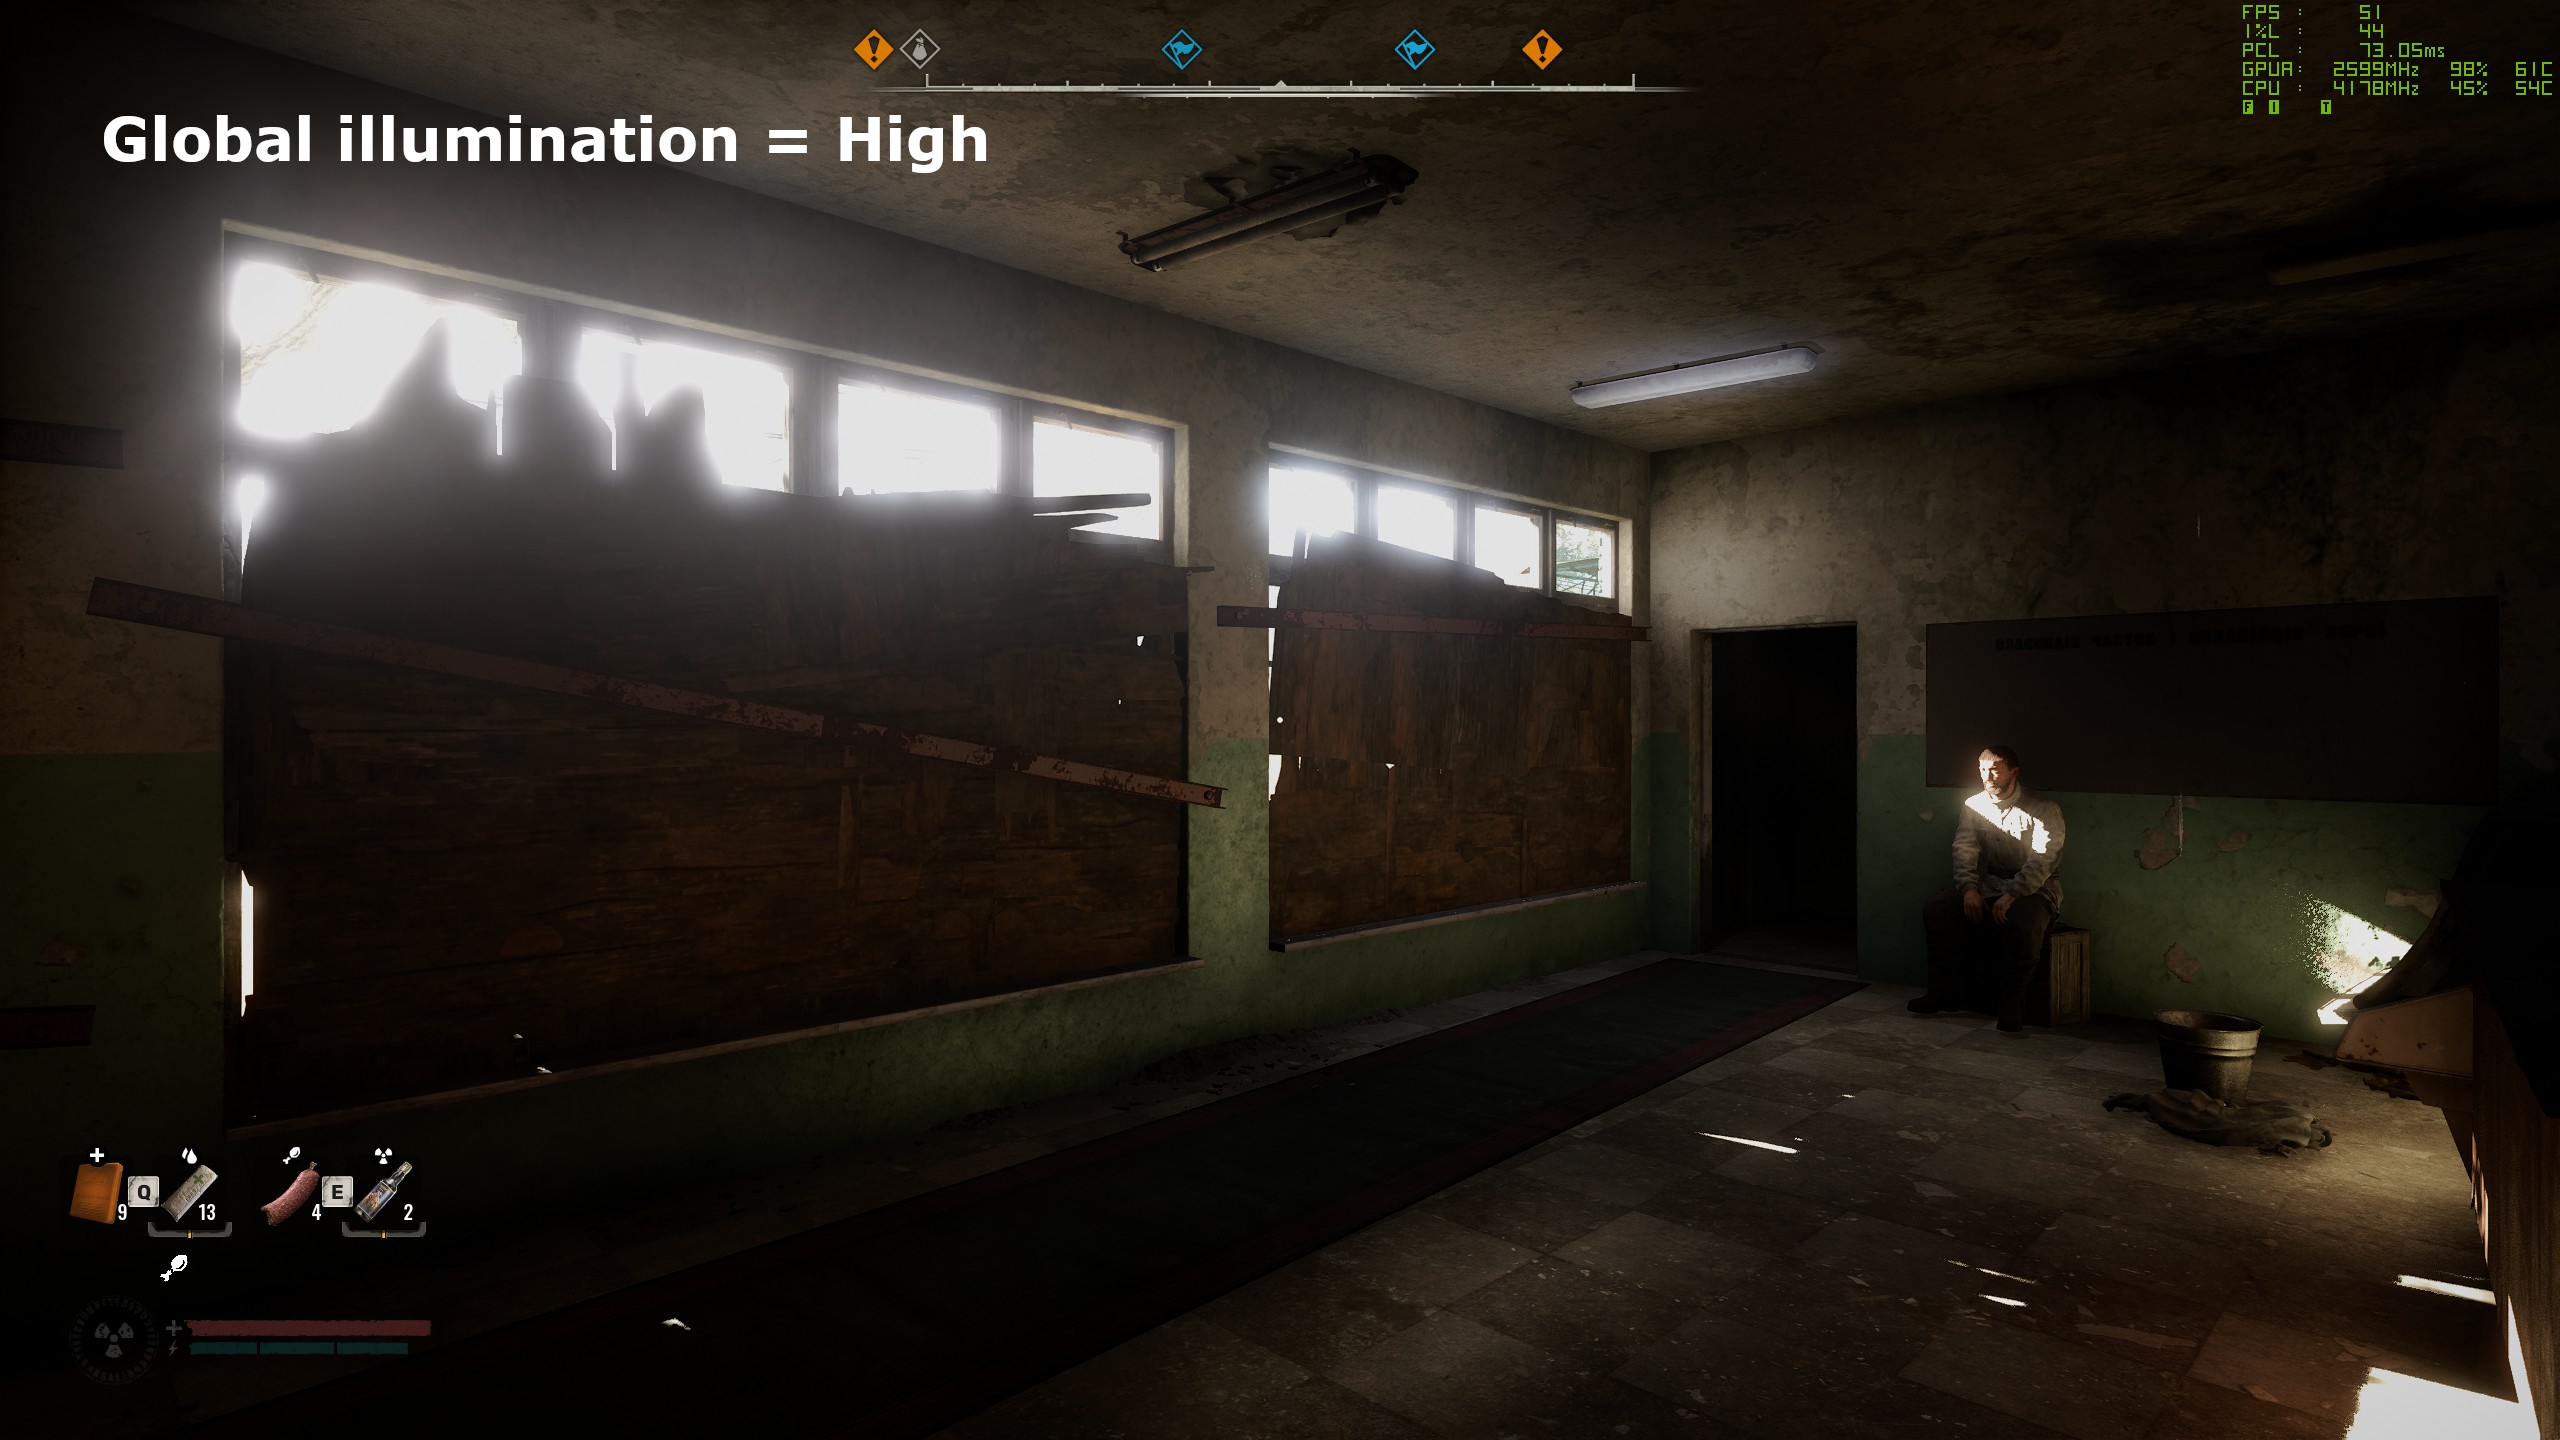
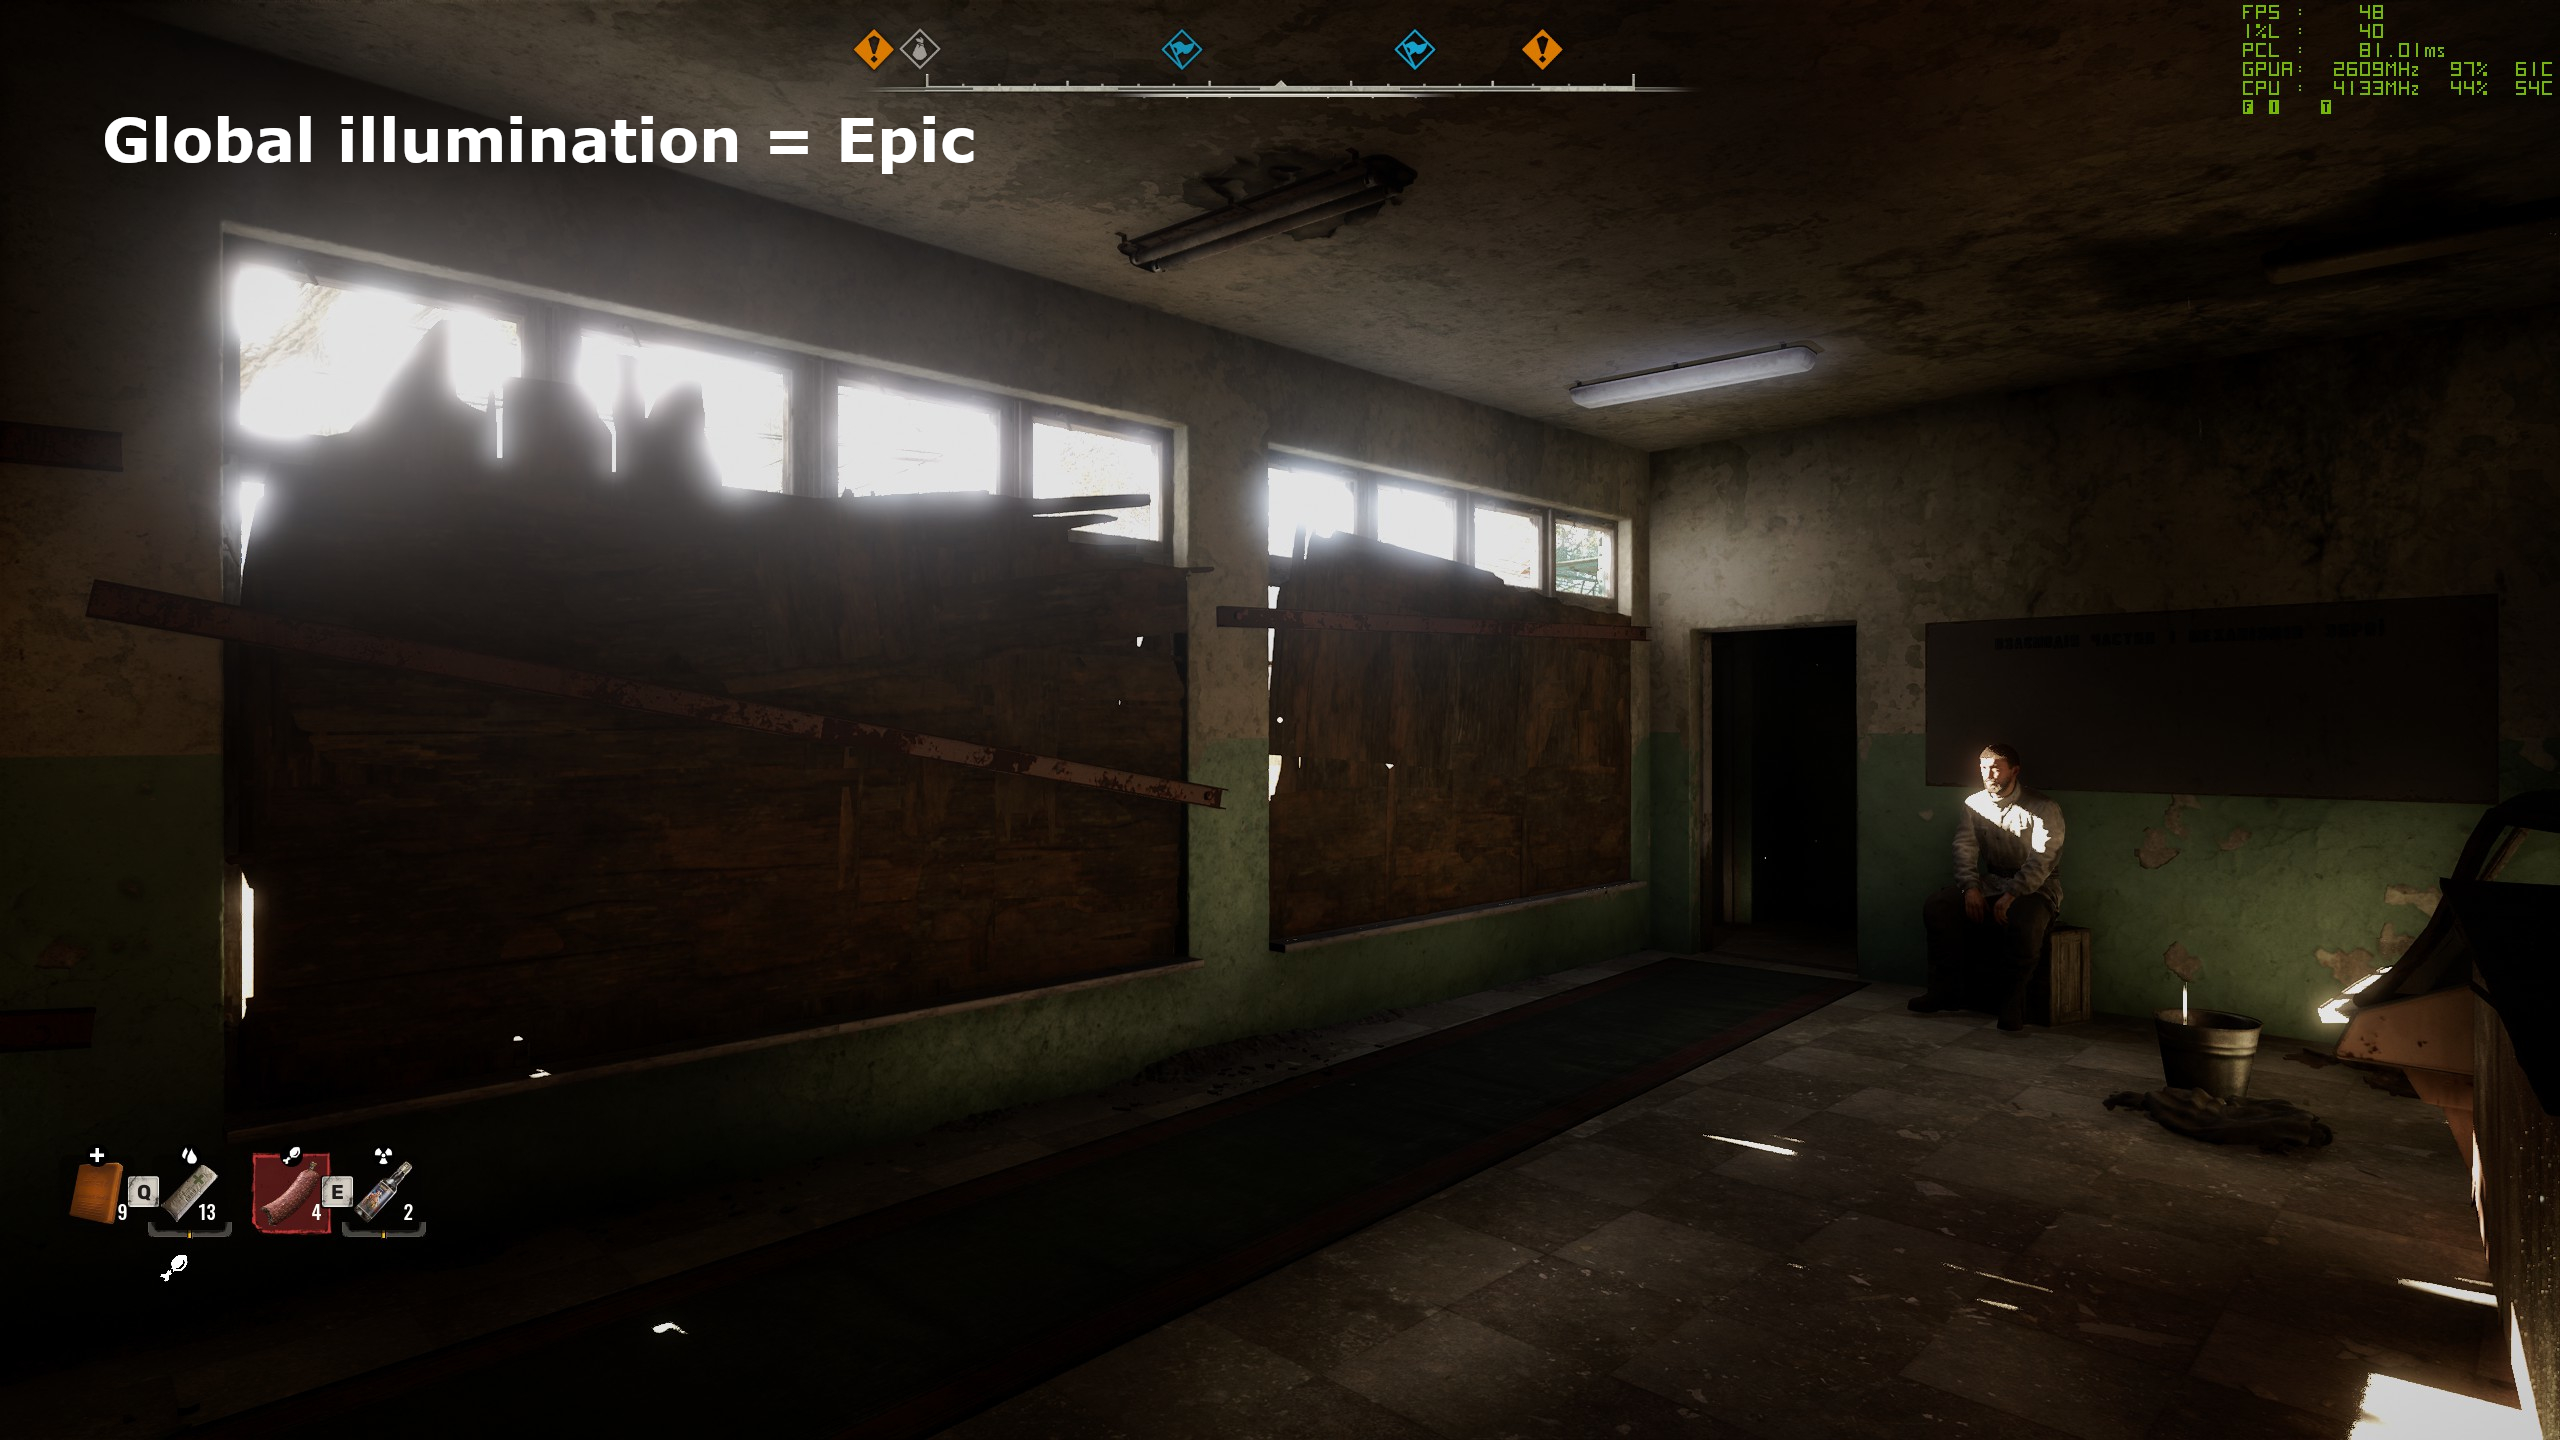
As its name suggests, global illumination (GI) is a setting that affects the overall quality of lighting in the entire world, inside buildings and outdoors. It’s also one of the few quality settings that has a noticeable affect on performance by itself.
The RX 6750 XT coped perfectly well with GI up to high, before dropping a few frames per second when set to epic. It does look the best set to that value but in more complex areas that the one shown above, it can grind down mid-range GPUs.
You might be tempted to set GI to high or epic, and drop down everything else to maintain performance, but you’re better off balancing against what the other graphics options are set to. Pretty lighting doesn’t really help if your shadows are all blotchy.
Reflections
One of Stalker 2’s weakest aspects, in terms of graphics, is how well it handles reflections. You might think that because it’s all ray-traced it’s done to perfection but while the reflections are physically correct, they’re sampled at quite a low resolution.
That’s because the software Lumen mode used in Stalker 2 evaluates lighting where rays interact with a surface cache (a dataset of what an object’s materials are like from different views), rather than on a per-triangle basis.
The quality setting for reflections seems to just increase the sampling quantity but at least the performance impact isn’t huge. Depending on what other settings one uses, it can be too small to be unnoticeable but if you have, say, a high level of foliage detail and shadow quality, then the reflection setting will matter.
Just as with GI, you’re probably best off using the same value for reflections as you do for object detail, shadow quality, and foliage.
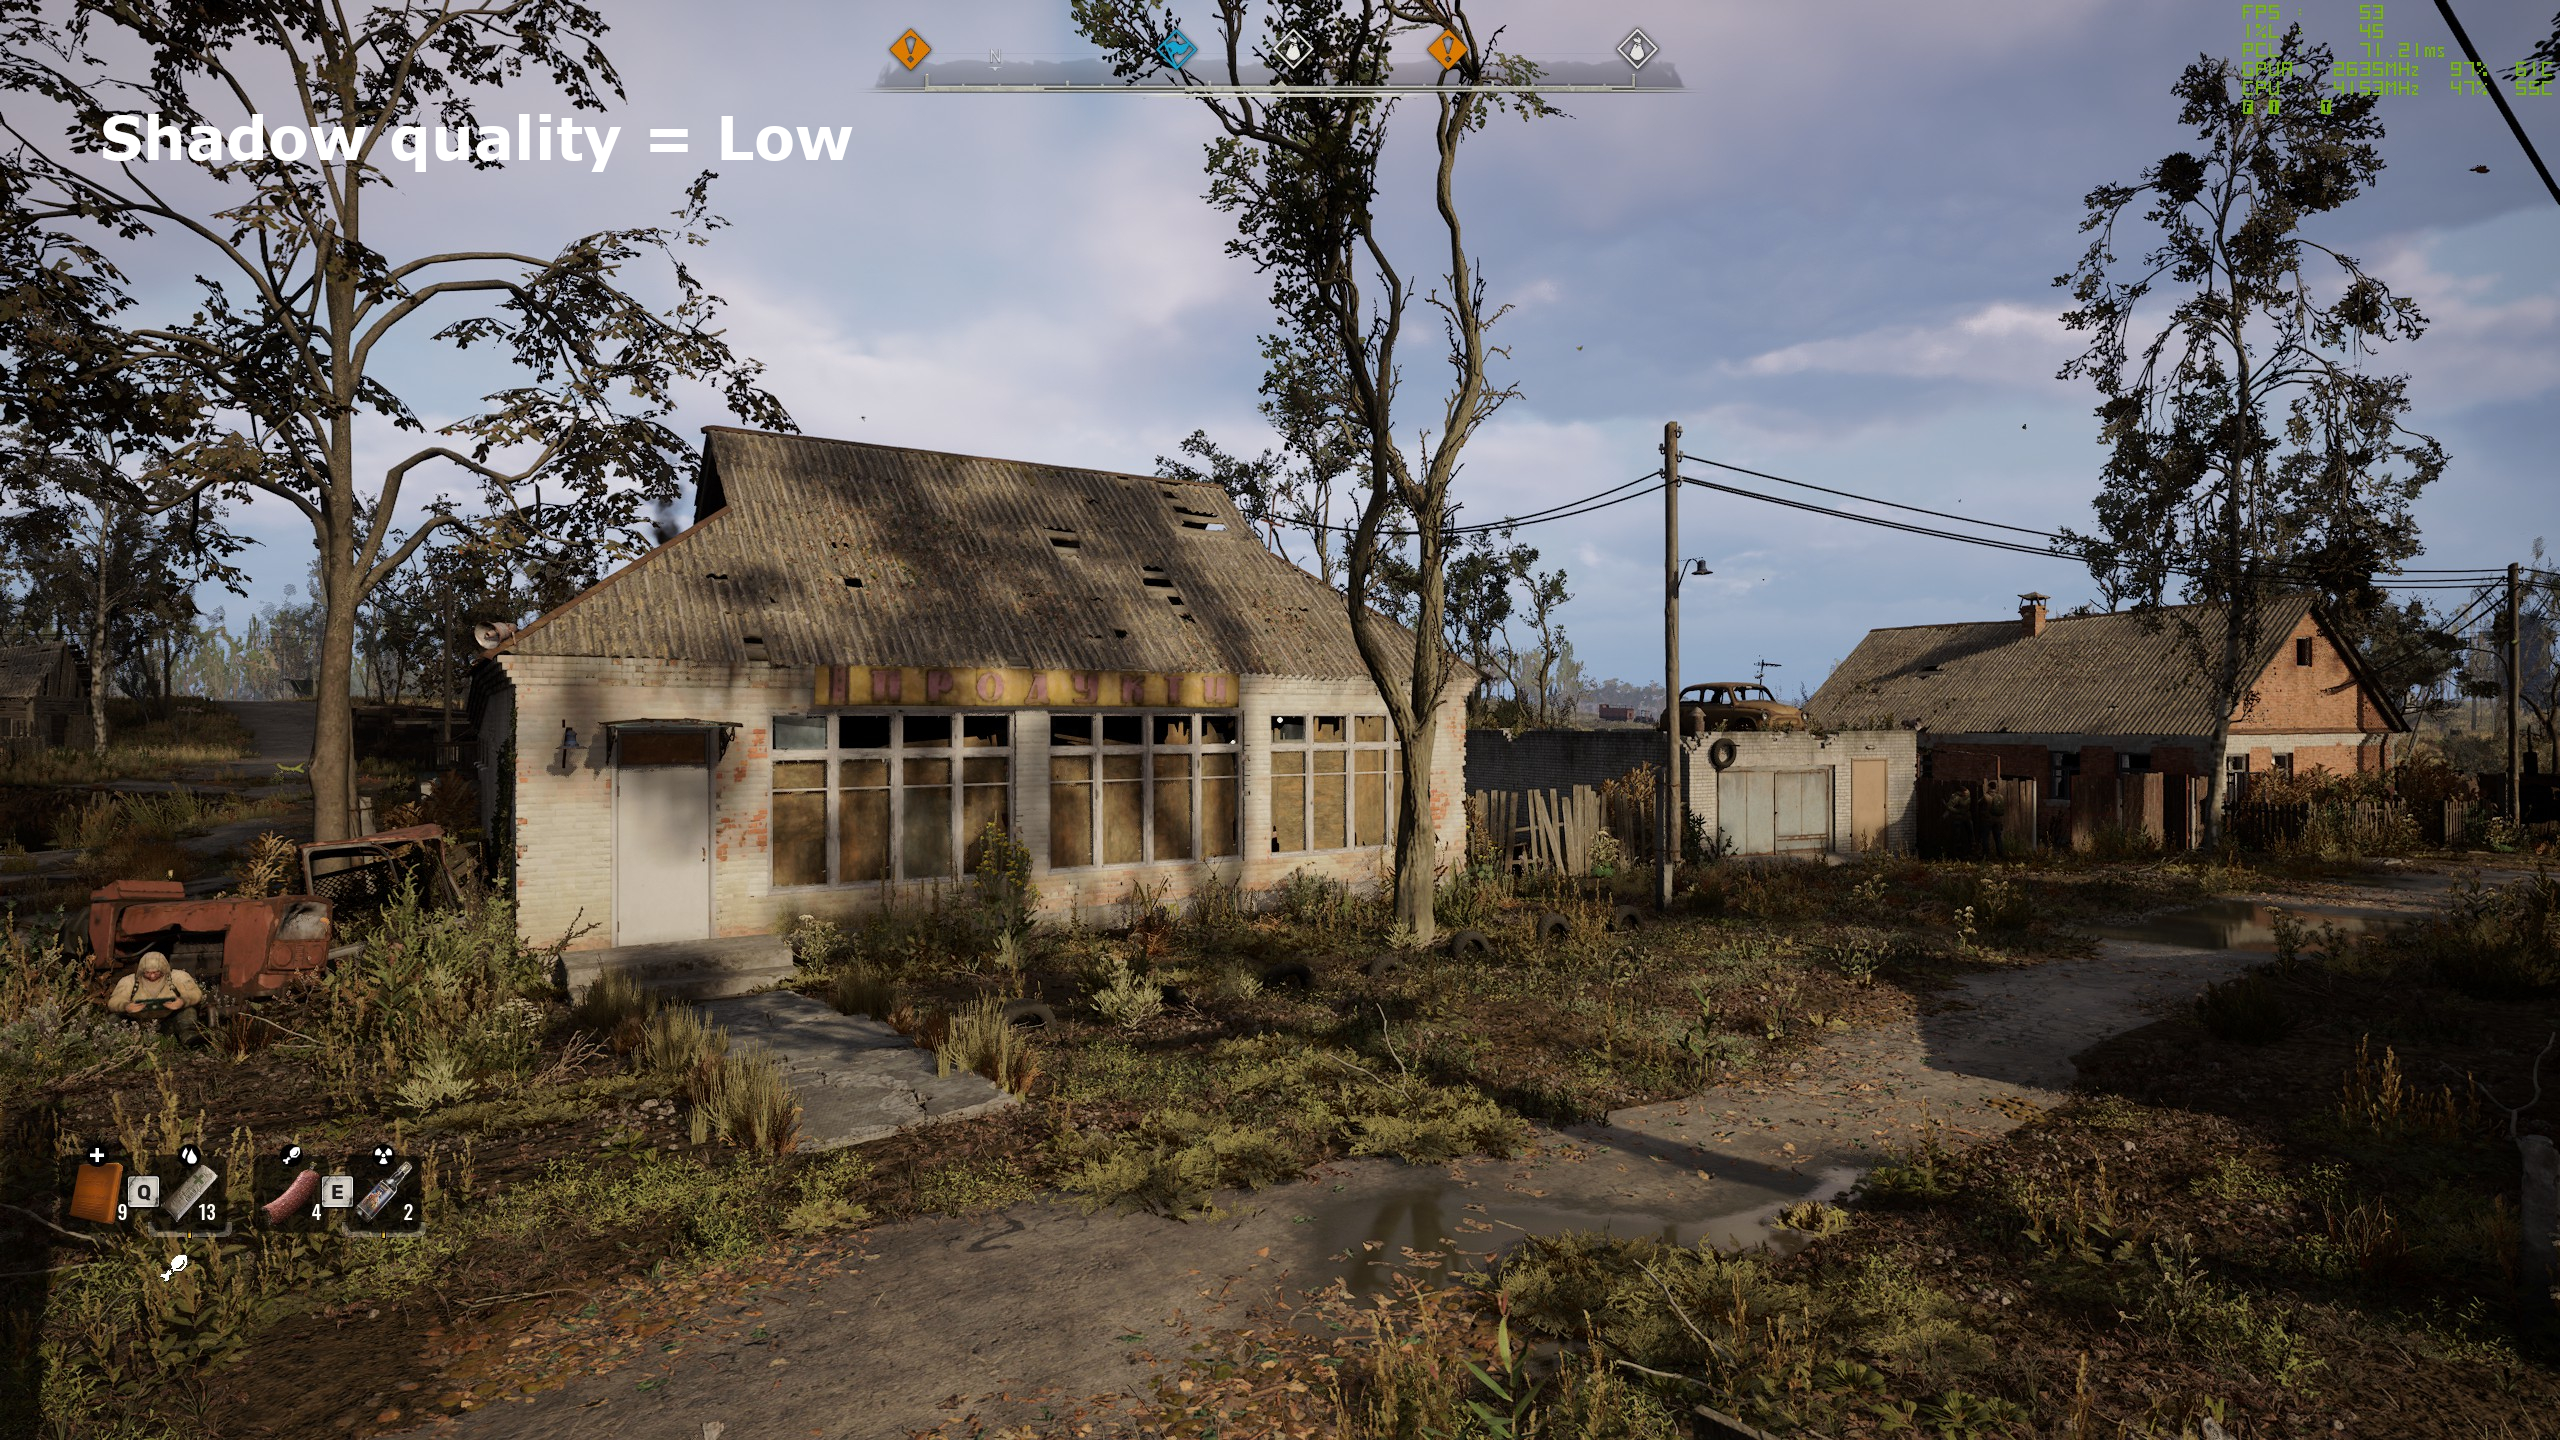
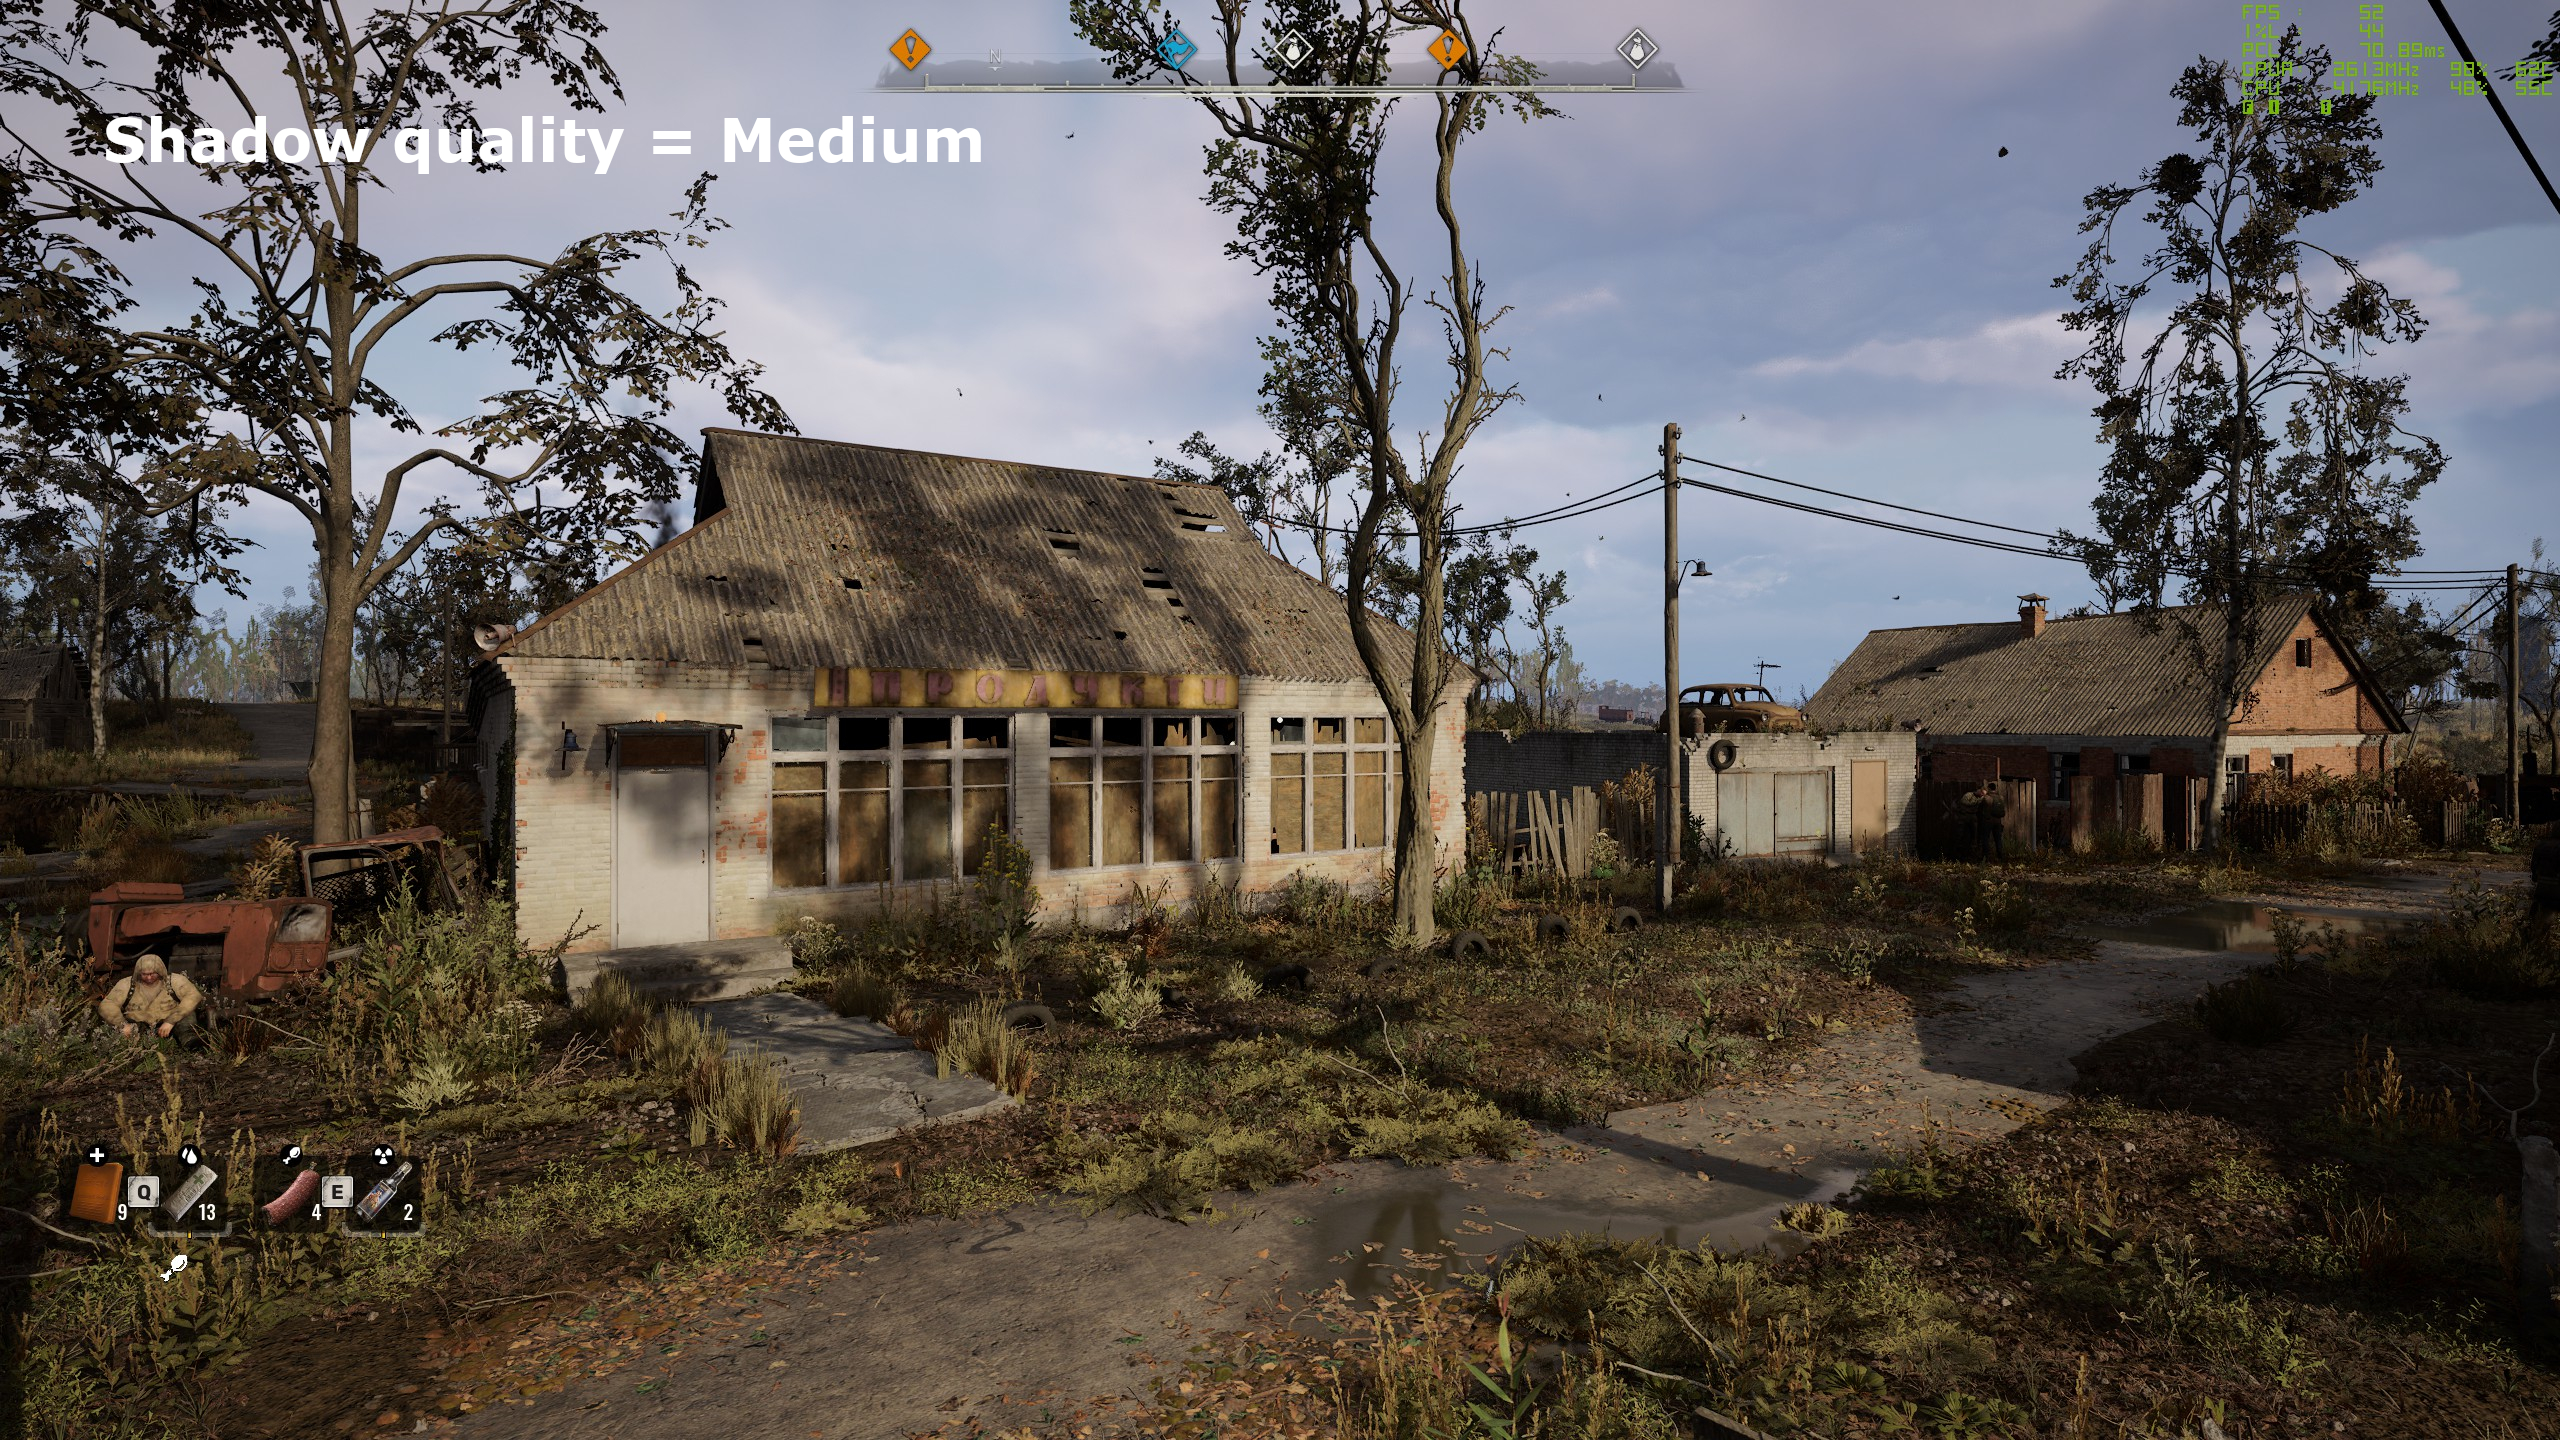
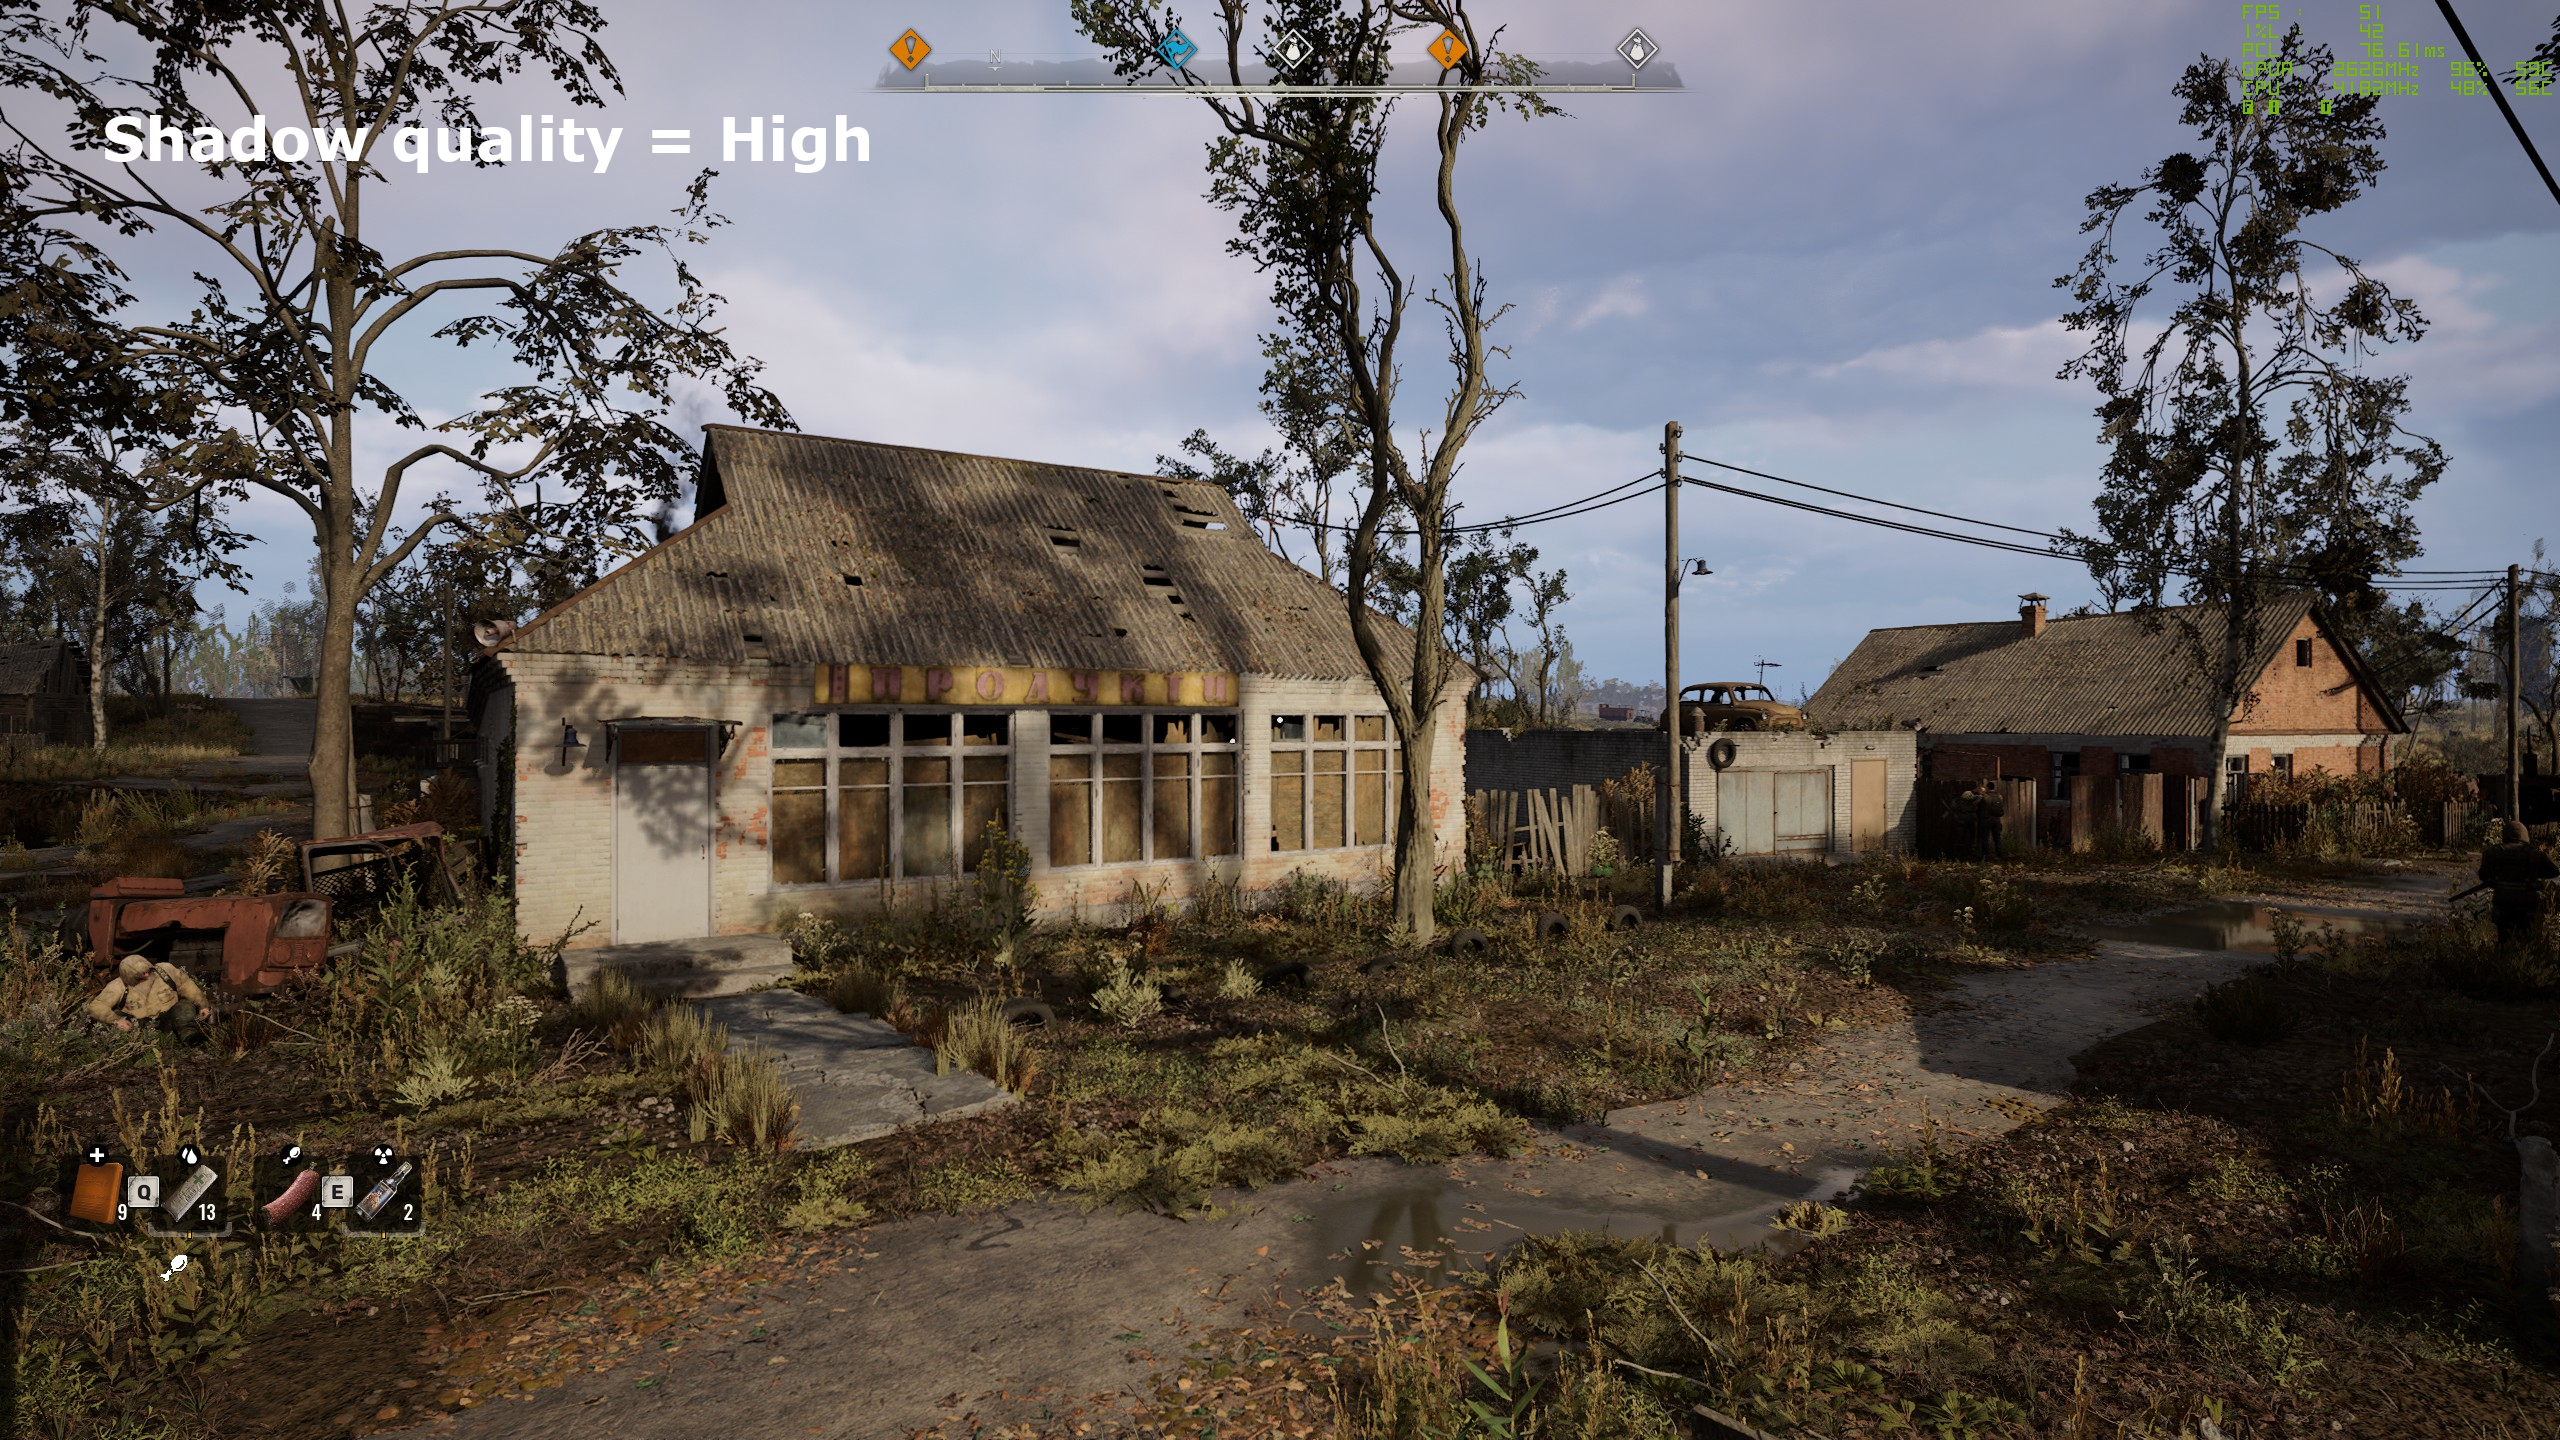
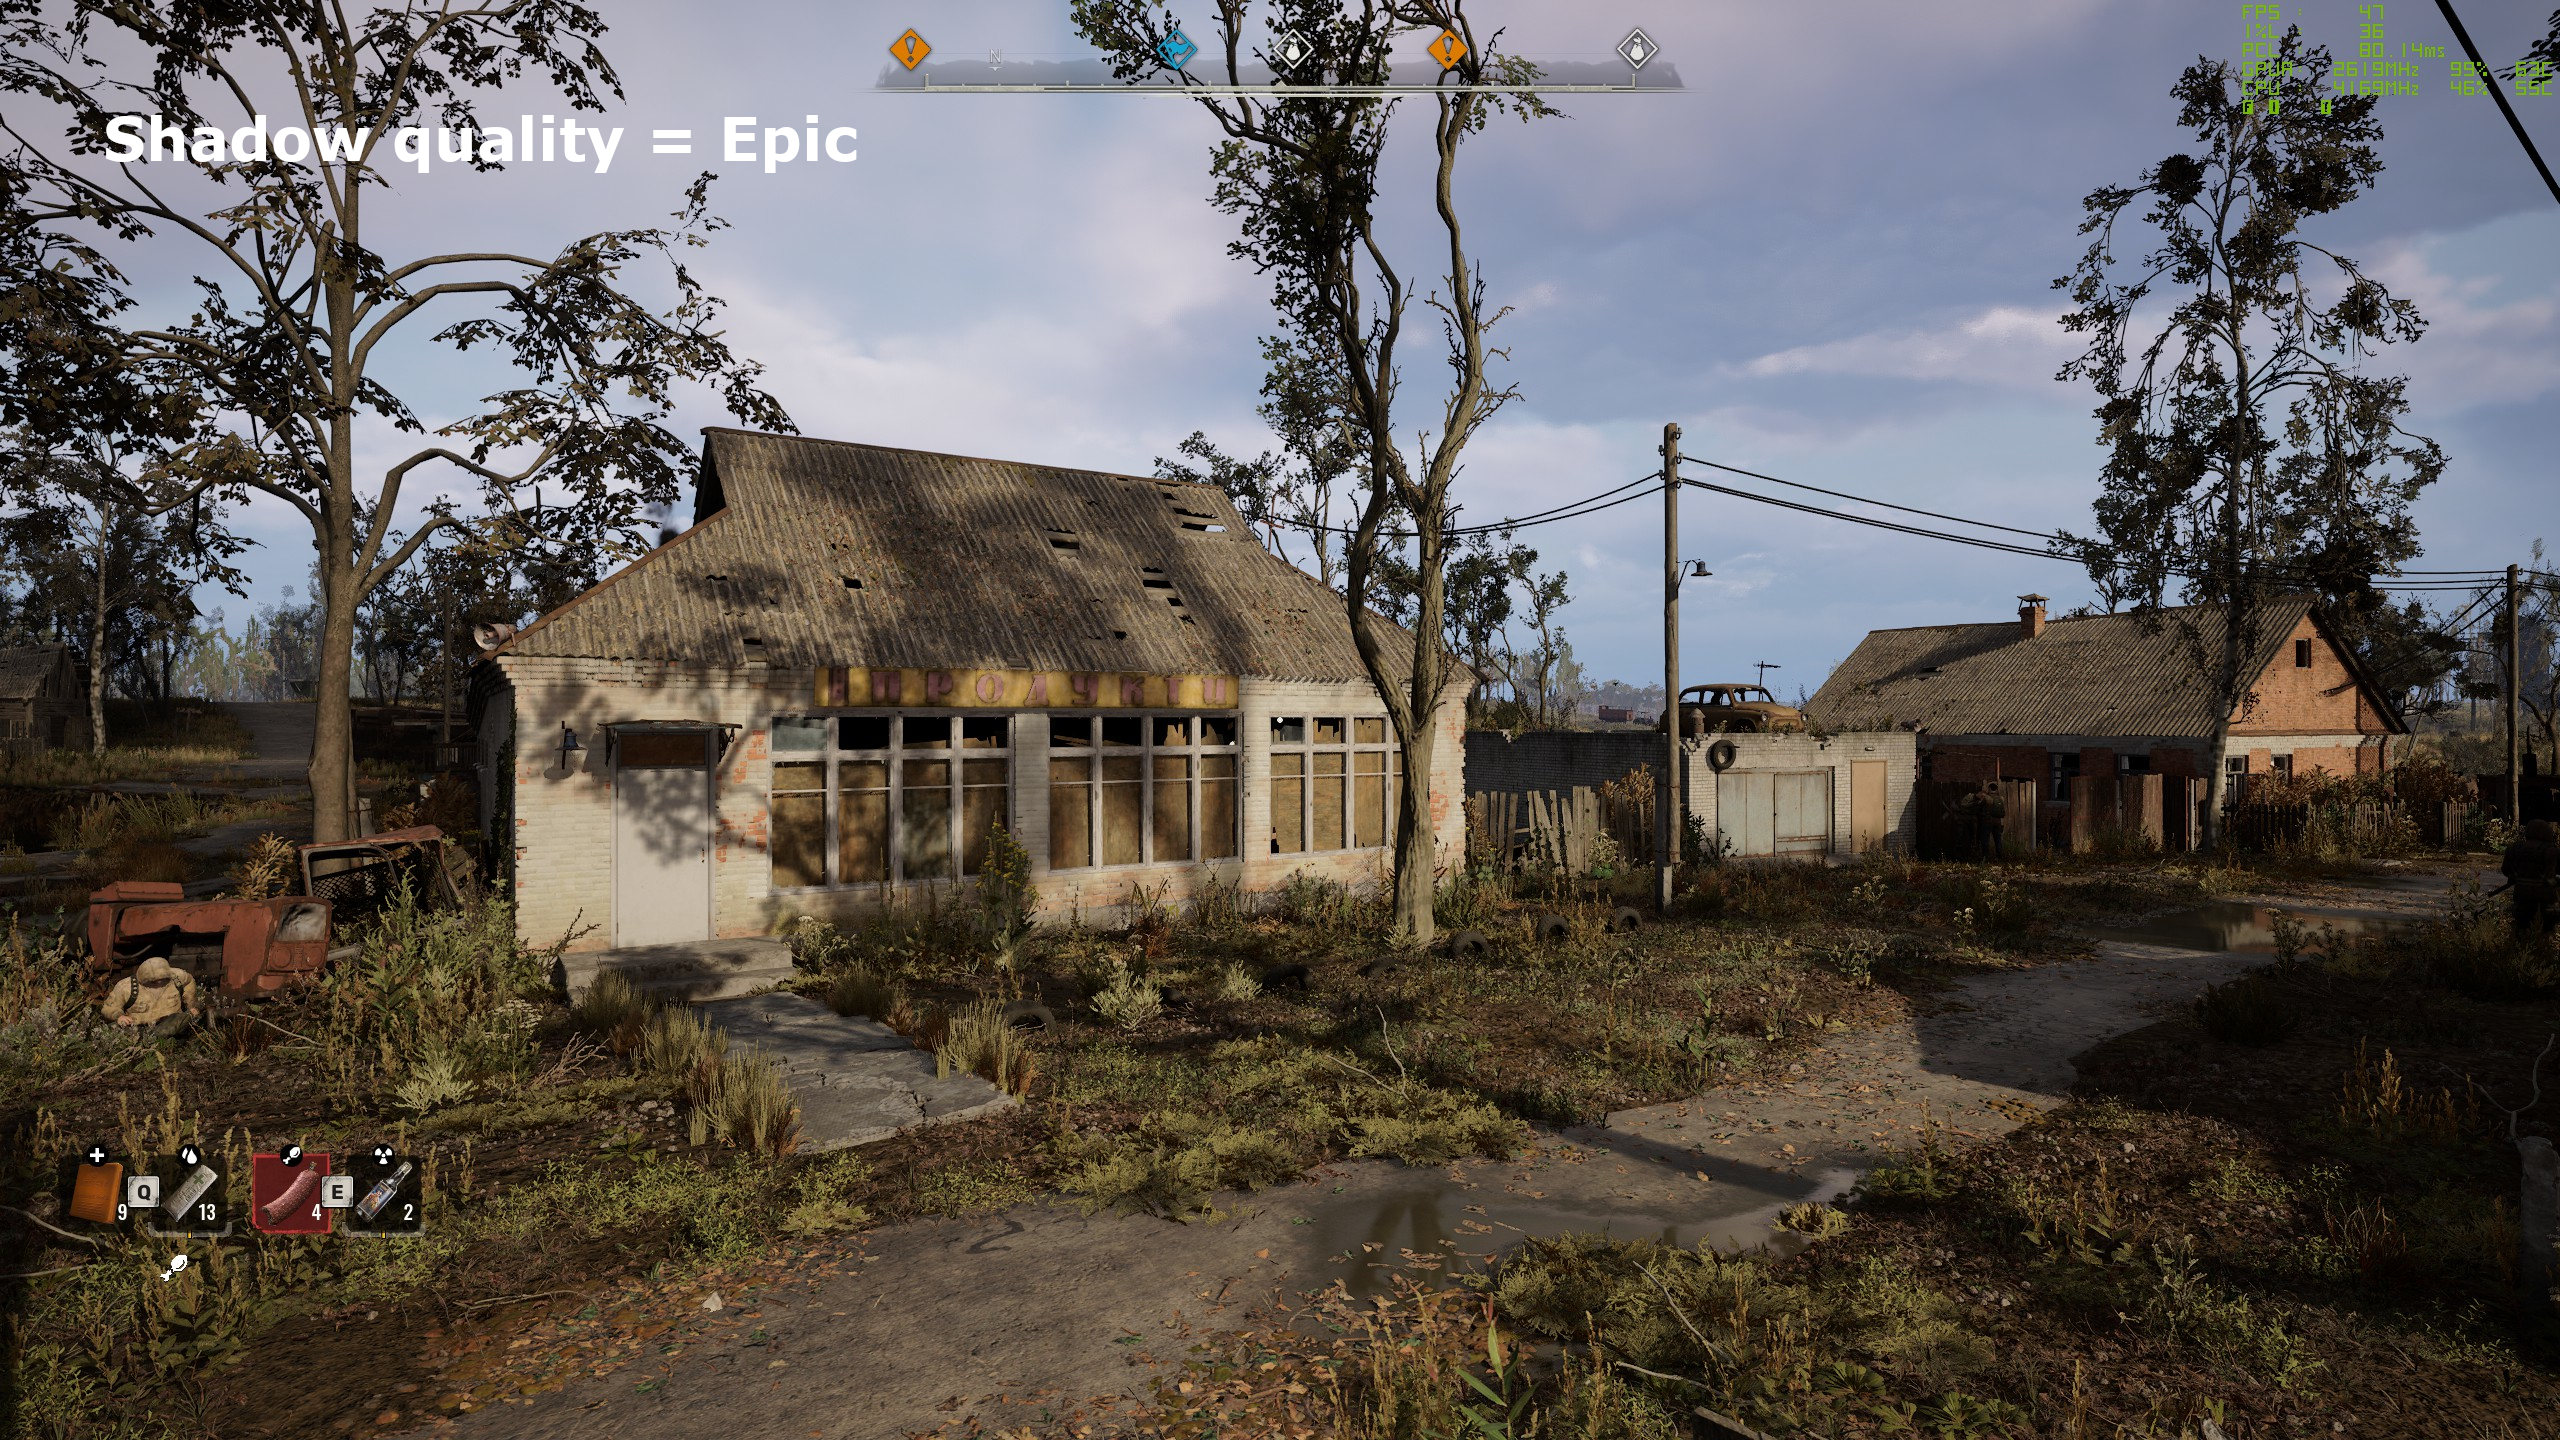
Shadow quality
Out of all the settings, shadow quality is the one that I’ve found to have the most noticeable impact on performance and visual fidelity by itself. Just as with reflections, the game always renders shadows in a seemingly physically correct manner, but they’re quite low in resolution.
At maximum settings, shadows are sufficiently sampled to appear smooth and consistent from a distance, but up close they just soften into quite a mushy appearance. Or rather, some shadows do.
It seems that static objects, such as buildings, generate quite sharp shadows. However, if the objects move, such as NPCs, enemies, and trees, then the quality of the shadow it casts varies quite a lot (with trees being the worst).
Unless you have a high-end GPU, you should stick to using the medium or high value for shadow quality, and put up with the somewhat fuzzy appearance.
Foliage quality
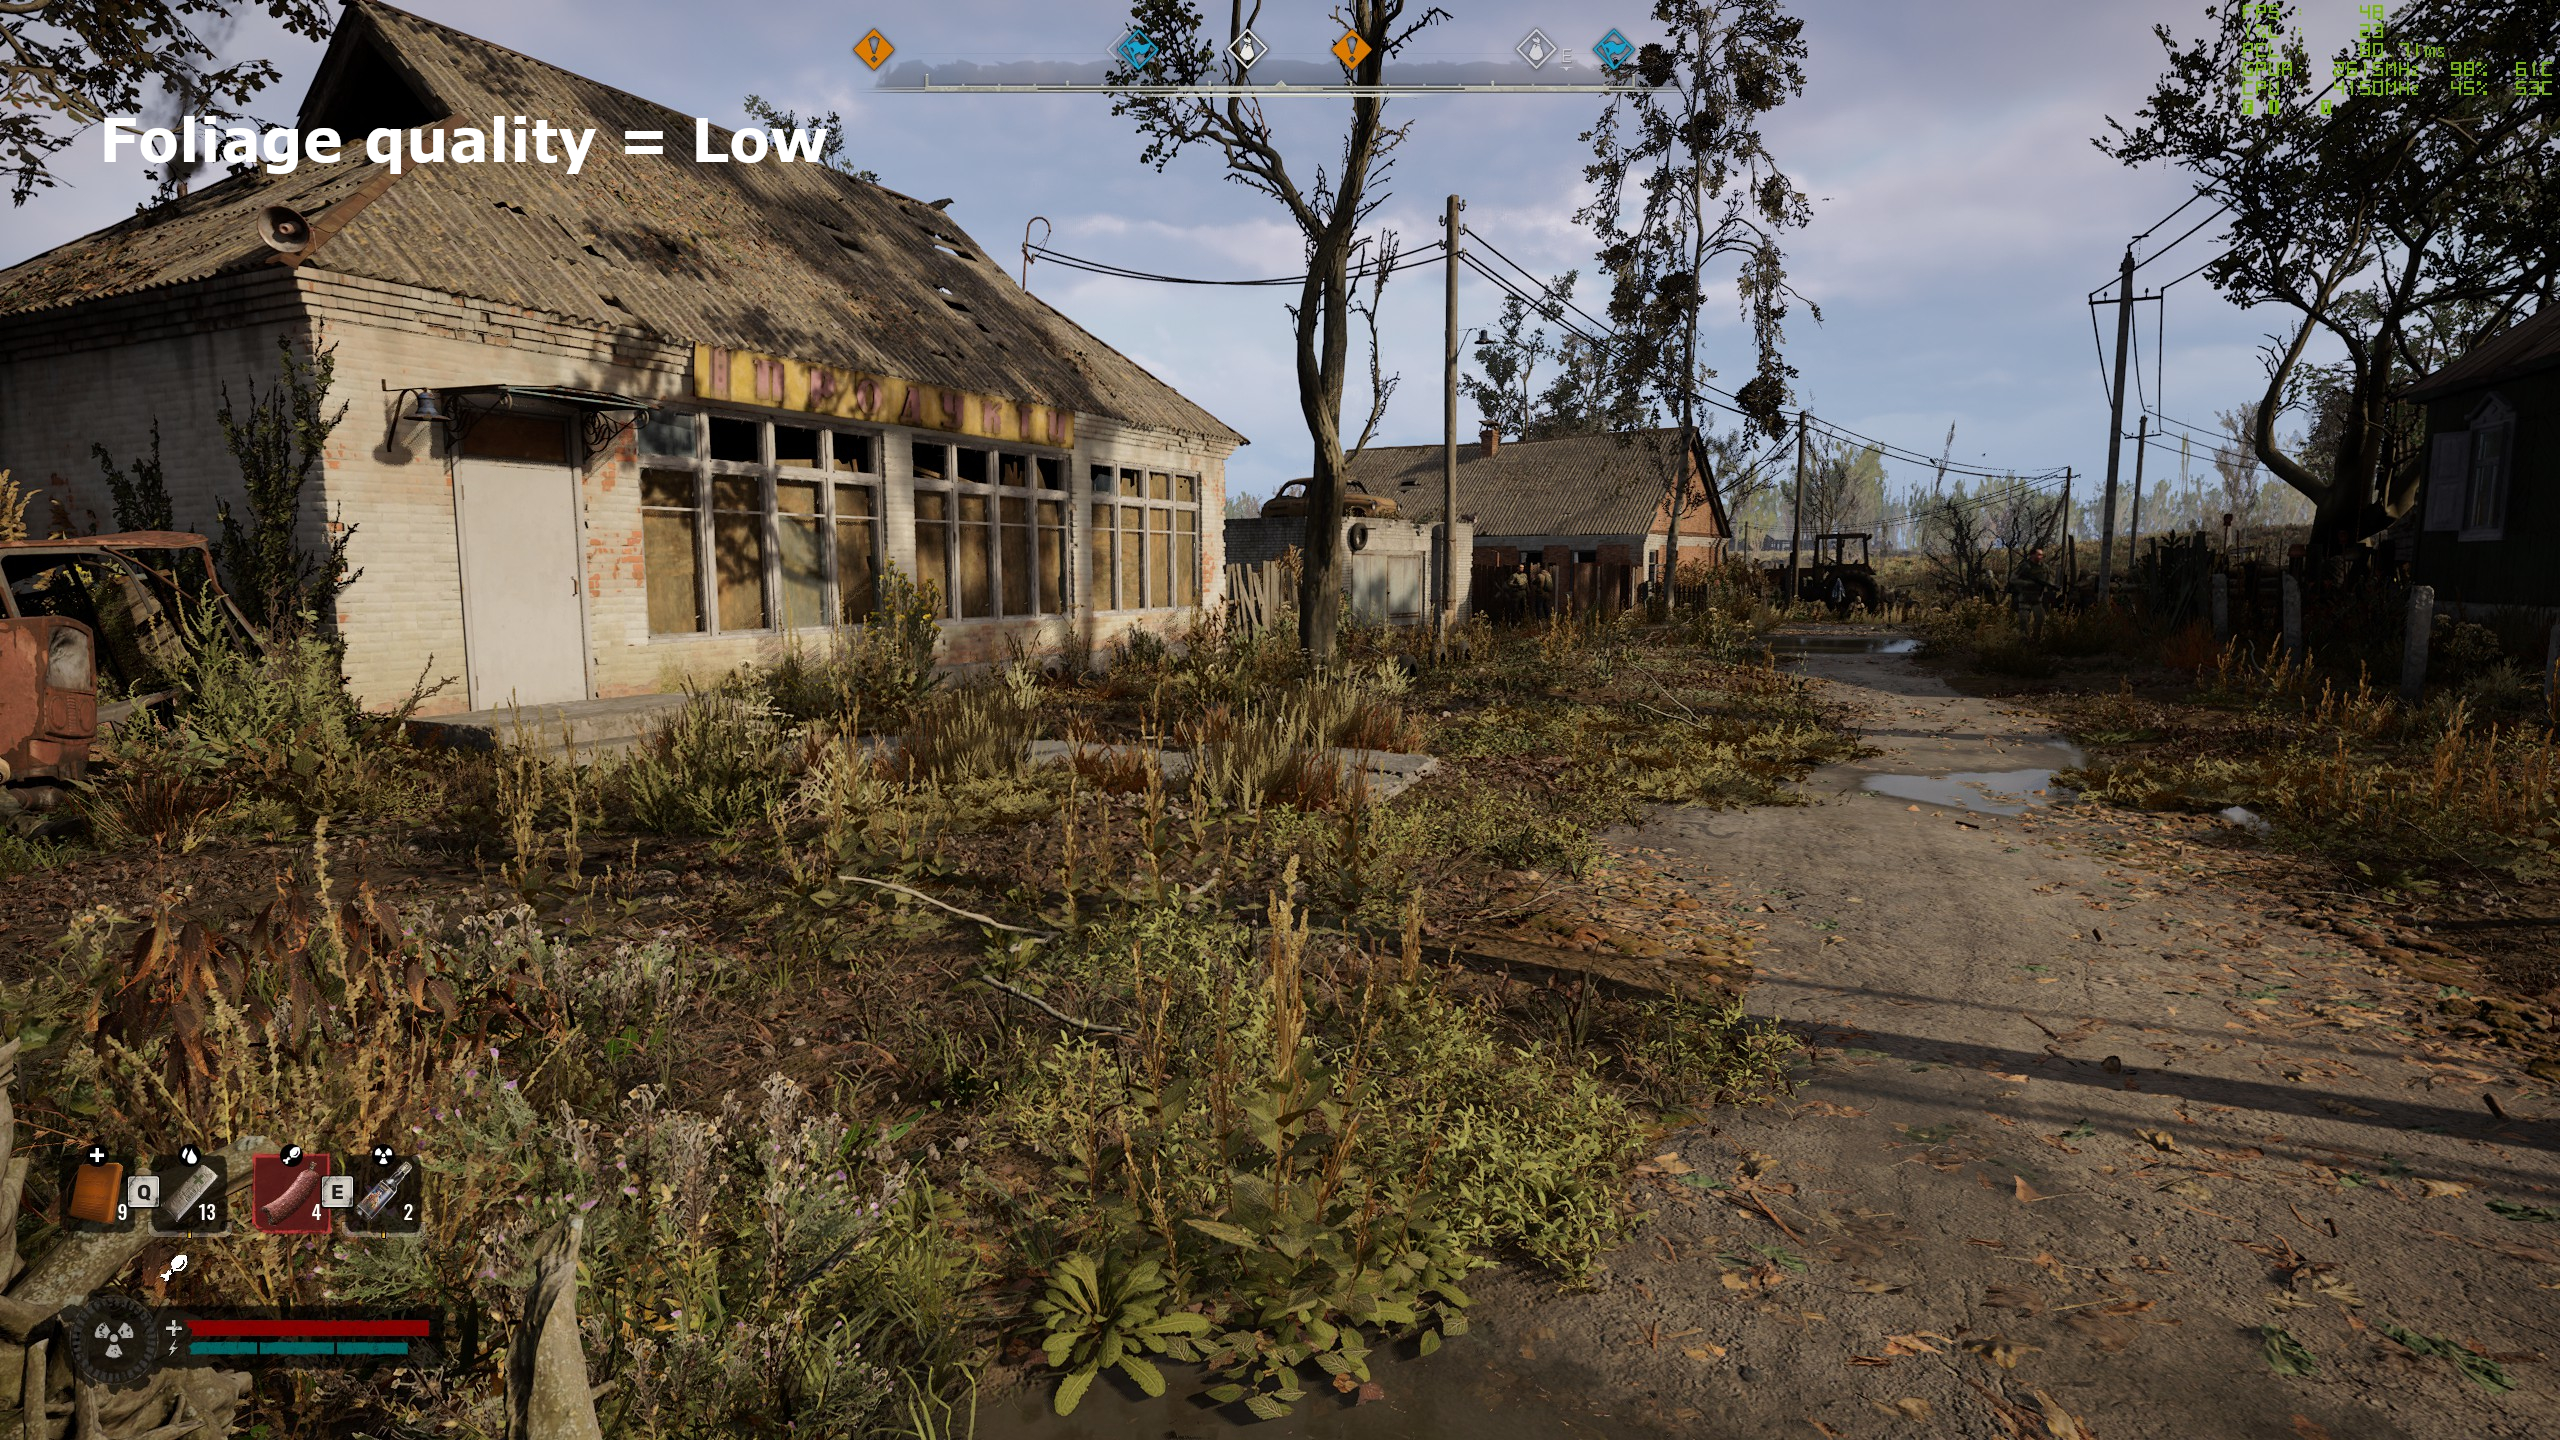
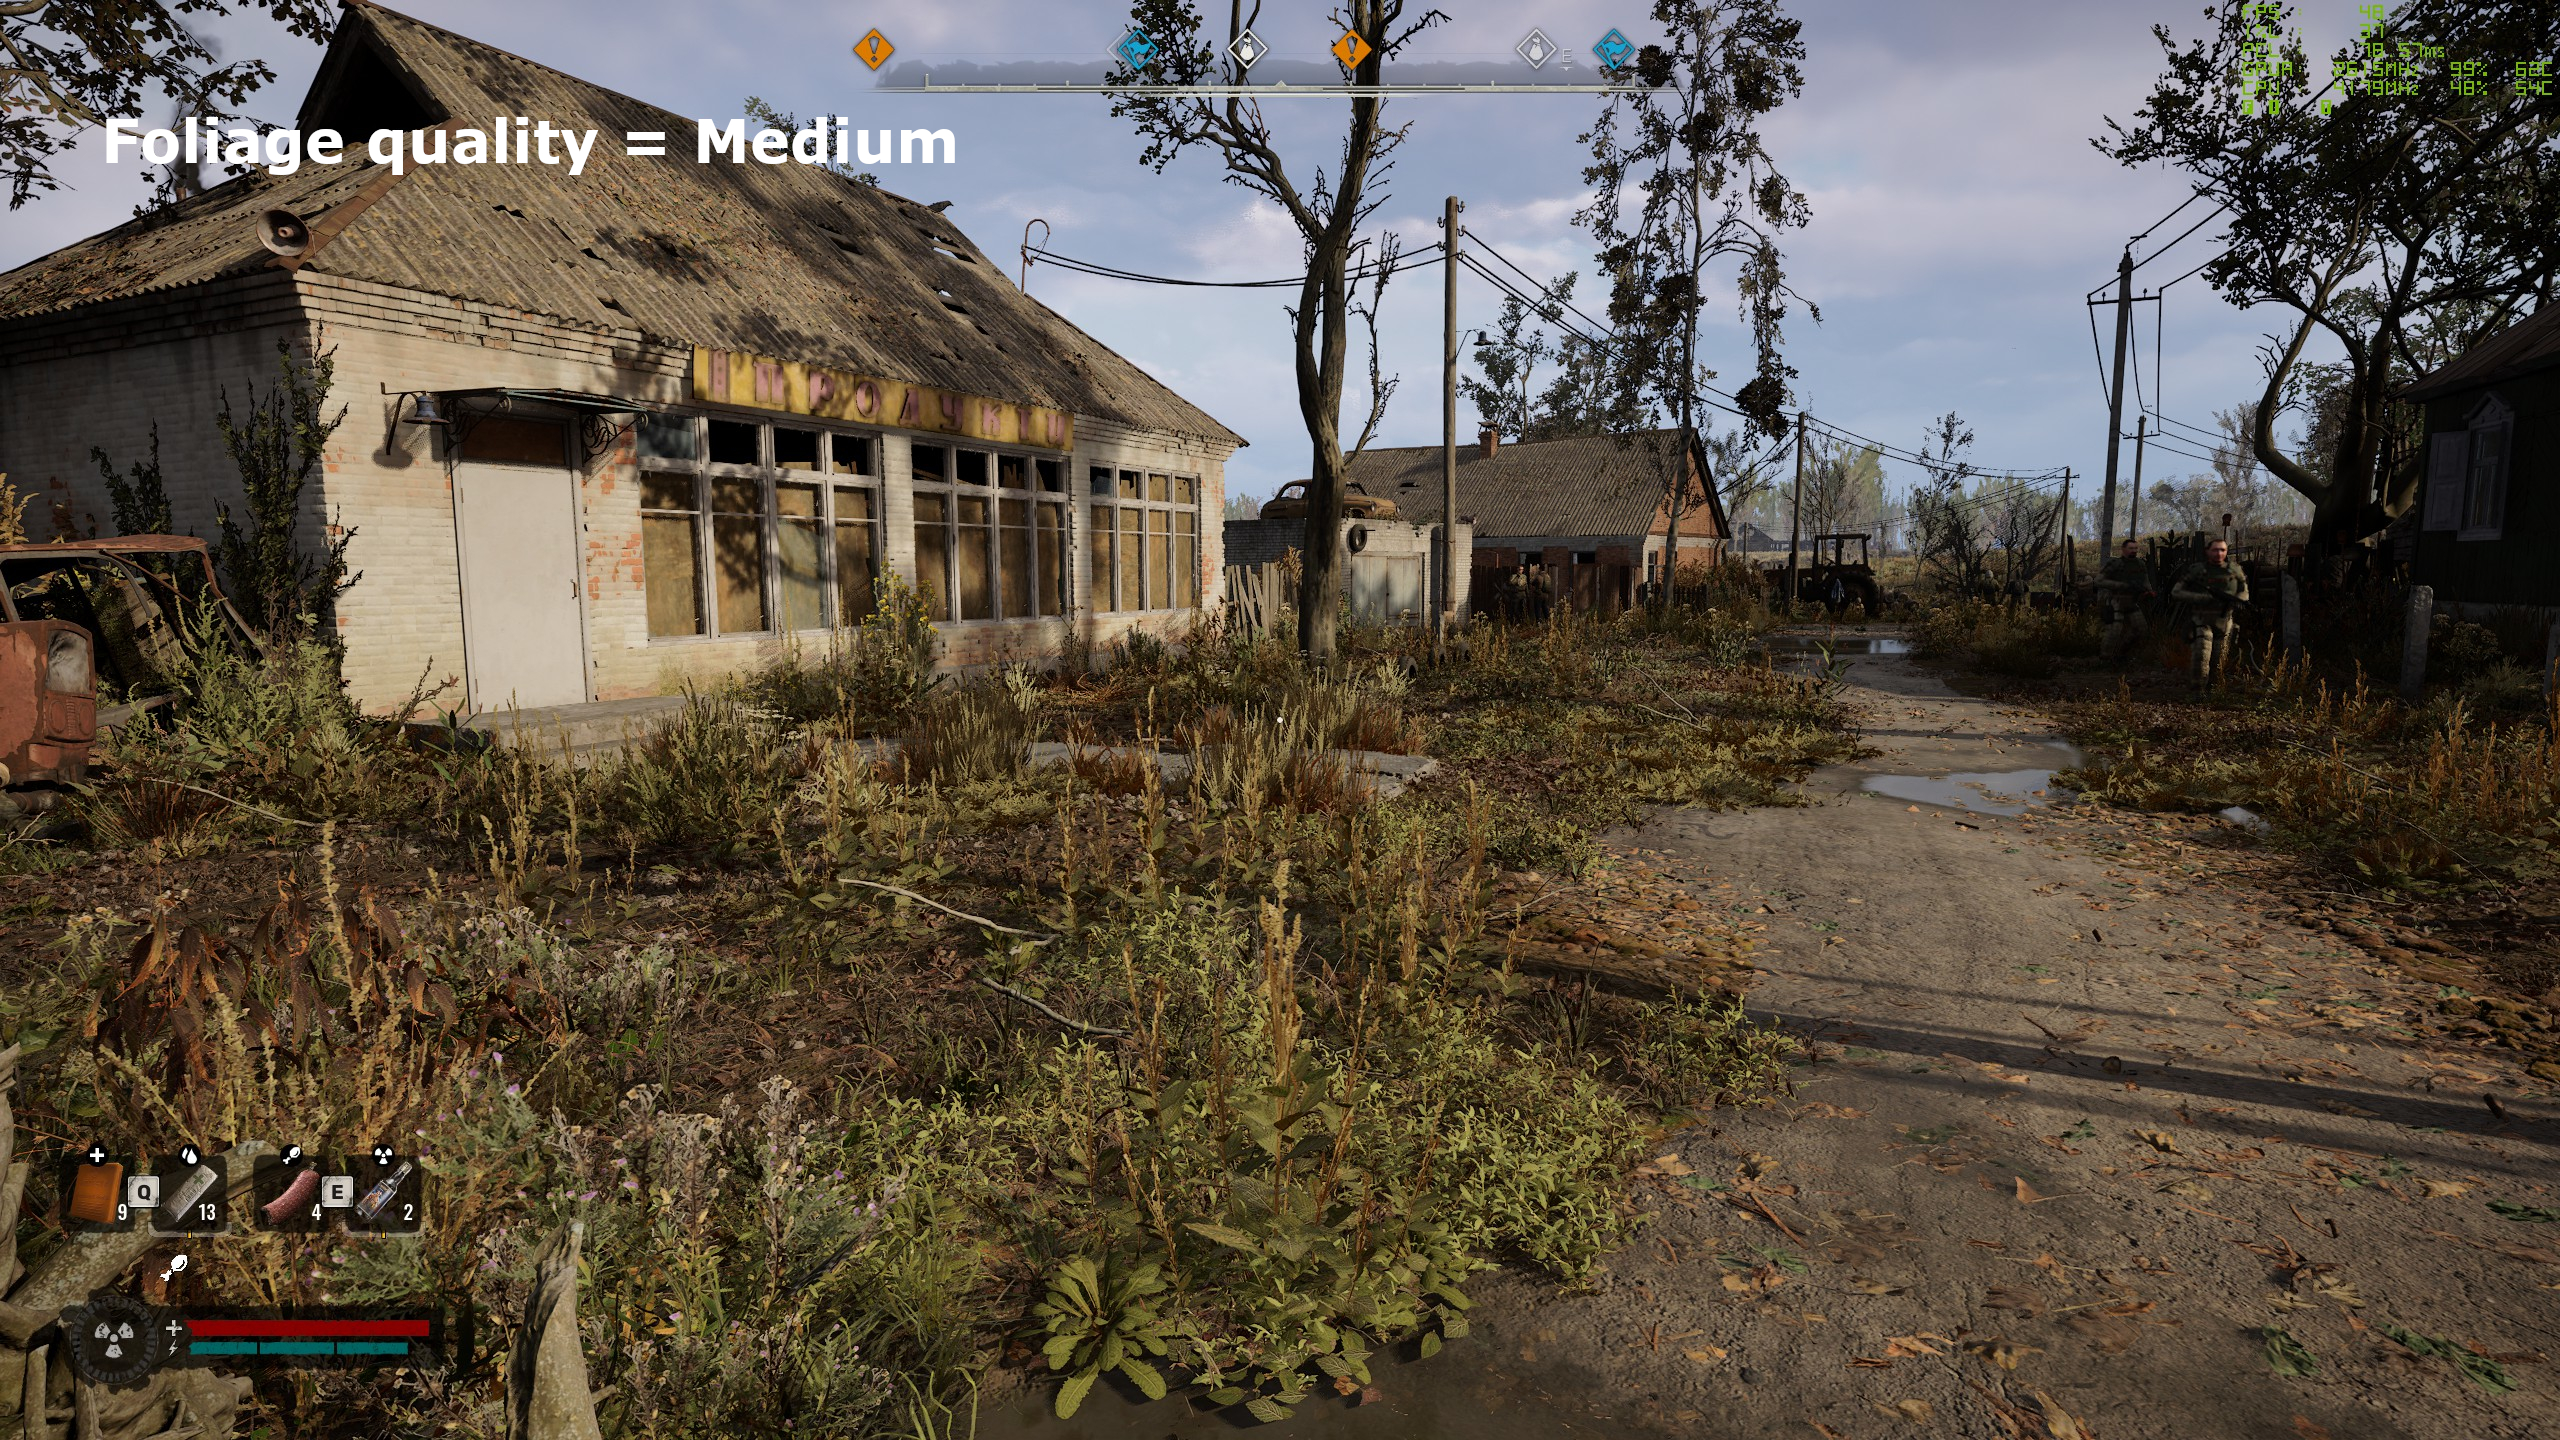
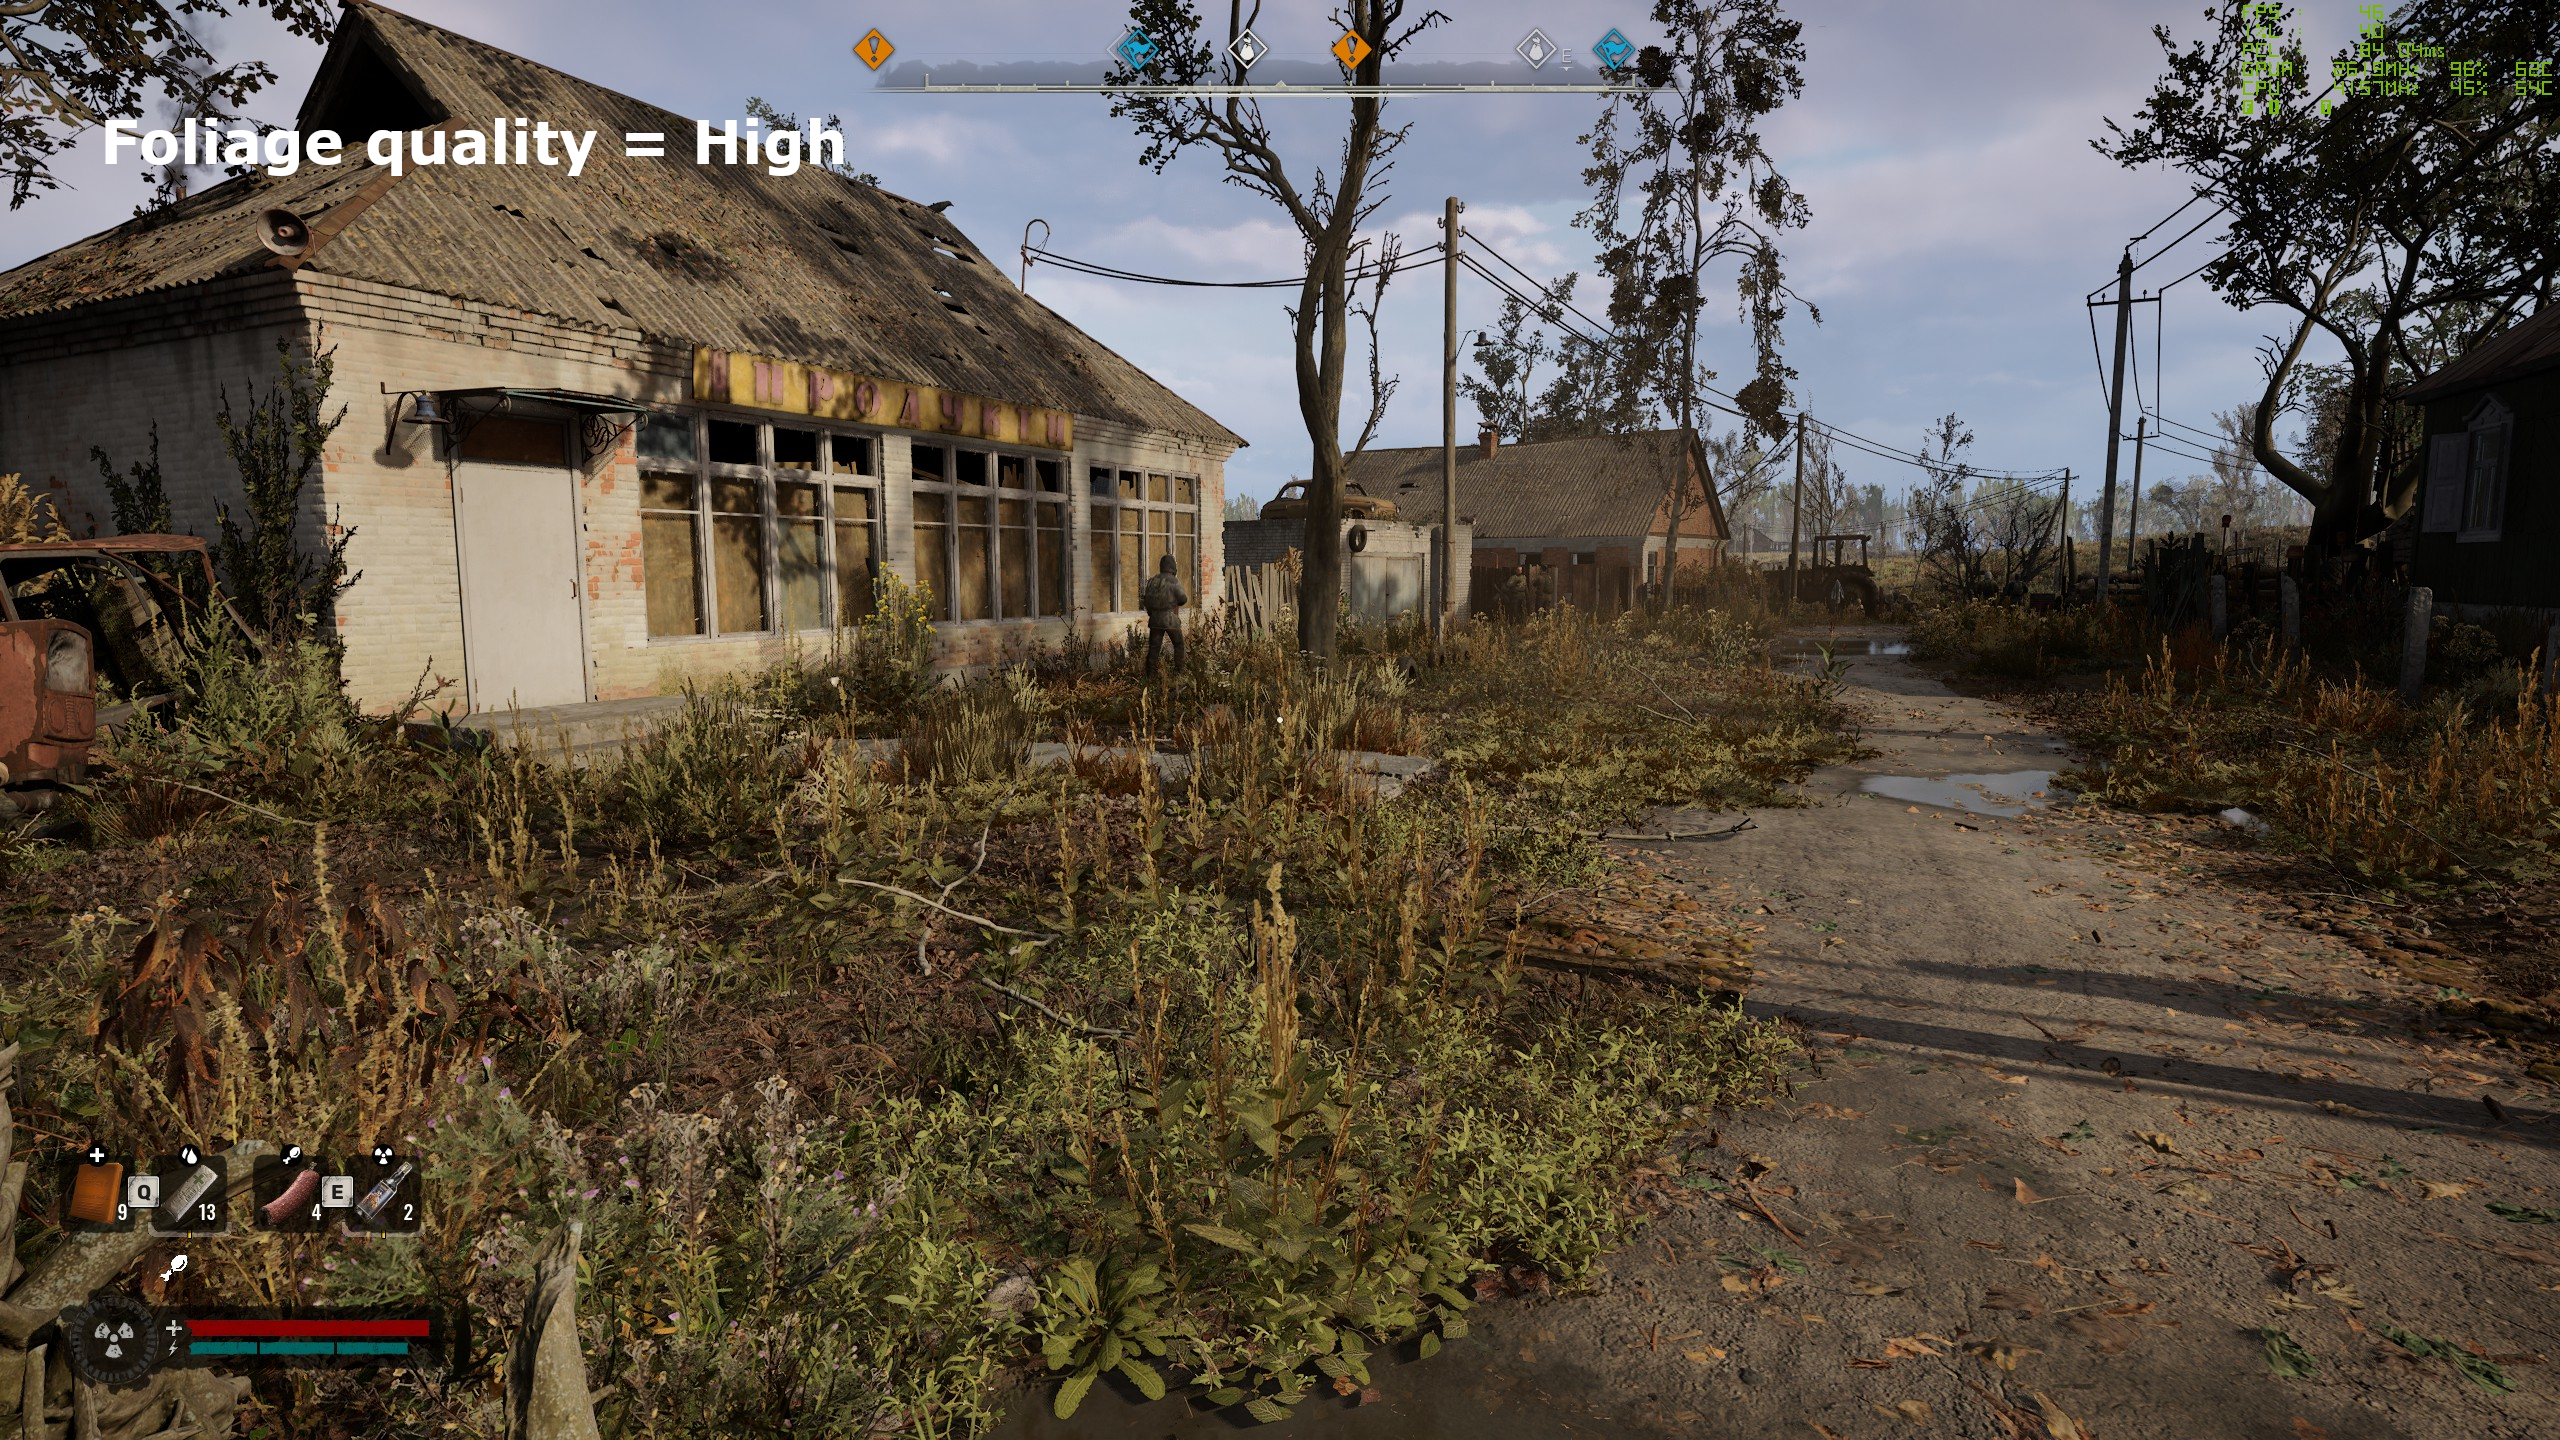
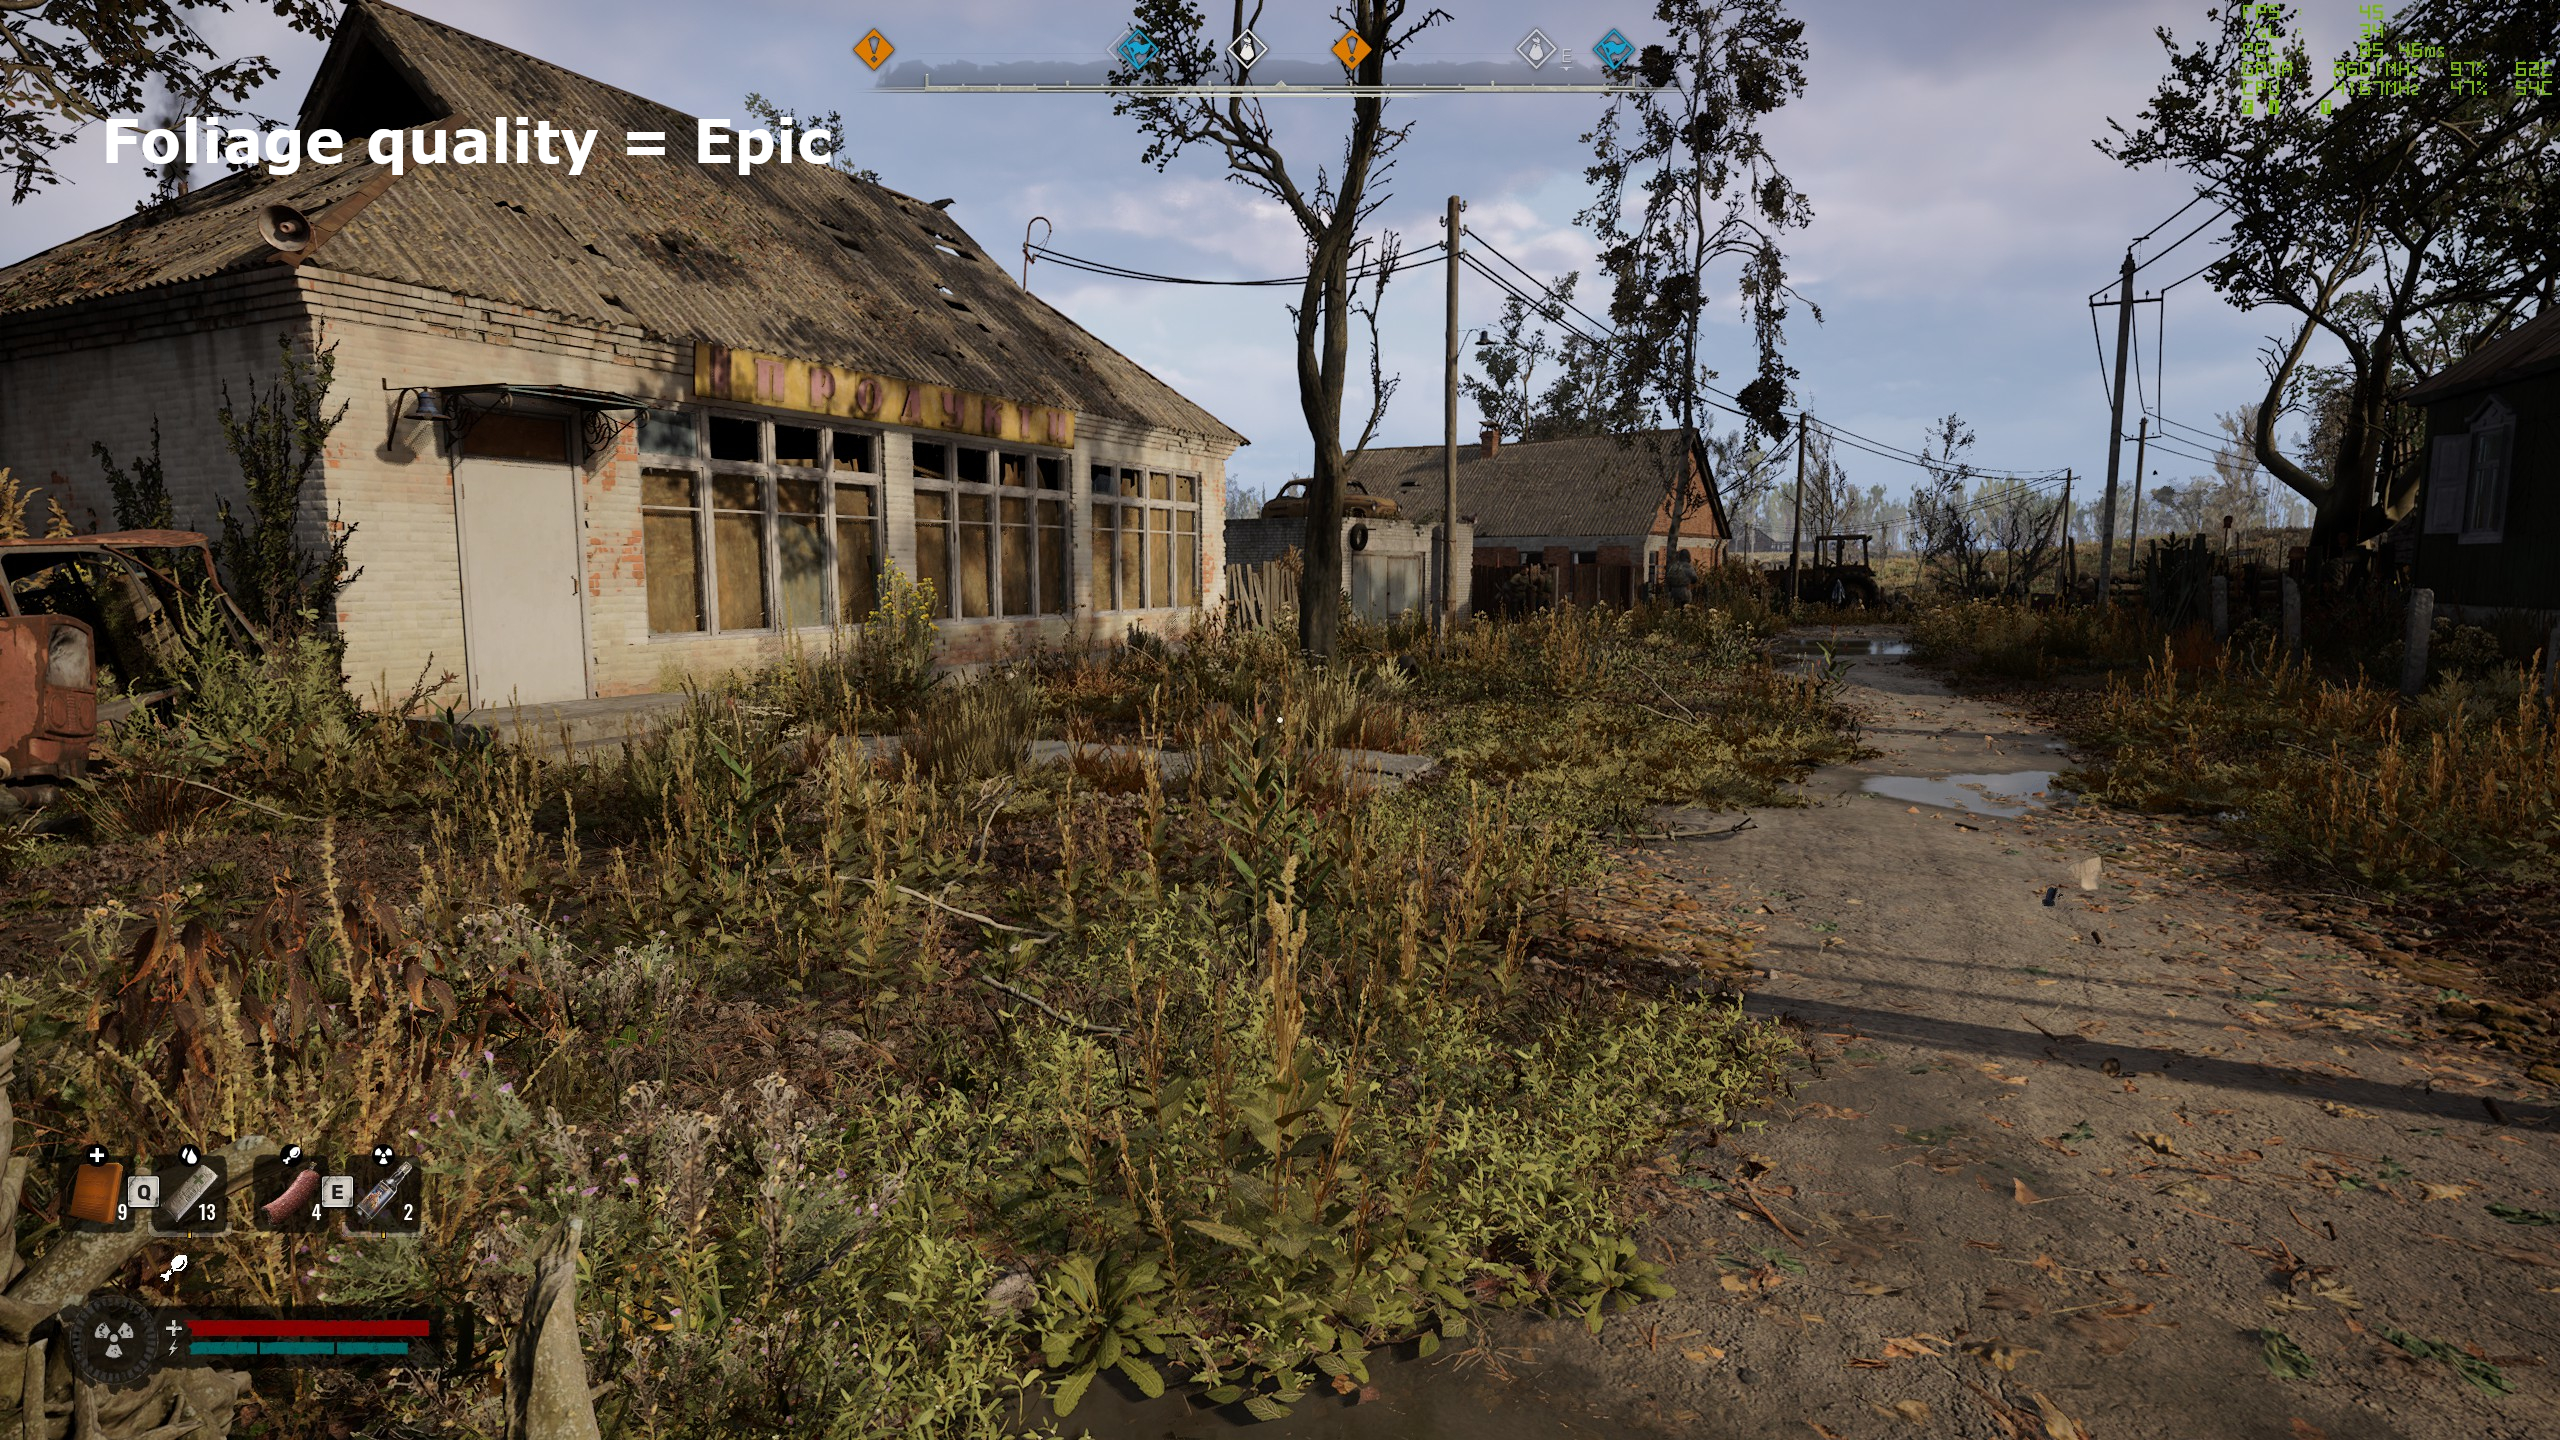
The foliage quality setting in Stalker 2 greatly changes how much grass you’ll see in the open world, as well as the overall appearance of trees and bushes (though to a lesser extent than with grass).
Just as with shadow quality, it looks best with the epic setting but it does affect the performance, especially when coupled with high settings for environment draw distance, shadows, and global illumination.
There’s not a wealth of difference between the medium and high settings, though, so if you’re looking to save a bit of performance while using the high preset, then it’s worth knocking this one down a touch to claw back a few frames per second.
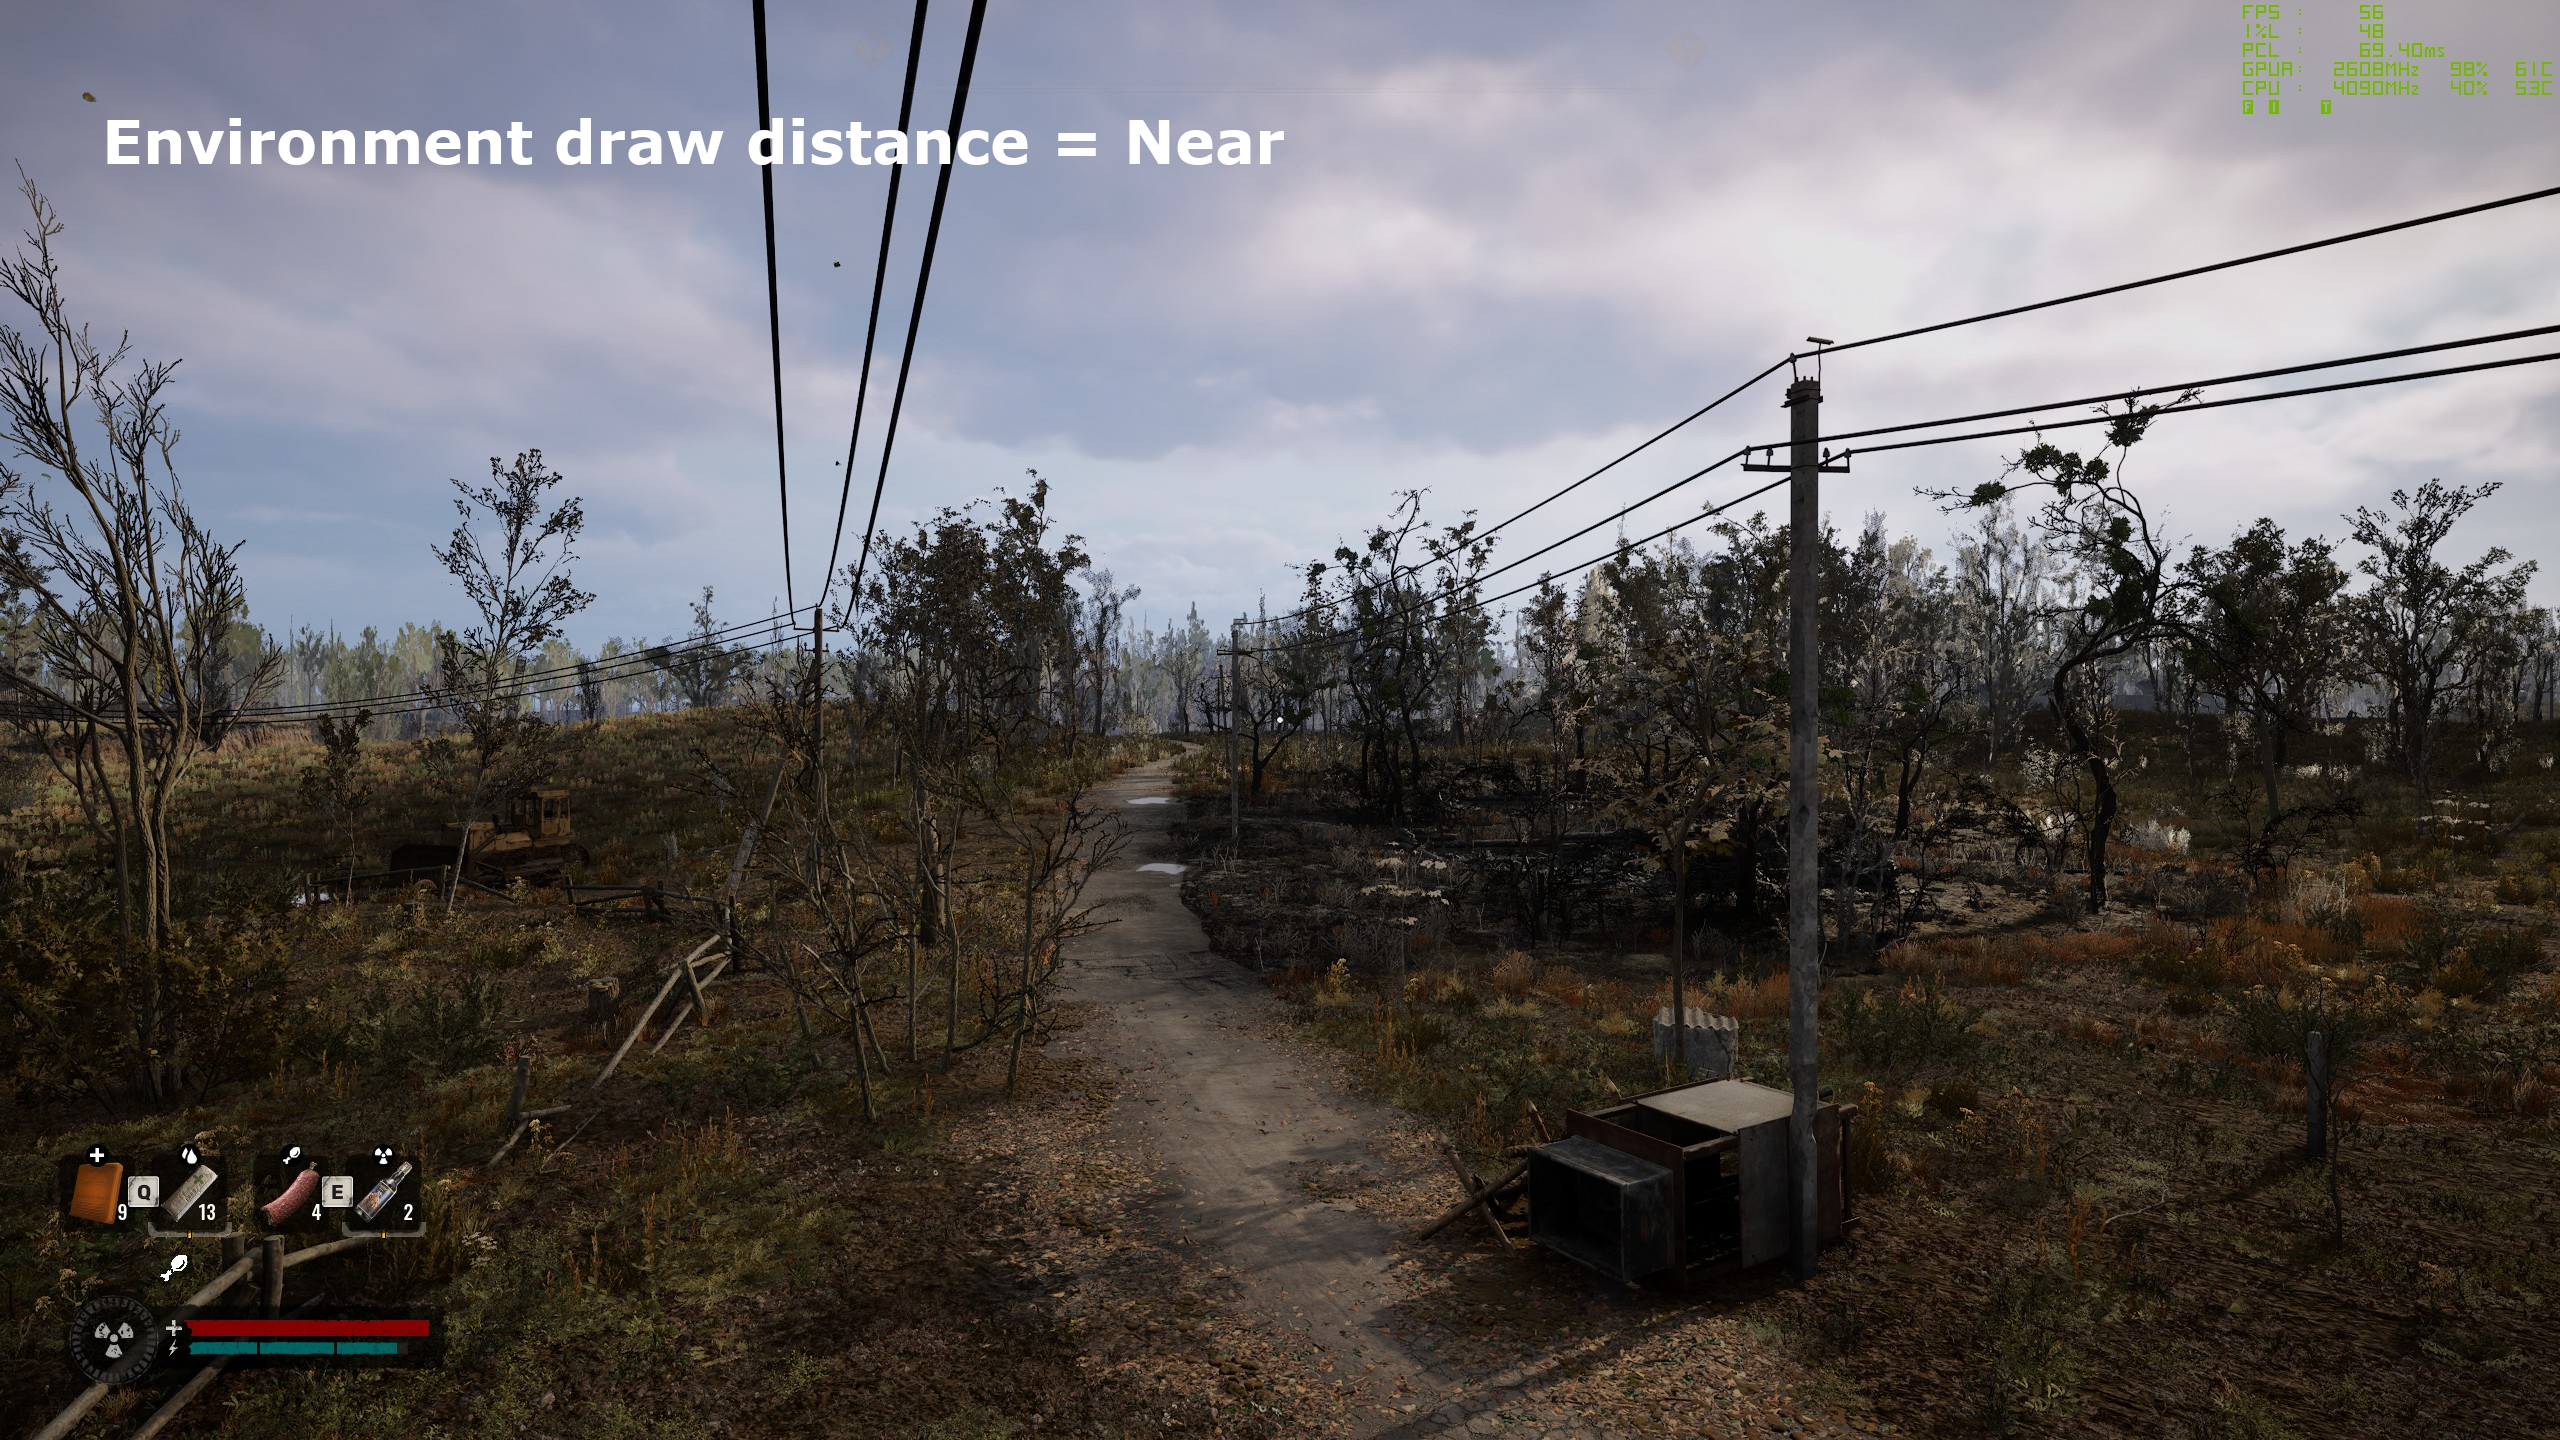
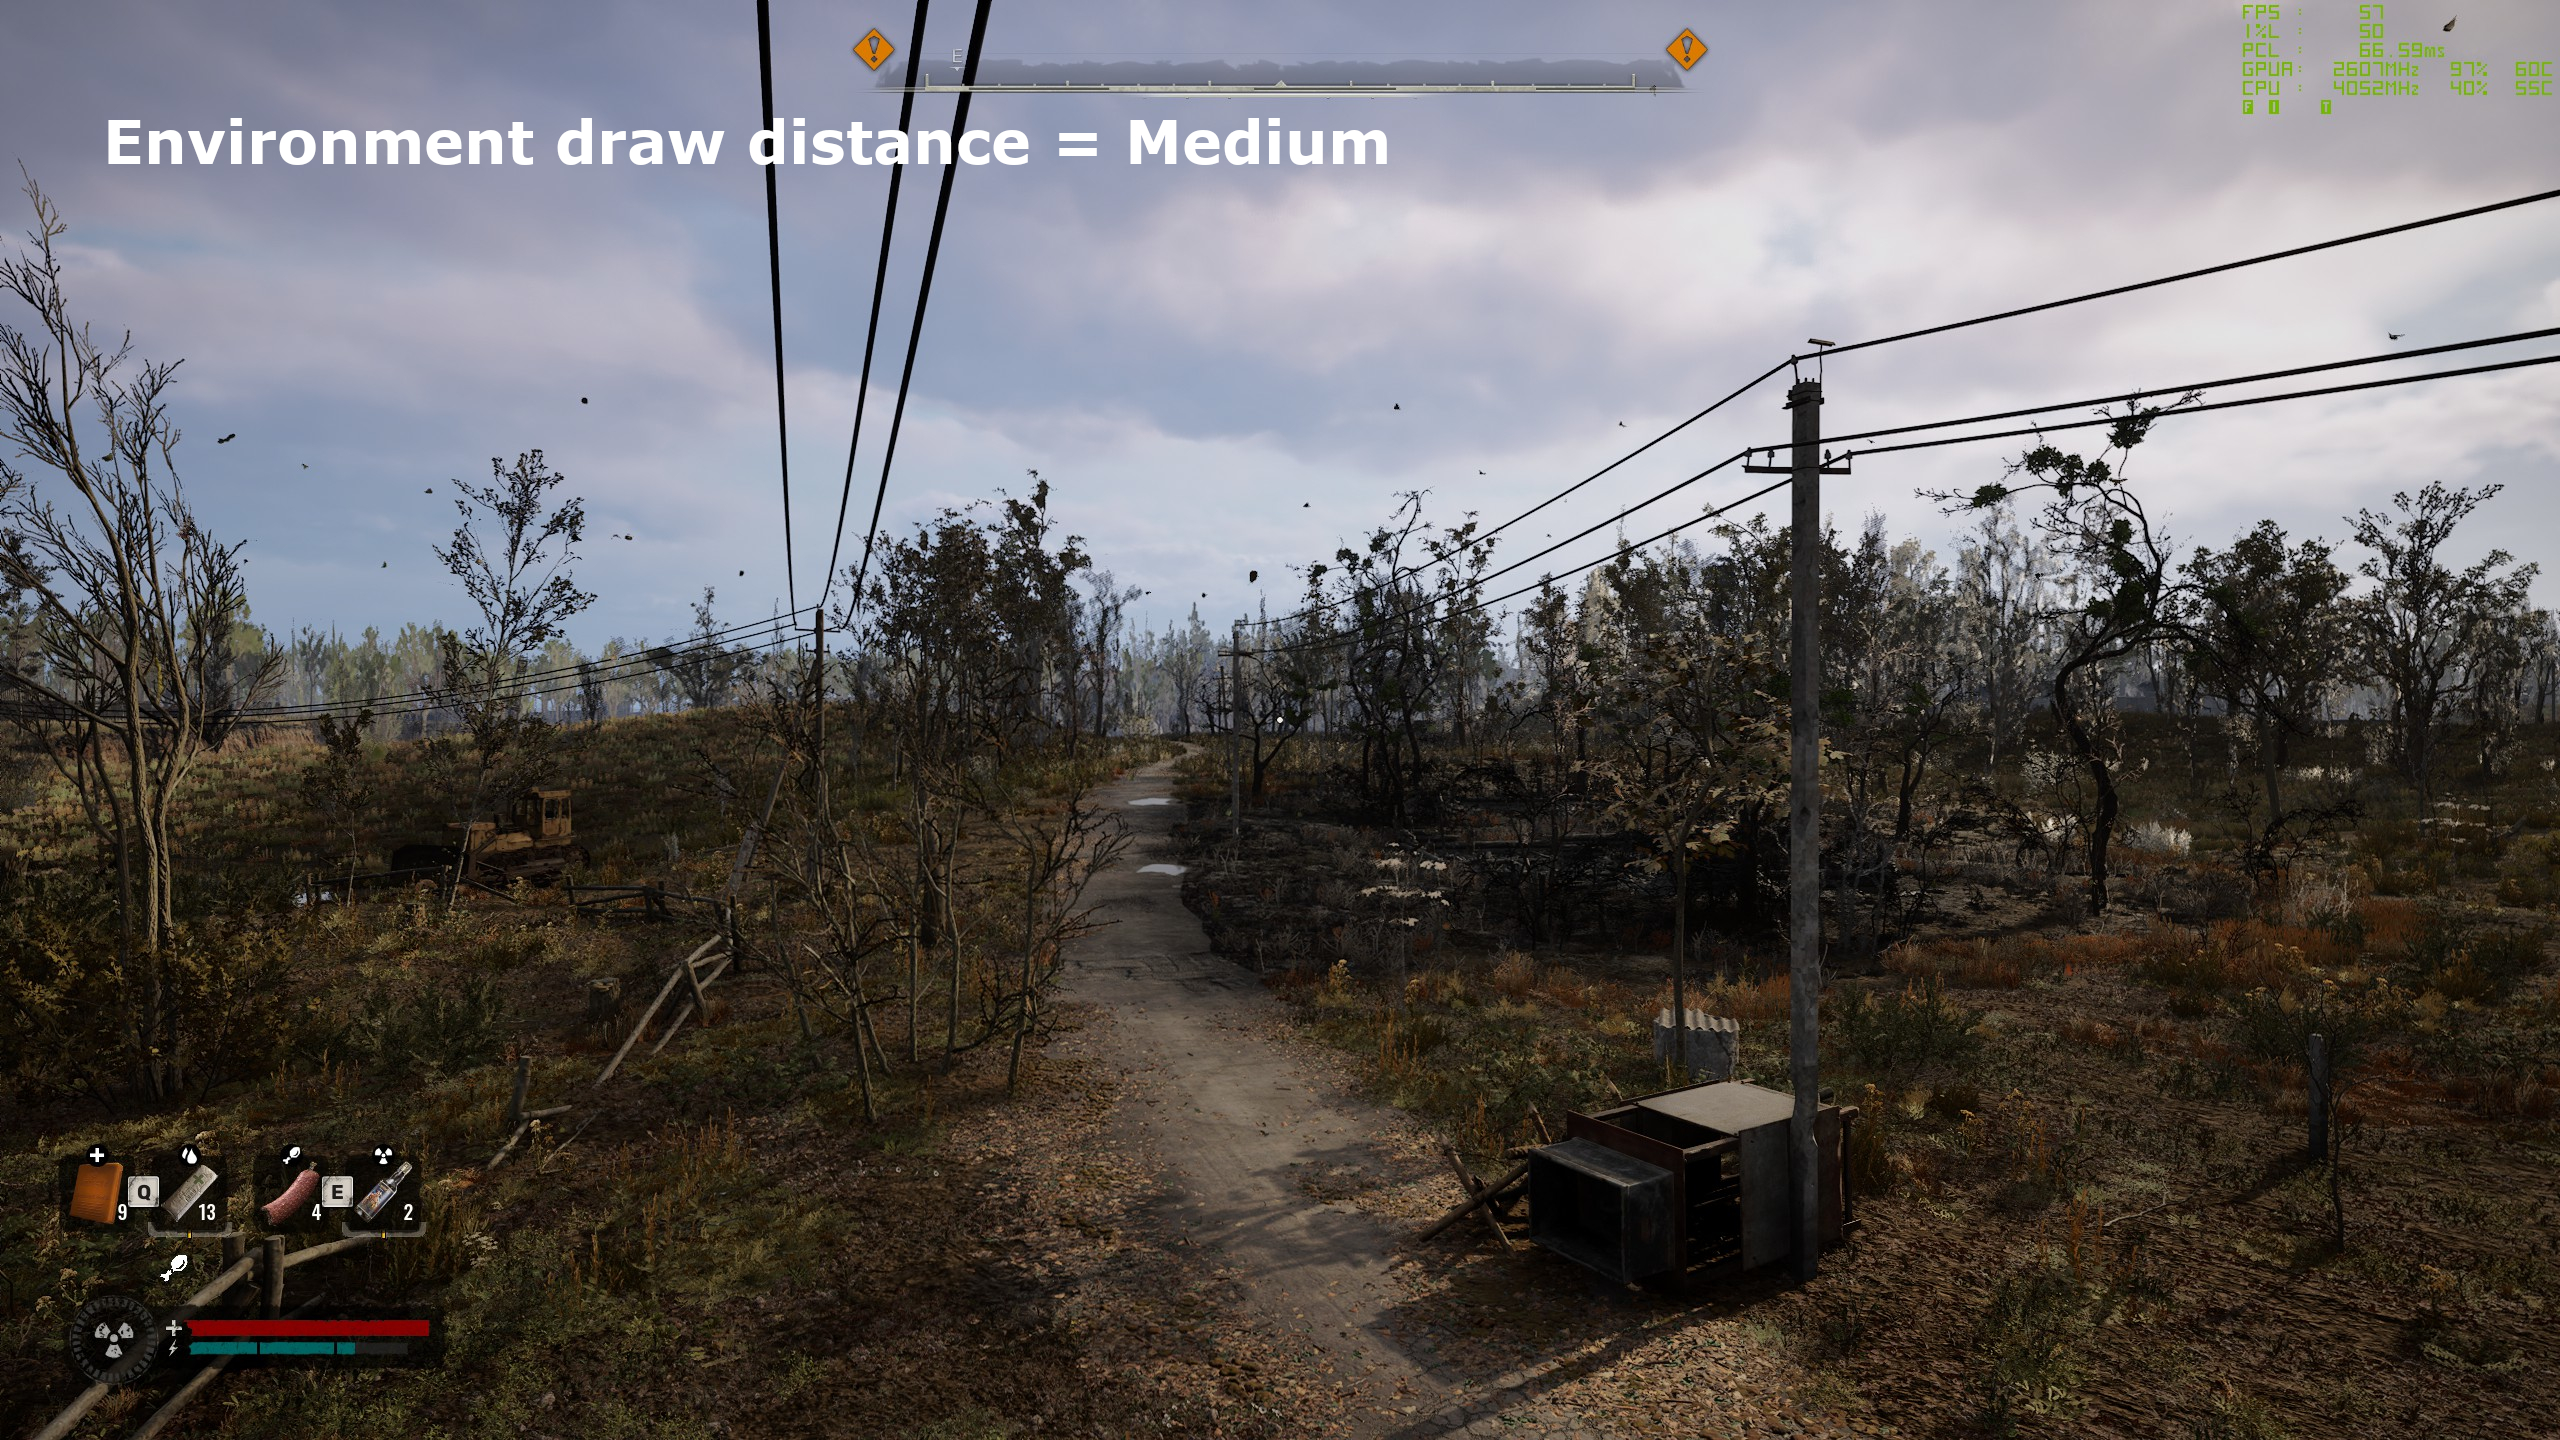
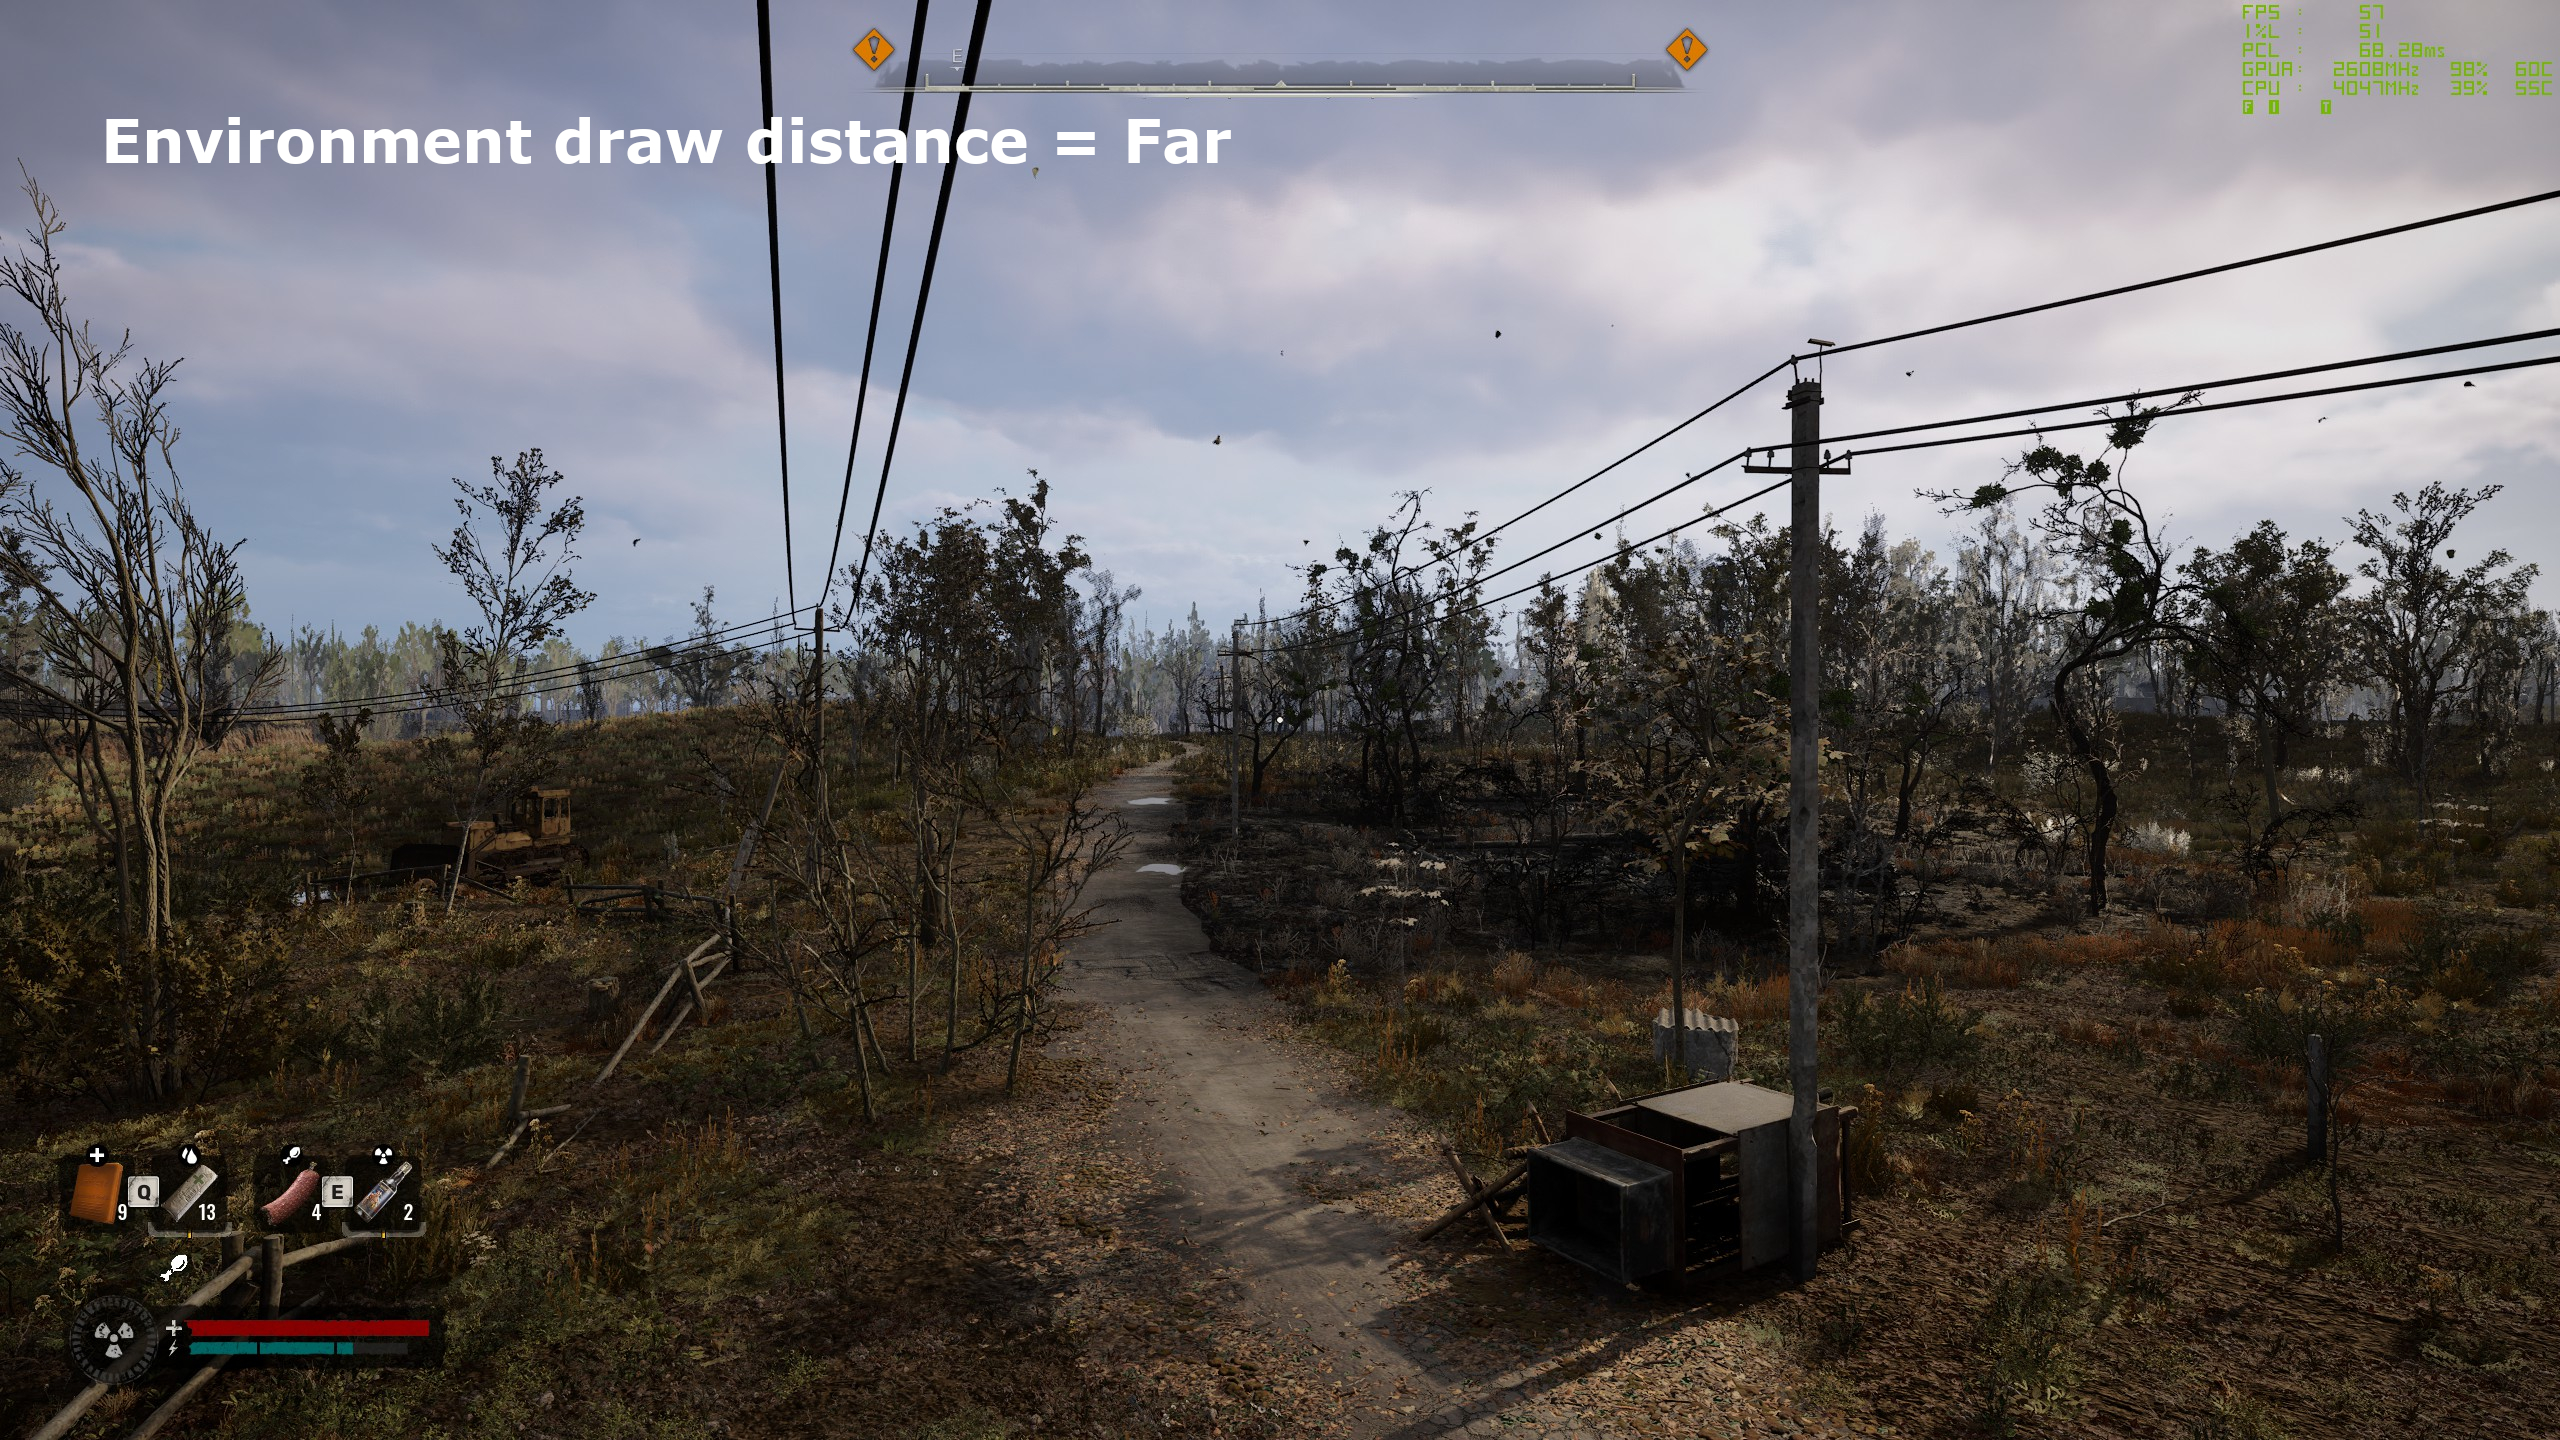
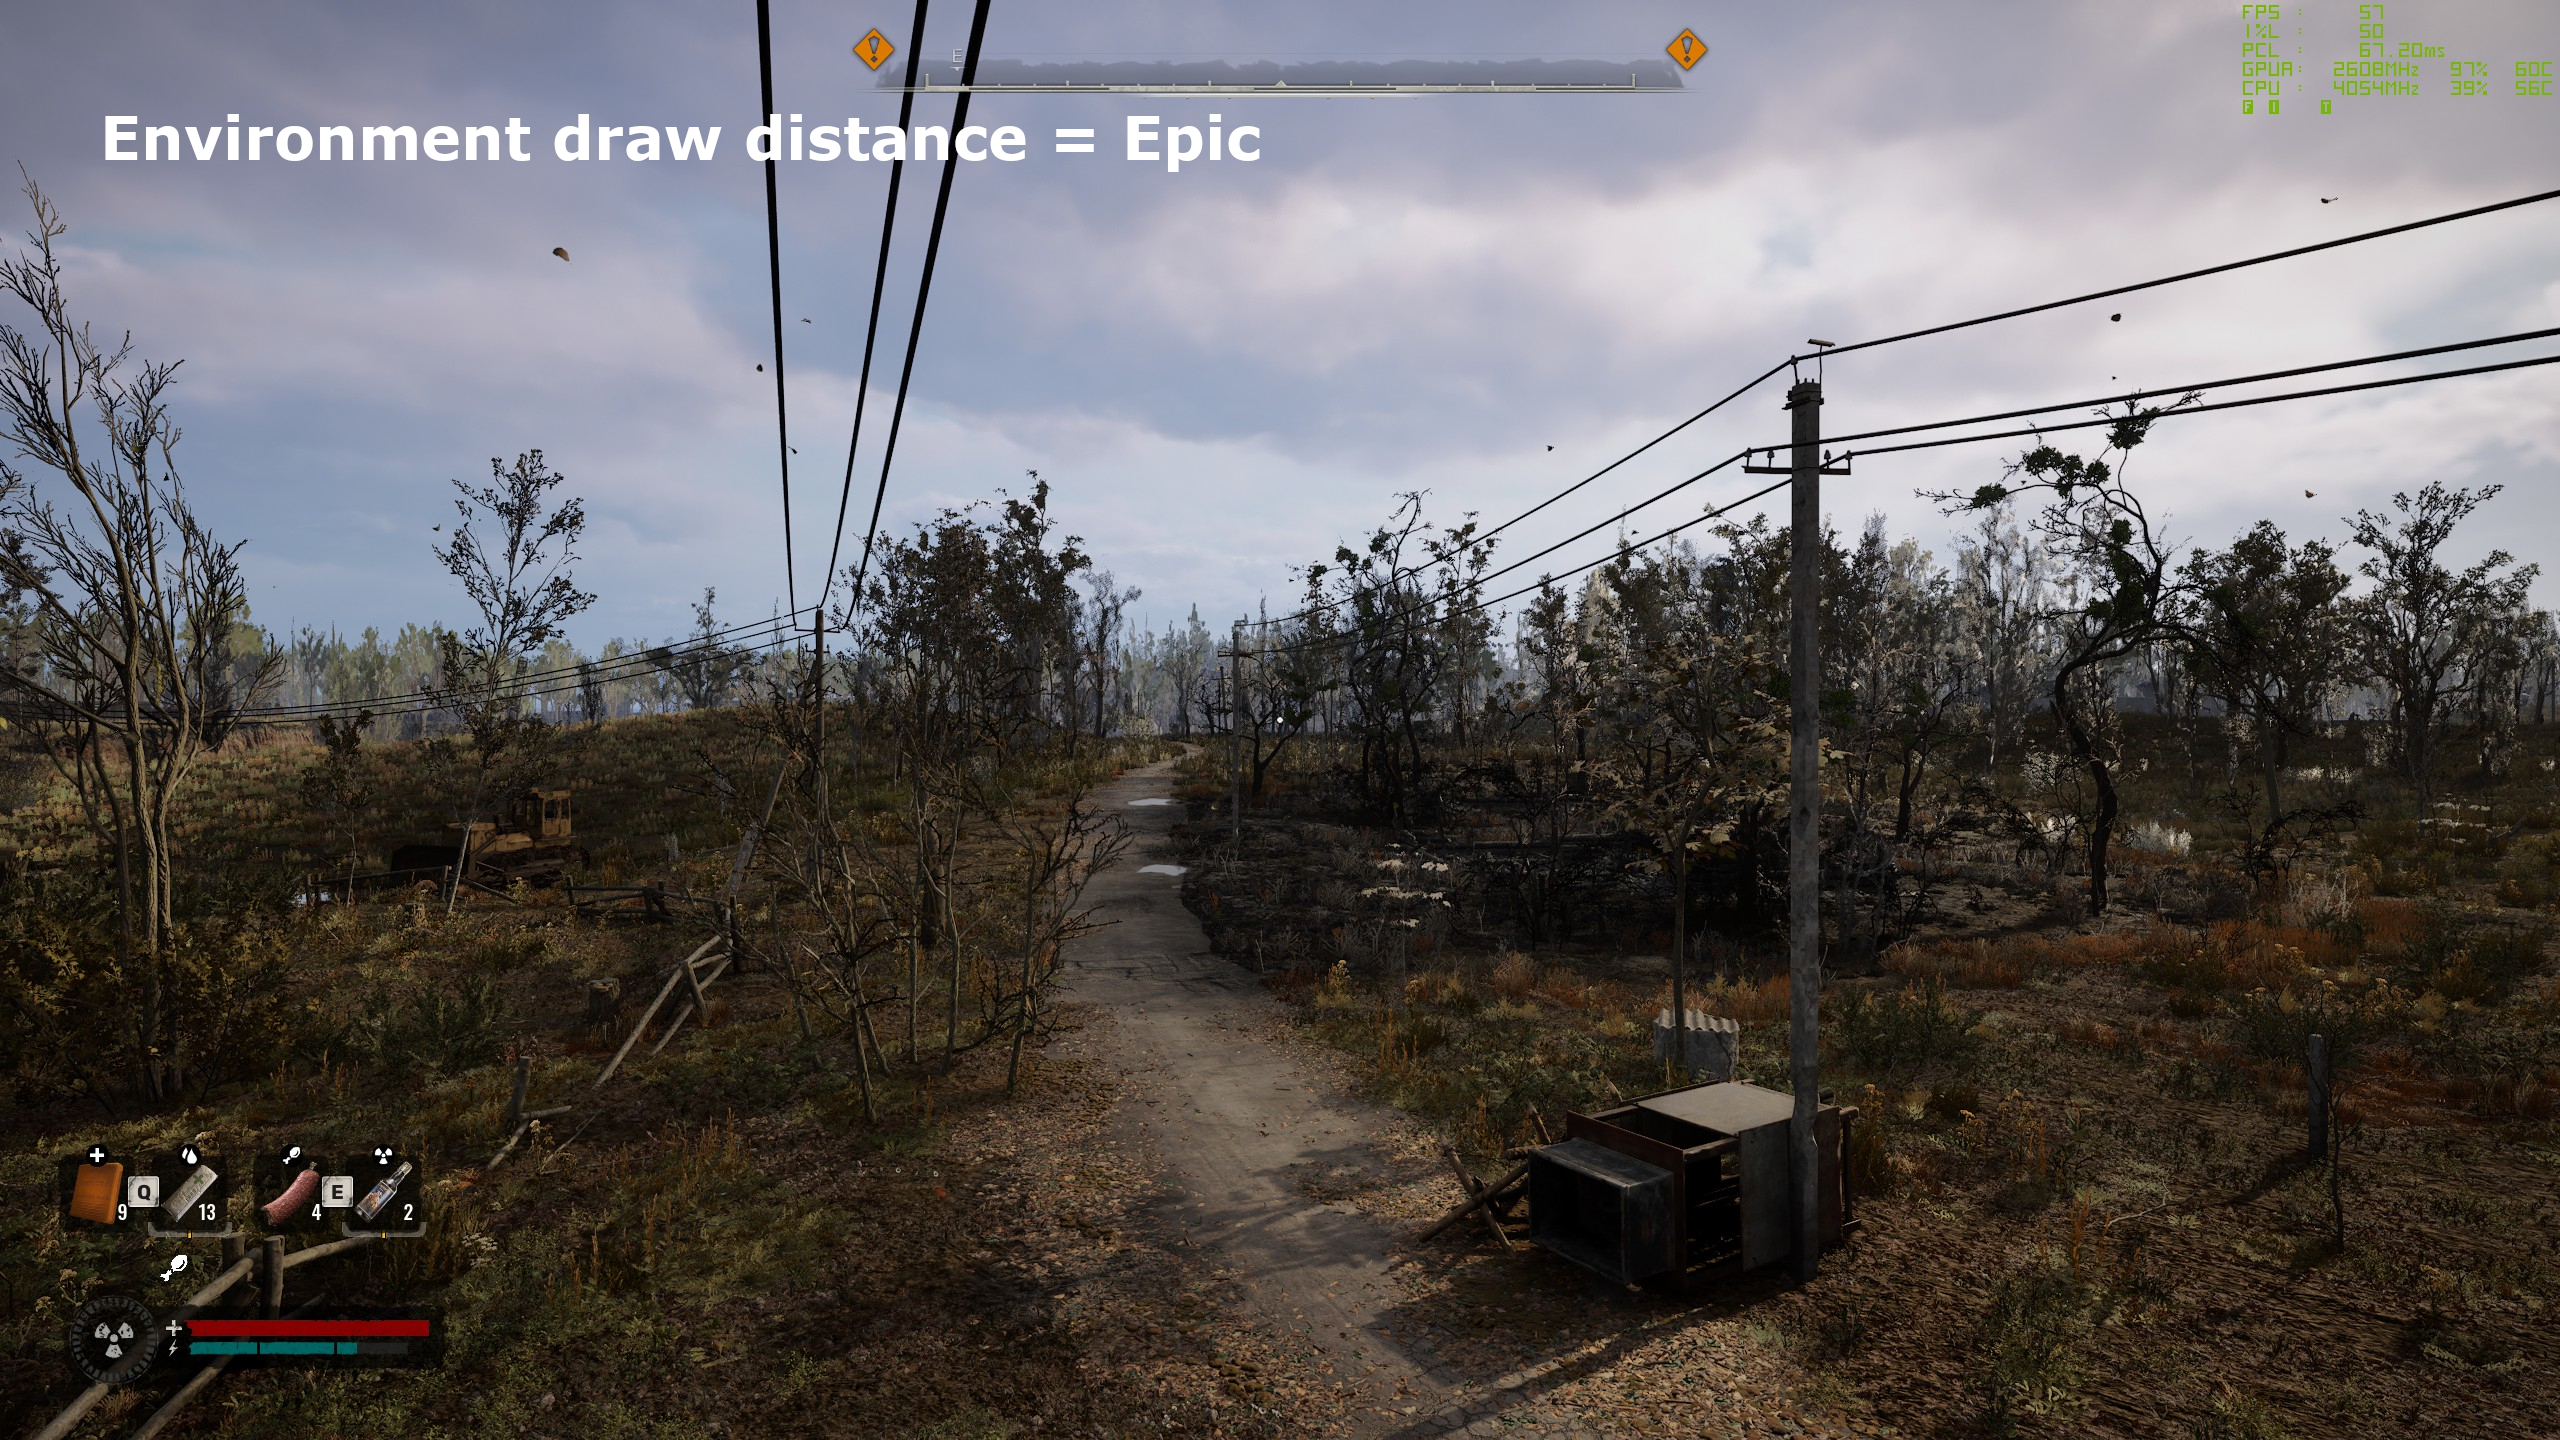
Environment draw distance
Environment draw distance is the last quality setting that I think is worth playing around with. If you’re using the medium preset, like I have to get all the images in this guide, then you can set it as high as you like and enjoy the full desolate beaty of the Zone as GSC Game World intended.
However, if the foliage quality setting is high or epic, then increasing the draw distance will incur a larger performance hit. For example, with the RX 6750 XT, using an epic value for the draw distance with the medium preset showed no drop in the frame rate.
But with changing foliage quality along with it produced a 10% drop in frame rate (low vs epic). Like many of the quality settings in Stalker 2, you’re best off matching the environment draw distance to whatever you’re using for foliage and shadows.
Tweak or preset?
This guide has been based on a review code sample of Stalker 2 and during the period of pre-release testing, the developers issued multiple patches (two of which were both over 130 GB in size), so there’s a possibility that none, some, or even all of the guidance offered won’t be totally relevant in the official release version.
That said, with the use of ray tracing setting the scope of what level of performance is achievable on any gaming PC, changing just one quality setting is unlikely to ever make much difference. Instead, you’ll need to tweak multiple values to get things exactly as you want them, and some of them require you to restart the game if altered.
Epic preset, 1080p resolution, no upscaling
Core i7 14700KF, RTX 4080 Super, 32 GB DDR5-6400
Outside of performance vs graphics settings, Stalker 2 has a decent FOV option (70 to 110°, in the Display menu) which is handy for offsetting any motion sickness you might get while playing. Likewise, there’s a sharpness slider, with a default value of 20%, which I found can also help (12% worked best for my sickness).
On the whole, my advice is to just use the presets and head on into the Zone. You might not have the very best possible frame rate or the perfect balance of graphics, but once you’re caught up in the weird and wonderful world of Stalker 2, you won’t really care.

